How should a homeowner read a vanity shop drawing?
Use the drawing to confirm what will be supplied, how the actual assembly fits the room and whether the storage works for its intended contents. Read the written dimensions, view labels and notes together; a balanced front view alone cannot answer those questions.
A shop drawing should make decisions inspectable. The homeowner does not need to perform the designer's or installer's technical work, but should be able to identify what is being accepted and what remains unclear. Start with the exact proposed configuration, then turn each uncertainty into a question tied to a view, component or missing dimension.
Confirm what the drawing represents
Check the project identification, drawing issue and the cabinet or assembly named on the sheet. Identify whether it describes cabinet-only work or includes other selected components. Compare the listed basin, top and hardware information with the actual choices; do not rely on a familiar-looking rendering as proof that the selections match.
Read notes defining included, separately supplied and assumed items. A basin shown for coordination may not be part of the cabinet supply. If the status of a component is unclear, ask for it to be stated before using the drawing as a complete description of the order.
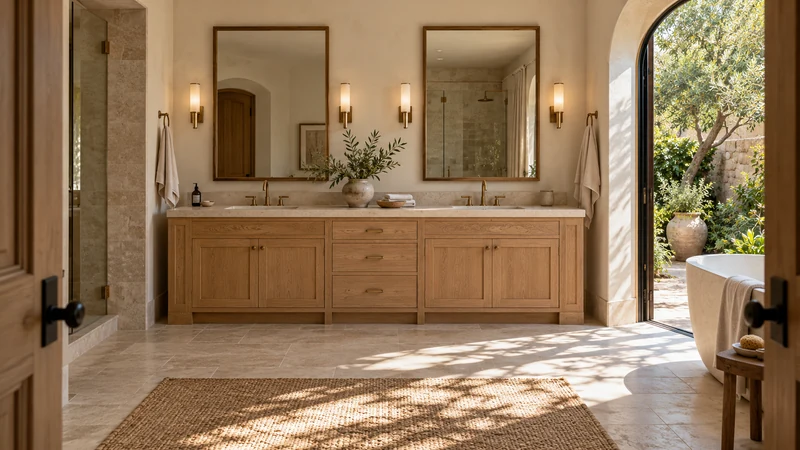
Design study The oak study illustrates a finished front arrangement. It is not a shop drawing and cannot establish the actual internal dimensions or supply scope of a selected product.
Establish the view and reference points
Identify the plan, elevation and section and what direction each looks. Find the finished-floor or wall references used for the relevant dimensions. The same edge can appear in several views, but the view may describe a different part of the assembly, such as the top rather than the cabinet body.
Use written dimensions for the stated relationships instead of estimating from an enlarged screen image. If a critical dimension is absent, request it. Check whether an overall measurement includes projecting fronts, handles or a top overhang, and keep those definitions explicit when comparing the room survey.
Read the front as a map of functions
Ask which panels open, which are fixed and what is behind each working front. Identify hinges, drawer direction and any special interior shape shown in the notes or section. A visible panel line does not automatically correspond to a usable compartment.
For example, a proposed elevation has a row that looks like shallow storage, but the notes identify it as fixed fronts below the basin. The household planned to keep daily grooming items there. The useful response is to ask where that group will actually fit, not to count the attractive front divisions as confirmed storage.
Follow the occupied interior in section
Read the basin underside, cabinet partitions and any indicated plumbing or support volume together. Ask what dimensions describe usable storage rather than the outside of a drawer box. Bring the actual bottle, pouch or organizer requirements into the comparison instead of accepting a general promise of generous capacity.
Keep unshown conditions visible. If the drawing omits the selected basin underside or only marks plumbing by a symbol, identify what additional coordination is needed. The homeowner can flag the missing relationship while the appropriate professional determines the technical solution; an empty area on the sheet should not become an assumed clear volume.
Compare the drawing with the measured room
Check the actual proposed position against walls, doors, adjacent fixtures and the required ordinary access. Include the front or door in its open position where it affects use. Review the same cabinet location in all views, rather than allowing a convenient side shift in one view to stand in for a resolved layout.
Record site information that is still provisional. A dimension derived from an unfinished wall or an unverified hidden condition needs its own confirmation. Ask who will check that field condition and which drawing relationship may change as a result.
Write comments that can receive a precise answer
Name the location and the decision in each comment. For example, identify the daily pouch assigned to the left compartment and ask for its clear opening and usable interior dimensions with the selected basin installed. That question is more useful than asking whether the cabinet has enough storage.
Distinguish a requested change from a request for clarification. If a revised front or interior is needed, state what user task it must support. Ask for the response to appear in the relevant drawing or accompanying record so the answer does not remain disconnected from the configuration being reviewed.
Close the review by checking the agreed outcome
Read the updated sheet against the questions that were raised. Confirm that the selected products, usable functions and site relationships now agree, and identify any remaining conditions that need another responsible person's review. Do not assume every uncertainty disappeared because a new drawing file arrived.
Keep the reviewed issue and its decisions with the project records. A useful homeowner review leaves a clear account of what the cabinet will do, what the complete assembly depends on and which technical or field matters still require confirmation.
Pure White
Cream White
Light Warm Gray
Gray
Navy
Black
Oak Tone
Dark Walnut Tone
Design study These finish studies are design references, not a list of currently orderable colors. Screens and lighting change the appearance; compare a physical sample before choosing.See all finish options →
Resolve the selected assembly's concealed support, service locations and related fixture requirements before the affected wall work proceeds. Identify each dependency from actual product information and the project design rather than following a universal cabinet-first or plumbing-first slogan.
The elevation explains the front arrangement; the plan reveals where that arrangement occupies the room. Compare them using the same cabinet position, finished surfaces and selected components, then add the movements needed for actual use. Symmetry is only part of the decision.
Review the old mirror's wall footprint, mounting or recess, storage and lighting relationships before selecting the new mirror with the vanity. The visible glass is only part of the existing arrangement, and removing it can create work that cabinet measurements alone do not reveal.
The sample shows the door frame, a separate center panel, the face frame and the cabinet box. Each component has its own place in this Shaker construction.
Shaker construction: door frame, center panel, face frame and cabinet box. The cutaway helps locate these parts; confirm each material in the specifications for the selected cabinet.
01 / Door frame
The Shaker door has rails and stiles around a separate center panel. The frame and center panel are different components; confirm their materials in the specifications for the selected cabinet.
02 / Face frame
The face frame surrounds the opening at the front of the cabinet box and sits behind the doors. The face frame, door frame and cabinet box are separate parts.
03 / Cabinet box
The sample exposes the cabinet sides, interior surfaces and layered edges. The image does not establish the wood species or material specification of a selected cabinet.