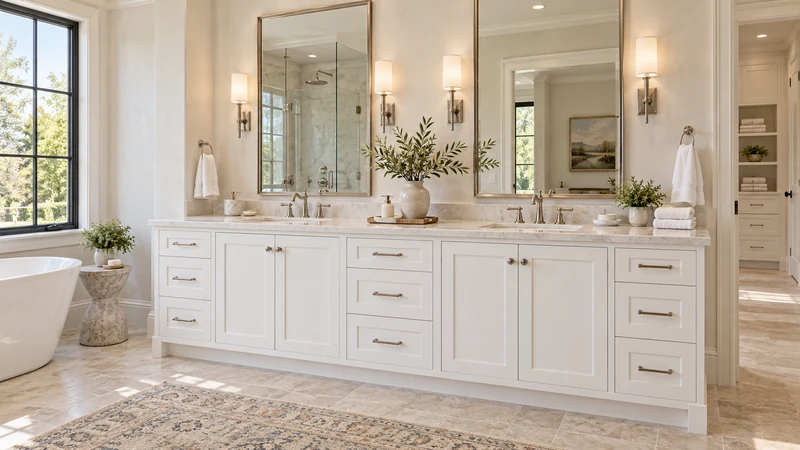
What changes when a replacement vanity also gets a different mirror?
Review the old mirror's wall footprint, mounting or recess, storage and lighting relationships before selecting the new mirror with the vanity. The visible glass is only part of the existing arrangement, and removing it can create work that cabinet measurements alone do not reveal.
A household may want to replace a large built-in mirror with separate mirrors, or remove a mirrored cabinet for a simpler wall surface. Those choices can change what remains exposed, where everyday supplies live and how the new basin positions relate to the wall above. Treat the mirror change as a defined part of the same project rather than a decorative choice left until every other component is fixed.
Identify what is actually being removed
Record whether the existing item is a plain mirror, a surface-mounted storage cabinet, a recessed unit or part of a larger built-in assembly. Include known lighting, outlets or adjacent pieces that belong to it. Do not infer the hidden construction from the appearance of the reflective face.
Kohler's buying guide distinguishes surface-mounted and recessed mirror cabinets. That difference is useful when describing the existing and proposed installations, but it does not tell you what is inside this particular wall. Obtain the selected product's requirements and a review of actual conditions rather than treating the general category as an installation plan.
Design study The white study shows mirrors in relation to a double vanity. It does not document an old mirror’s removal, the hidden wall or any electrical connection.
Map the wall that will become visible
Draw the old outer footprint, known mounting locations and any verified recess relative to fixed room references. Overlay the proposed mirror shapes and positions. Areas between separate new mirrors, or around a smaller mirror, may become visible even if the new vanity is larger below.
Keep concealed wall condition provisional until it is reviewed by the appropriate professional. Identify who will determine the needed repair or preparation and how it relates to retained tile or other finishes. A new mirror that visually covers an old area does not by itself establish that the wall is ready for its mounting system.
Account for storage that disappears
If the existing mirror includes storage, inventory the actual contents and decide what happens to each group. A plain replacement mirror may remove a convenient daily location even while the new vanity adds nominal cabinet capacity. Test the proposed destination with the ordinary items and the user's routine.
Distinguish supplies that can move into the vanity from those with storage conditions that require another location. Do not automatically transfer everything from an old mirrored cabinet under the basin. Keep the allocation visible in the project notes so the final wall design does not leave a surprise pile on the new top.
Coordinate the new viewing positions with the assembly
Place the proposed mirrors with the selected cabinet, top, basins and controls in the same elevation. Have the intended users check the useful view from their actual working positions. A mirror centered on the old wall arrangement may no longer serve the new basin or preparation position.
If a new mirrored cabinet has an opening door, include its motion and projection in the review. Check adjacent lights, wall returns and the objects or controls below. A closed elevation can look balanced while omitting a conflict that appears only when the storage door is opened.
Review the lighting and electrical relationships
Record which existing lights or electrical elements remain, move or disappear with the mirror change. If new lighting or powered features are proposed, have the relevant professionals coordinate the selected products and site conditions. Keep this separate from a visual mockup of mirror shape.
Do not assume that replacing an integrated feature with a separate product preserves the same connection or control arrangement. Identify the missing information and its owner before fixing the wall finish plan. This comparison should produce a coordinated scope, not instructions for disconnecting or modifying an electrical installation.
Compare an actual wall-layout consequence
For example, a broad existing mirror hides most of the wall above a vanity. The replacement proposal uses separate mirrors over the new basin positions. The gap between them exposes a previously concealed wall area, while a light formerly related to the broad mirror no longer aligns with the new composition.
Compare the required wall preparation and lighting coordination before choosing that proposal solely for its appearance. A different mirror arrangement may change the work, but should still serve the users and selected assembly. The decision is between complete outcomes, not between isolated mirror silhouettes on an unfinished drawing.
Carry the change into the project handoff
Keep the existing-condition record, proposed elevation, storage relocation, mounting requirements and lighting decisions together. Identify the conditions that can be confirmed only after appropriate removal or inspection. Update the related drawings if those findings alter the accepted plan.
Before ordering the final combination, verify that each retained or replacement component has a defined role and that the newly visible wall has a reviewed treatment. The useful result is a mirror and vanity arrangement that works as a whole, with its hidden-condition questions resolved or explicitly pending rather than assumed away.
Pure White
Cream White
Light Warm Gray
Gray
Navy
Black
Oak Tone
Dark Walnut Tone
Design study These finish studies are design references, not a list of currently orderable colors. Screens and lighting change the appearance; compare a physical sample before choosing.See all finish options →
Map the tile boundaries, openings and attachment conditions, then compare the complete replacement assembly in that same wall position. Keeping the tile is a project constraint that needs coordinated review, not a result guaranteed by matching the old cabinet's width.
Resolve the selected assembly's concealed support, service locations and related fixture requirements before the affected wall work proceeds. Identify each dependency from actual product information and the project design rather than following a universal cabinet-first or plumbing-first slogan.
Compare a measured map of the unfinished area with the new cabinet's actual floor-covering shape and visible underside. Nominal cabinet width or top overhang cannot establish which parts of the floor will remain exposed.
The sample shows the door frame, a separate center panel, the face frame and the cabinet box. Each component has its own place in this Shaker construction.
Shaker construction: door frame, center panel, face frame and cabinet box. The cutaway helps locate these parts; confirm each material in the specifications for the selected cabinet.
01 / Door frame
The Shaker door has rails and stiles around a separate center panel. The frame and center panel are different components; confirm their materials in the specifications for the selected cabinet.
02 / Face frame
The face frame surrounds the opening at the front of the cabinet box and sits behind the doors. The face frame, door frame and cabinet box are separate parts.
03 / Cabinet box
The sample exposes the cabinet sides, interior surfaces and layered edges. The image does not establish the wood species or material specification of a selected cabinet.