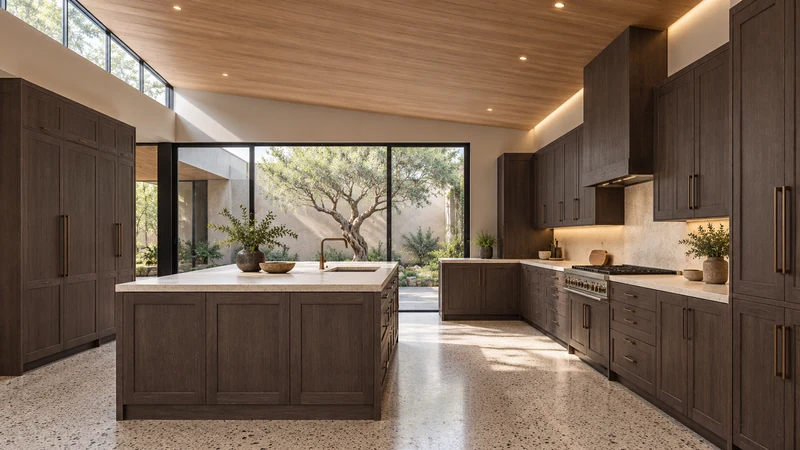
A tall cabinet fits beneath a sloping ceiling only when its complete installed envelope fits at every occupied point. The room’s central ceiling height is not enough. Measure above the proposed cabinet footprint, including the back, front and side corners, and use the intended finished floor as the height reference. Then check how the cabinet will reach that position. A unit that can stand in a space may still lack the room required for the planned placement method.
Draw the ceiling over the cabinet, not over the room center
Sketch a section from the wall toward the cabinet front. Show the floor, the ceiling plane and any beam or dropped portion crossing the footprint. Add a front view when the ceiling also changes height along the cabinet run. A section in only one direction can miss a low corner. Record the locations of measurements so the designer knows which height belongs at which edge.
IKEA’s room-measurement scope explicitly includes the position of sloping ceilings. The useful takeaway is to record that condition; it does not establish a clearance for another cabinet system.
Identify what the cabinet height includes. The box, selected base or legs, top trim and any other part occupying vertical space must be coordinated as one assembly. Do not add pieces twice if a specification already includes them, and do not omit a component because it is listed separately. Name the finished-floor assumption as well. A later change below the cabinet can change the available height above it.
Measure ceiling positions above the actual cabinet depth, not merely along the wall. A ceiling that rises toward the room might leave generous space over the front while interfering with the back. A beam can create the opposite problem. Wall lean and floor unevenness also need their own records; they should not be hidden within a convenient single “ceiling height” on the cabinet list.
Design study Compare the ceiling plane with the tops of the tall cabinet groups. This design study helps identify the relationship to inspect, but gives no verified slope, assembly height or placement clearance.
A cabinet can clear the front and still fail at the back
In a hypothetical example, the complete cabinet assembly is 90 inches high and 24 inches deep. Ceiling height above the proposed finished floor is 89 inches at the back of its footprint and 95 inches at the front. The front has 5 inches above the assembly, but the back is short by 1 inch. The cabinet does not fit that position. These are assumed dimensions, not standard cabinet sizes or measurements from the image. Moving the unit forward would require a new footprint check, rather than an estimate based on the front reading.
Check the route to the standing position separately
A rigid cabinet rotated upward can occupy a taller envelope during movement than when it is standing. The relevant path depends on its depth, orientation, base condition and permitted handling method. Have the installer check that path with the selected cabinet instructions. Do not assume assembly inside the room is permitted, or remove structural parts to make a unit easier to raise. The article’s final-fit example is not a lifting calculation.
Also keep access to nearby equipment in view. If the tall enclosure contains an appliance, its installation and service requirements remain separate from the cabinet’s ability to fit beneath the ceiling. A decorative top treatment cannot be used to justify closing a space that the selected equipment needs. Resolve the complete assembly before using the remaining gap as a purely visual design decision.
Choose a response that preserves the cabinet’s function
Possible layout responses include a shorter approved assembly, relocating the tall storage to a more suitable part of the room or choosing a different upper termination. Compare what each does to usable storage and adjacent work surfaces. Avoid treating an on-site cut into a tall cabinet as the default solution. Hand over the footprint, ceiling sections, finished-floor reference, complete assembly height and placement question together. That packet lets the designer resolve the actual conflict before finish preferences determine the cabinet selection.
Pure White
Cream White
Light Warm Gray
Gray
Navy
Black
Oak Tone
Dark Walnut Tone
Design study These finish studies are design references, not a list of currently orderable colors. Screens and lighting change the appearance; compare a physical sample before choosing.See all finish options →
Build a room sketch and a cabinet-run total that include the parts between the boxes. A worked example shows why the tighter measurement changes the filler allowance.
The sample shows the door frame, a separate center panel, the face frame and the cabinet box. Each component has its own place in this Shaker construction.
Shaker construction: door frame, center panel, face frame and cabinet box. The cutaway helps locate these parts; confirm each material in the specifications for the selected cabinet.
01 / Door frame
The Shaker door has rails and stiles around a separate center panel. The frame and center panel are different components; confirm their materials in the specifications for the selected cabinet.
02 / Face frame
The face frame surrounds the opening at the front of the cabinet box and sits behind the doors. The face frame, door frame and cabinet box are separate parts.
03 / Cabinet box
The sample exposes the cabinet sides, interior surfaces and layered edges. The image does not establish the wood species or material specification of a selected cabinet.