Use the drawer near a coffee station for the dry tools and supplies needed during your usual brewing routine. Do not treat it as a catchall for every coffee-related object. A practical arrangement keeps the active set visible, separates backup stock and gives damp or dirty items a different route. The right interior depends on how you make coffee, not on a generic organizer labeled for a coffee bar.
Choose the active set before buying an insert
Set out everything used for a normal drink: the tools, filters or compatible accessories your method actually requires. A pour-over setup and an espresso setup do not need the same compartments. If the household uses several methods, separate their everyday sets enough that users can recognize what belongs where. Keep instructions and model-specific parts associated with the right machine rather than mixing similar-looking accessories.
Distinguish the working supply from unopened backups. A large package of filters or spare accessories can occupy another cabinet while a smaller ready-to-use group stays at the station. This prevents the convenient drawer from becoming deep storage that must be unpacked whenever you make a drink. Keep any food-storage requirements separate from the cabinet arrangement.
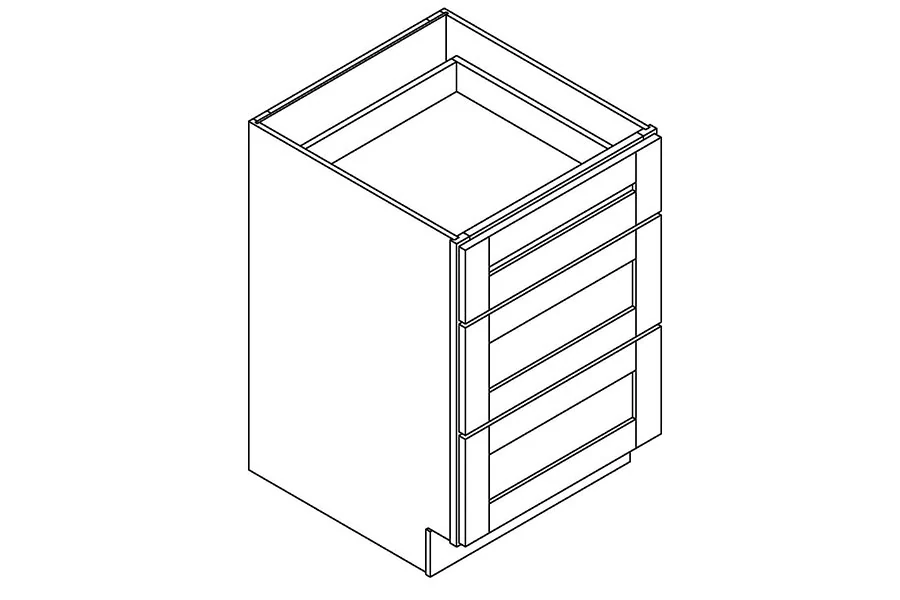
Diagram A shallow-looking front is a useful starting point for comparing drawer types, but it does not establish clear interior height or the fit of a coffee organizer. Compare cabinet types and sizes →
Check height with the tools in their intended positions
A tamper, dosing tool, measuring scoop or other accessory may be taller than the shallow drawer allows when standing upright. Measure the actual piece and the organizer beneath it, then compare with the clear space below the framing above the drawer. Laying a tool down changes its footprint and grip, so test that arrangement rather than merely rotating its dimensions on paper.
Pay attention to usable depth as well. A drawer may extend far enough for the front group while leaving the back difficult to see. Frequently used tools should not hide under the lip of the counter or behind an insert wall. A removable tray can help bring the group out, provided you can lift it without disturbing every surrounding item.
Give used tools a separate cleanup route
Decide where a used filter, damp reusable accessory or cleaning cloth goes immediately after brewing. It should not return automatically to the dry-tool drawer. Follow the machine and accessory instructions for cleaning and drying. A cabinet organizer is not a substitute for that process. A nearby appropriate landing area can keep the drawer from collecting the mess created during cleanup.
Consider a hypothetical espresso routine in which dry tools come from the upper drawer, used parts move to the cleaning area and clean, dry parts return afterward. If the only landing spot is inside the open drawer, revise the counter arrangement. The problem may be a missing temporary work area rather than insufficient drawer compartments.
Open the drawer while standing where you brew
The drawer directly below the machine can be convenient, but it may open into the person using it. Try reaching the tools, closing the drawer and continuing the preparation without repeatedly stepping aside. A nearby drawer to one side might be easier than the closest possible one. Check the same sequence with anyone else who uses the station.
Do not let the station block a primary food-preparation drawer when another person is cooking. Shared mugs, spoons and coffee-specific tools may need different positions if several people gather there. The useful question is which openings can be used together, not whether all related items occupy a single vertical column.
Leave room for the routine to change
Start with movable dividers that fit the selected drawer and the measured active set. Keep the drawer easy to empty and clean, and avoid a permanently fitted insert before the collection is settled. Record the clear width, depth and height plus the largest tool and tray. Choose a drawer that supports the actual workflow rather than buying extra cabinetry to preserve an oversized backup collection at the station.
Pure White
Cream White
Light Warm Gray
Gray
Navy
Black
Oak Tone
Dark Walnut Tone
Design study These finish studies are design references, not a list of currently orderable colors. Screens and lighting change the appearance; compare a physical sample before choosing.See all finish options →
The closed appliance footprint is not the whole requirement. Keep storage, cooking and serving locations distinct until the actual model and cabinet arrangement are checked.
The sample shows the door frame, a separate center panel, the face frame and the cabinet box. Each component has its own place in this Shaker construction.
Shaker construction: door frame, center panel, face frame and cabinet box. The cutaway helps locate these parts; confirm each material in the specifications for the selected cabinet.
01 / Door frame
The Shaker door has rails and stiles around a separate center panel. The frame and center panel are different components; confirm their materials in the specifications for the selected cabinet.
02 / Face frame
The face frame surrounds the opening at the front of the cabinet box and sits behind the doors. The face frame, door frame and cabinet box are separate parts.
03 / Cabinet box
The sample exposes the cabinet sides, interior surfaces and layered edges. The image does not establish the wood species or material specification of a selected cabinet.