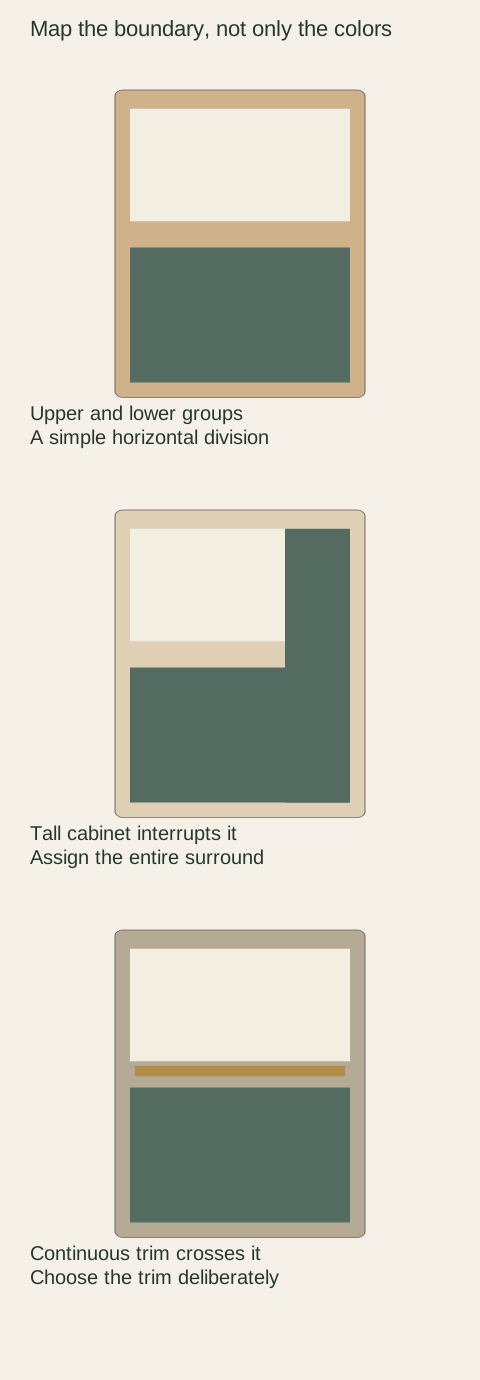
A two-tone kitchen needs a boundary map as well as a pair of attractive samples. Decide where each finish begins and ends on doors, exposed sides, fillers and trim. Otherwise a drawing that says light uppers and dark lowers can leave a tall pantry, refrigerator surround or corner return open to interpretation. Those unresolved pieces are often visible from the main room entrance.
Choose the grouping before polishing the color pair
KraftMaid describes two-tone cabinetry as combining different finishes and shows several distributions: an island contrasting with the perimeter, upper and lower groups, or an accent zone. These are useful composition examples, not requirements for every kitchen or evidence that another supplier offers the same combinations.
Sketch the proposed groups on a plain elevation before studying subtle color differences. Ask what the second finish is supposed to do: identify the island, distinguish a furniture-like cabinet or connect a beverage area to an adjoining room. If its job cannot be described, try simplifying the grouping. The exercise is about a readable arrangement, not following a fixed proportion or a trend.
A tall cabinet does not fit an upper/lower shortcut
A pantry or refrigerator surround spans both zones. Decide whether it belongs to the lighter wall group, the darker lower group or a separately defined block. Include its exposed side, top treatment and any neighboring filler. Merely painting the door rectangles on a rendering leaves the surrounding structure unresolved.
Diagram Conceptual finish maps. The colors identify assignments; they are not material samples, product colors or a construction drawing.
Consider the view from the adjacent room. A tall dark side may read as a large vertical block even when the kitchen's front view looks mostly light. If that feels too strong, test another assignment on the same drawing. Do not change its color in one view and forget the corresponding side in another; both views describe the same physical component.
Follow the boundary around inside corners
At an inside corner, determine which surfaces actually meet and which belong to a corner cabinet assembly. An apparent color boundary on the front elevation may turn into a visible filler or return on the next wall. Mark these pieces explicitly. A line on the plan should have a corresponding physical edge, joint or approved change of finish.
Avoid placing a finish transition halfway across a component unless the supplier has confirmed that treatment. A standard part with a split-color sketch is not automatically a split-finished orderable part. If the desired boundary falls in an awkward place, compare moving it to a full cabinet group or using a deliberately distinct panel that the selected system supports.
End panels need a face and an edge decision
When an island changes color, identify the seating back, short ends and any visible panel edges. Decide whether all of those surfaces form the same block. A door color alone does not specify the side of the cabinet beneath it, and a decorative panel can have an exposed edge that reads differently from its broad face.
Look at the island from the entry and the seated position, not only from the cooking side. A contrasting back may be the dominant view in an open room. If the design mixes wood and paint, record whether that back needs a coordinated wood direction or simply the assigned finish. Grain continuity is an additional request and should not be smuggled into the word matching.
Give continuous trim an explicit rule
Toe kicks, crown, light rail and other visible trim may run through more than one color group. Draw their actual runs and decide whether each follows the adjacent cabinet, remains continuous in one finish or stops at a planned transition. Do not let a small trim piece become a third unplanned color because it was missing from the schedule.
The correct choice depends on the room and the components available. A continuous dark toe kick may visually connect separate lower groups; matching each group may keep their blocks distinct. Compare both on the same elevation. Then confirm the required pieces, joints and finish assignments with the supplier. This is a specification task, not a reason to impose one decorative rule on every project.
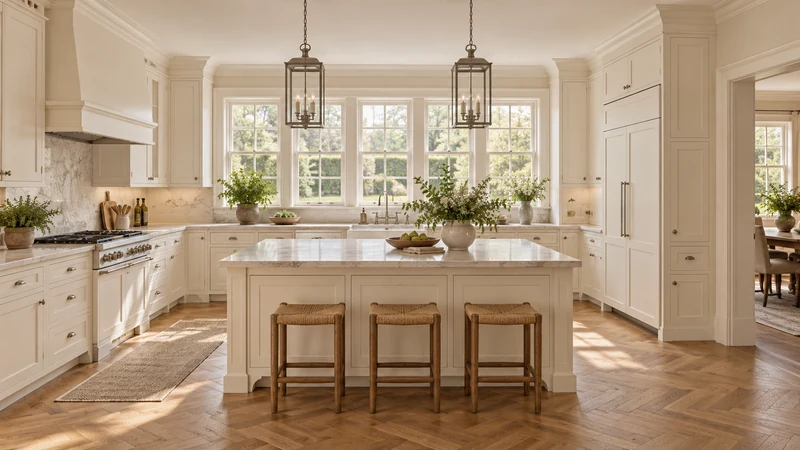
Design study This single-palette design study identifies the tall units, island and trim that would need separate finish assignments in a two-tone proposal. It is not a supplied kitchen or verified color match.
A worked example: pale uppers, green lowers and a pantry
Imagine pale wall cabinets above green base cabinets, with a tall pantry at the end. The initial rendering colors the pantry pale but leaves its exposed side and the lower filler unspecified. From the dining room the side is more visible than the doors, so the unresolved detail can reverse the intended balance.
One revision makes the entire pantry surround pale and stops the green at the neighboring base group. Another makes the whole pantry green and treats it as an end block. Compare them from both viewpoints with the same surrounding materials. Whichever is selected, assign the side, filler and trim at the same time. The decision is complete only when the order can reproduce it without guessing.
Build a component map that survives revisions
Use the cabinet identifiers already on the project drawing. Beside each, list the front finish and any exposed side, applied panel or trim exception. Keep the finish names and codes consistent with the quote. Words such as island, perimeter or accent are useful descriptions but are insufficient when a revised plan moves a component from one group to another.
When a cabinet width, layout or door arrangement changes, recheck the boundary map. A filler added to solve a fit issue also needs a finish. A newly exposed side may require a different component. Review those visual consequences with the dimensional change instead of assuming the original color schedule still covers every piece.
Approve the pair in place, then receive by the map
View the actual finish samples together in the room after the grouping makes sense. A drawing helps decide where colors go; it cannot settle their physical appearance. Keep the samples tied to the final component map so a later substitution is reviewed against both the color relationship and the surfaces where it appears.
At receipt, check labeled panels and trim alongside the major cabinets before installation. Report a finish assignment concern with the component identifier and the approved drawing view. The question should be specific, such as a green island end ordered in the pale finish. A precise map makes correction possible without reopening a settled debate about whether two-tone kitchens are attractive.
Pure White
Cream White
Light Warm Gray
Gray
Navy
Black
Oak Tone
Dark Walnut Tone
Design study These finish studies are design references, not a list of currently orderable colors. Screens and lighting change the appearance; compare a physical sample before choosing.See all finish options →
A cabinet color that looks warm online can read differently next to your floor. Compare an identified physical sample in the positions and lighting where the cabinets will live.
Identify whether the visible cabinet end is an applied decorative panel, a finished structural side or a different construction option before approving the quote.
The sample shows the door frame, a separate center panel, the face frame and the cabinet box. Each component has its own place in this Shaker construction.
Shaker construction: door frame, center panel, face frame and cabinet box. The cutaway helps locate these parts; confirm each material in the specifications for the selected cabinet.
01 / Door frame
The Shaker door has rails and stiles around a separate center panel. The frame and center panel are different components; confirm their materials in the specifications for the selected cabinet.
02 / Face frame
The face frame surrounds the opening at the front of the cabinet box and sits behind the doors. The face frame, door frame and cabinet box are separate parts.
03 / Cabinet box
The sample exposes the cabinet sides, interior surfaces and layered edges. The image does not establish the wood species or material specification of a selected cabinet.