Finished end panel or cabinet side: what are you paying for?
Identify whether the visible cabinet end is an applied decorative panel, a finished structural side or a different construction option before approving the quote.
A finished cabinet end may be the case side itself, an applied decorative panel or another specified construction option. Determine which one the quote includes before comparing cost or describing it as an upgrade. An attractive end can complete the room’s appearance without changing the cabinet’s structural side, and an upgraded side may look quite plain unless its finish is also specified.
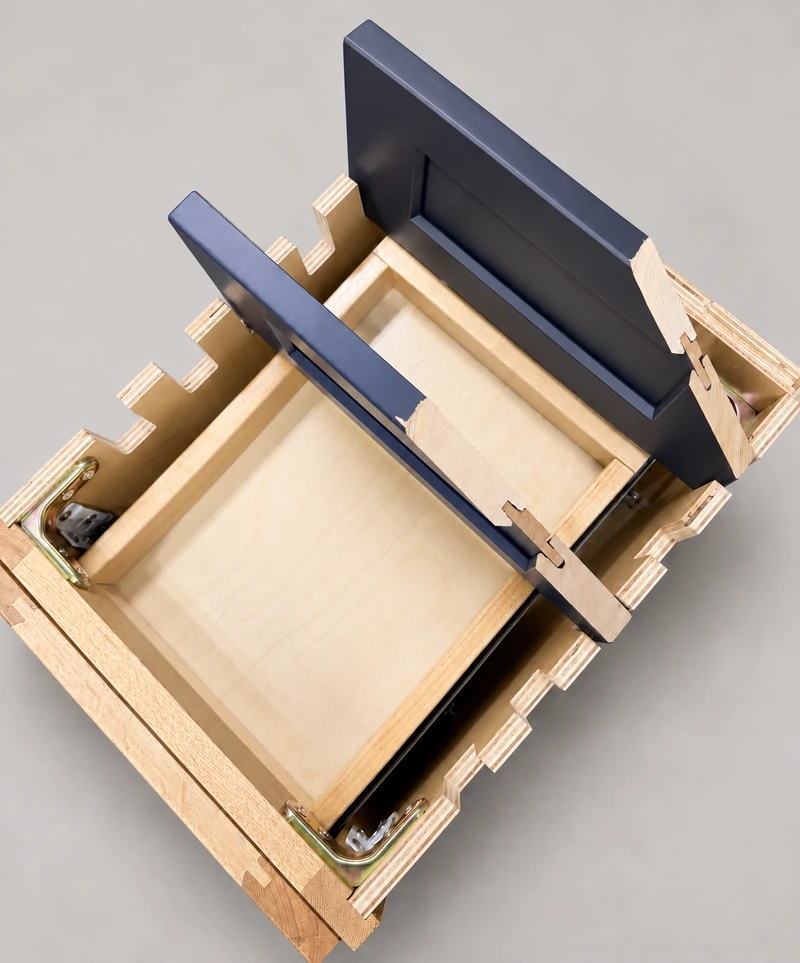
Physical sample Different visible components can have different constructions and finishes. This sample does not show the exact applied-end or structural-side option for a cabinet order.
Locate the case side and the added surface
Look at an identifiable section or sample showing where the cabinet box ends. If a panel is applied outside that side, ask whether its thickness is included in the overall dimensions shown on the plan. If the case side itself receives the finish, confirm the treatment of its front edge and any visible top or bottom edge. Similar room photographs can conceal these construction differences.
American Woodmark’s published example distinguishes standard side construction from plywood-side and furniture-end options. The option names must be read with their definitions; they are not usaKT.com product descriptions.
Review the cabinet end from the normal approach to the room and from the adjacent seating or doorway. Identify the broad side, front return, toe area and exposed edges that require a finished appearance. This is an appearance check, not a reason to assume the same material must be used in every location.
If a decorative door-shaped panel is proposed, confirm its orientation, profile and relationship to the neighboring door. A flat painted side, a flush applied panel and a framed decorative end create different shadows. Ask to see the intended detail rather than accepting “matching end” as a complete description. The word matching may refer only to color.
Check the addition against the approved dimensions
An applied panel occupies space beyond the case side unless the stated dimensions already account for it. Make sure the drawing identifies which dimension is the bare case and which is the finished assembly. Also clarify whether installation involves a supplied finished-size piece or a panel intended to be fitted on site.
Do not treat a decorative panel as a substitute for a missing installation component or as support for an adjacent load without explicit product approval. Its appearance does not establish that role. Any attachment or site trimming must follow the requirements of the actual panel and cabinet, including how newly exposed edges are to be finished.
A worked comparison of two “finished end” quotes
Imagine that both quotes describe a finished end in the selected paint color. One finishes the cabinet side directly; the other adds a door-style decorative panel outside the box. In a straight-on room picture they may look similar. From an angle, the extra profile and its front edge become visible, and the finished outer dimension may also differ.
Choose based on the desired appearance and the documented assembly. If you prefer the flat end, verify that its visible edges receive the agreed finish. If you prefer the decorative panel, identify its profile, orientation and inclusion in the parts list. Neither choice should be credited with an unverified structural improvement simply because it costs more.
Keep the end treatment attached to the right cabinet
Mark each exposed end on the drawing and connect it to a particular cabinet and part number. Record whether the treatment is included in the cabinet price or supplied as a separate item. A finish upgrade applied to doors does not automatically establish that all exposed ends and trim have been changed to the same selection.
At receiving, check panel identity, finish, orientation and visible-edge treatment before fitting or fastening. Photograph a mismatch next to the associated cabinet and label, using consistent lighting. Keep the approved detail with the installer’s package so an optional decorative piece is not overlooked or applied to the wrong end. This is how a small line in a quotation becomes a clear, inspectable finish decision.
Pure White
Cream White
Light Warm Gray
Gray
Navy
Black
Oak Tone
Dark Walnut Tone
Design study These finish studies are design references, not a list of currently orderable colors. Screens and lighting change the appearance; compare a physical sample before choosing.See all finish options →
A painted door, a wood-grain side and a plywood cabinet box can belong to the same cabinet. Here is how to read those parts, what the sample photos actually show, and which details to put on a quote.
Inspect finished corners, shelf edges and accessible surfaces, and obtain the care instructions for the actual interior rather than judging it only by color.
The sample shows the door frame, a separate center panel, the face frame and the cabinet box. Each component has its own place in this Shaker construction.
Shaker construction: door frame, center panel, face frame and cabinet box. The cutaway helps locate these parts; confirm each material in the specifications for the selected cabinet.
01 / Door frame
The Shaker door has rails and stiles around a separate center panel. The frame and center panel are different components; confirm their materials in the specifications for the selected cabinet.
02 / Face frame
The face frame surrounds the opening at the front of the cabinet box and sits behind the doors. The face frame, door frame and cabinet box are separate parts.
03 / Cabinet box
The sample exposes the cabinet sides, interior surfaces and layered edges. The image does not establish the wood species or material specification of a selected cabinet.