Cabinet Color Samples: Choosing Under Your Room Lighting
A cabinet color that looks warm online can read differently next to your floor. Compare an identified physical sample in the positions and lighting where the cabinets will live.
Benjamin Moore recommends viewing color samples under natural and artificial light. KraftMaid also warns that screens, lighting and manufacturing variation affect the appearance of its finish images. Those are reasons to examine a physical sample, not a promise that a wall-paint chip duplicates a factory cabinet finish. A matching color name does not establish matching surface texture, sheen or substrate.
Start with a sample of the selected cabinet finish on the intended door material. Label its manufacturer, door style, finish and any stated sheen. If you have only a printed card or a related paint sample, mark that limitation clearly. Use it to narrow a direction while keeping final approval tied to the appropriate cabinet sample.
Stand the sample where the door will be
Place the sample vertically near the planned cabinet location. A door lying on a countertop catches light differently from an installed front. Look at the upper-cabinet area, the lower cabinets and a shaded end. Move the same sample between positions rather than assuming a darker corner needs a different batch of paint.
Set floor, wall and countertop reference materials nearby in their intended relationship. A floor sample belongs below the door, while a backsplash sample belongs behind it. If a countertop has not been selected, retain that choice as unresolved. You can compare a cabinet direction without inventing the rest of the room or implying that a cabinet supplier provides the countertop.
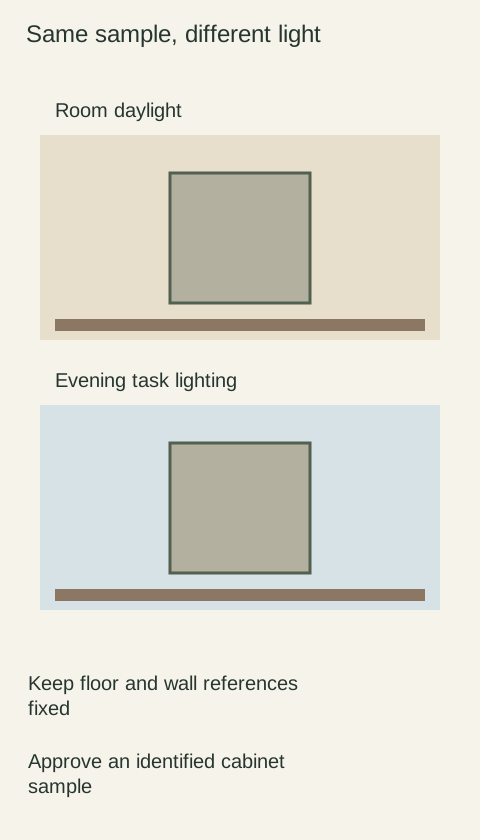
Diagram Illustrative diagram; not a product specification.
Review daylight and the lights you will use
Return to the sample during different ordinary uses of the room. Observe daylight, evening task lighting and the combined setting. Keep notes about which lamps were on. If the lighting will change during the remodel, compare the proposed lamp with the finish before ordering; a picture of the current room cannot predict that change reliably.
You do not have to like every sample under every possible light. The useful question is whether the appearance works under the conditions in which you cook and spend time. Record the condition that causes concern: for example, the pale door looks yellow beside the existing floor when the evening fixtures are on. That is a more useful observation than “the white is wrong.”
Compare candidates without a wall of distractions
Put the strongest candidates in the same position, then remove those you have rejected. A large crowd of similar whites can make the task harder without adding useful information. Keep the surrounding materials consistent. Use a neutral border when a strong existing wall color distracts, but also return to the real room context before approving.
For an illustrative decision, imagine a warm floor and a cooler cabinet sample. The tension might be a color mismatch you dislike, or a contrast you deliberately want. Place the actual backsplash proposal between them and judge the combination. There is no universal rule that every warm floor requires a warm cabinet or that every room needs mixed colors.
Photographs are records, not color authorities
Take a wider photograph showing the sample location and a closer view showing its label. Note the lighting conditions. Phone processing, display settings and reflected light can change the apparent result. Use photographs to communicate which sample and situation you mean; make the final visual decision with the physical material.
For a shared household or professional project, have the decision-makers view the same labeled sample. Avoid approving through a chain of screenshots from different devices. If remote approval is unavoidable, record that the review was remote and retain a physical control sample for delivery comparison.
Keep the approval usable after ordering
Write the selected finish, material, sheen designation and sample identification on the finish schedule. Include panels, fillers, trim and island differences. Keep the approved sample protected from paint splatter and strong changes in exposure. On delivery, compare the specified parts with that record under reasonable, consistent lighting. A sample helps communicate appearance; the seller's written product variation policy still governs what it represents.
Write an approval note that describes the viewing conditions
An approval note can name the finish sample and say where it was reviewed, which surrounding materials were present and which lighting choices remain open.
Record a rejected combination as well as the selected one; it explains why a later substitution may not work. If different rooms receive different light, review them separately instead of treating the whole house as a single viewing condition.
Keep the final physical control sample connected to the order, and avoid signing an approval based on a sample that the supplier identifies as a different substrate or finish system.
Finish references
Pure White
Cream White
Light Warm Gray
Gray
Navy
Black
Oak Tone
Dark Walnut Tone
Design study Design references only. The finish studies do not establish actual material, color matching or availability. Compare the selected physical sample.See all finish options →
Choose antiqued mirror for the reflected scene and concealed storage you want. Compare the full door group, its patterned surface and the view when it opens before replacing transparent glass.
A photograph or illustration can become a cabinet surface, but a print-ready picture and a usable set of doors are different deliverables. Plan both before ordering.
Fine brush texture can be intentional. Compare completed painted doors, distinguish the final application from the production location, and agree what the finish should look like.
The sample shows the door frame, a separate center panel, the face frame and the cabinet box. Each component has its own place in this Shaker construction.
Shaker construction: door frame, center panel, face frame and cabinet box. The cutaway helps locate these parts; confirm each material in the specifications for the selected cabinet.
01 / Door frame
The Shaker door has rails and stiles around a separate center panel. The frame and center panel are different components; confirm their materials in the specifications for the selected cabinet.
02 / Face frame
The face frame surrounds the opening at the front of the cabinet box and sits behind the doors. The face frame, door frame and cabinet box are separate parts.
03 / Cabinet box
The sample exposes the cabinet sides, interior surfaces and layered edges. The image does not establish the wood species or material specification of a selected cabinet.