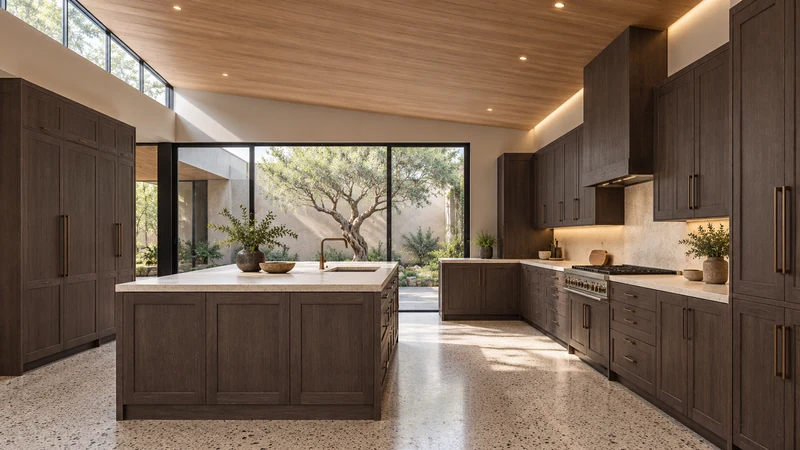
Divide a tall cabinet front according to the access zones behind it
Horizontal door divisions can separate access, but they do not automatically change interior compartments or reduce a side-hinged door’s floor-plan sweep. Check both sides of the front.
Choose divisions in a tall cabinet front after deciding which groups should be accessed independently. A divided front may let the user open a lower zone while another remains closed, but only the selected construction establishes what happens behind that line. Door proportions, interior partitions and opening movement are related decisions; they are not interchangeable descriptions of the same space.
Describe the access zones before drawing door lines
Identify the ordinary reason for opening each part of the cabinet. The lower area might hold upright trays, a middle area everyday supplies and the upper area occasional serving pieces. Use the actual inventory rather than forcing it into equal-height zones. Mark which groups are retrieved together and which benefit from independent access during a task.
Consider return as well as selection. A separate door is useful only if the intended contents can be restored through its opening. Long items may need to tilt or pass across a proposed division. Draw those movements before choosing a seam to match neighboring fronts. Visual alignment can be considered after the working requirements are clear.
Distinguish the front division from the interior construction
Ask for the selected arrangement’s interior details. A horizontal door joint does not prove there is a fixed shelf behind it; conversely, a seemingly continuous front does not prove the interior is uninterrupted. Rails, shelves, cabinet boundaries and hardware can affect the passage available to an item. Identify the actual parts rather than filling in an imagined interior from the elevation.
Design study The image shows front segmentation, including divided areas in the tall cabinetry. It cannot establish whether a particular seam matches a fixed interior boundary or an independent opening.
Check the clear opening for each proposed zone with the fronts in their required positions. The stored object and the hand controlling it must pass through that opening. If accessing a lower group still requires opening an upper front because of the selected design, record the real sequence. Do not count independent access that the construction does not provide.
Check movement and handles separately from the appearance
In a conceptual comparison of side-hinged fronts with the same width and hinge line, splitting a door horizontally changes its height but does not by itself shorten its reach across the floor plan. The lower and upper portions now occupy different vertical zones. An obstruction may affect only the portion at its height, so check the actual movement in space rather than assuming smaller-looking doors need less room everywhere.
Try the proposed handle positions and front operation using an appropriate sample or verified product arrangement. A shorter door is not automatically easier for every user to operate; hardware, grip location and the task matter. Include the person’s normal approach and adjacent fronts. A convenient handle in isolation may be inconvenient when the neighboring drawer is already open.
Use an upright-tray case to check the proposed split
In a hypothetical tall cabinet, upright roasting trays occupy the lower area and everyday wraps sit above. Separating the fronts could allow the wraps to be accessed while the tray zone stays closed. However, a proposed internal rail at the new division would interrupt the tilt needed to remove a tall tray. The access benefit for one group has created a problem for another.
Compare a supported arrangement with a different division, a tested tray orientation or another verified tray home. Keep the wraps and trays in each option. If the chosen design has no obstructing rail, test its actual opening instead of assuming the hypothetical problem applies. The example shows why the interior must be confirmed, not why divided fronts should always be avoided.
Keep a door schedule tied to the stored groups
Save the front divisions, corresponding interior boundaries, handle positions and opening sequences with the inventory. Note which fronts must open together and which genuinely operate independently. Recheck if a tray, internal fitting or door mechanism changes. The successful division lets each intended group be selected and returned without sacrificing another group merely to produce a tidy elevation.
Pure White
Cream White
Light Warm Gray
Gray
Navy
Black
Oak Tone
Dark Walnut Tone
Design study These finish studies are design references, not a list of currently orderable colors. Screens and lighting change the appearance; compare a physical sample before choosing.See all finish options →
Shelves and inner drawers solve different access problems. Compare the same inventory at its actual height, including the outer door, usable interior and restocking routine.
Recovering the corner is only part of the decision. Keep the room and inventory fixed, then compare adjacent cabinets, usable platforms and the full retrieval sequence.
The sample shows the door frame, a separate center panel, the face frame and the cabinet box. Each component has its own place in this Shaker construction.
Shaker construction: door frame, center panel, face frame and cabinet box. The cutaway helps locate these parts; confirm each material in the specifications for the selected cabinet.
01 / Door frame
The Shaker door has rails and stiles around a separate center panel. The frame and center panel are different components; confirm their materials in the specifications for the selected cabinet.
02 / Face frame
The face frame surrounds the opening at the front of the cabinet box and sits behind the doors. The face frame, door frame and cabinet box are separate parts.
03 / Cabinet box
The sample exposes the cabinet sides, interior surfaces and layered edges. The image does not establish the wood species or material specification of a selected cabinet.