A stand mixer’s location does not settle the storage around it. The bowl, splash guard, everyday mixing tools and specialty attachments may need different places. Start by deciding what remains on the counter and what must be put away, then lay out the parts used for your usual recipes. A cabinet chosen only for the mixer’s body can leave the working kit scattered across the kitchen.
Start with a recipe you actually make
Walk through gathering the mixer bowl, the correct attachment, measuring tools and ingredients for a familiar recipe. Notice what you want within reach while the counter is in use. Those items deserve accessible storage nearby. A pasta or grinding attachment used occasionally can be farther away without forcing daily tools into the same large compartment. Keep model compatibility clear when several appliances or older accessories share the kitchen.
Do not automatically turn every empty mixer bowl into an accessory bin. Follow the appliance maker’s storage instructions and consider how you remove the bowl, identify the tool and clean both. An arrangement that looks efficient while everything is dry and unused may add unloading work before each recipe. The bowl’s usable location matters more than filling its empty volume.
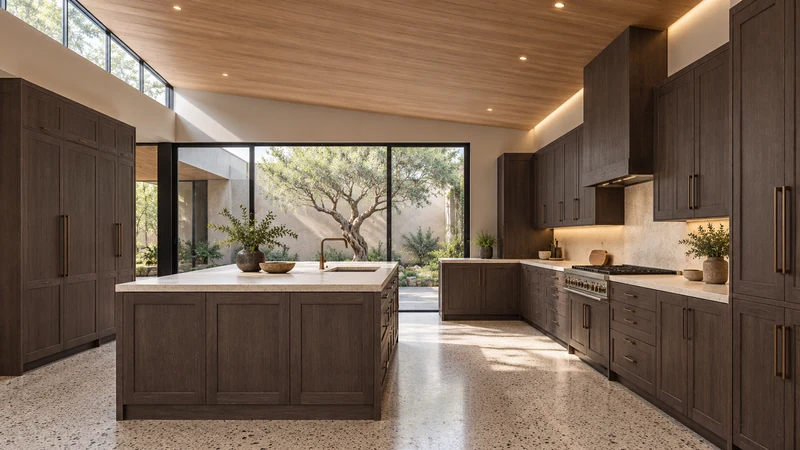
Design study The island and nearby cabinets illustrate how preparation and storage can relate. This design study does not show a mixer, lift or compatible attachment system.
Give each bowl an exit path
Measure bowls with their handles, spouts and normal covers. If several bowls are intended to nest, verify the arrangement with the actual pieces and the maker’s guidance rather than assuming that different bowl styles belong together. Check how you grip and separate the desired bowl. A deep shelf may hold the stack while leaving no comfortable route to lift it clear of the shelf above.
Compare storing the frequent bowl near the mixer with keeping every bowl in a common cupboard. A secondary bowl may deserve a less convenient location if it is rarely used, but not if a typical recipe requires switching bowls. Let the recipe sequence decide the split. Keep a landing spot for the clean bowl so retrieving it does not require shifting ingredients already on the counter.
Separate daily mixing tools from specialty equipment
An accessible tray or suitable divider can keep everyday mixing attachments visible without mixing them into general utensils. Check the shape and height of the actual attachments, including projecting stems. Specialty equipment may be easier to store as an identified kit with its feed parts, covers and manufacturer-provided holders. A small essential connector should stay with the kit rather than migrate to a miscellaneous drawer.
In a hypothetical baking setup, the mixer remains on the counter, daily tools occupy a nearby shallow drawer and a secondary bowl sits on an accessible shelf. An occasional attachment stays in its own case farther away. That arrangement earns its space only if the drawer fits the tools and the shelf allows the bowl to be lifted out; the example does not establish dimensions or a universal cabinet layout.
If the mixer moves, plan that job separately
Moving a mixer in and out is a different decision from storing its attachments. Assess the real appliance’s weight, grip and retrieval route with the intended user. A shelf, pullout or appliance lift must be suitable for the complete proposed setup, with its own documented capacity, fastening and permitted use. Do not assume an accessory marketed for mixers automatically fits every mixer and cabinet combination.
Keep operating space separate from stored size. A machine that fits with its head lowered or bowl removed may need another envelope during use. Follow the selected appliance and accessory instructions for that arrangement. A storage drawing alone cannot confirm electrical access, movement or operating clearances.
Finish the test after the baking is done
Try returning clean, dry bowls and attachments to their places while the mixer is in its planned position. Look for parts that block a drawer, require moving the mixer again or end up on the counter because their storage is inconvenient. Adjust those locations before choosing cabinet internals. The useful result is a baking area that can be set up and put away without repeatedly rearranging the kitchen.
Pure White
Cream White
Light Warm Gray
Gray
Navy
Black
Oak Tone
Dark Walnut Tone
Design study These finish studies are design references, not a list of currently orderable colors. Screens and lighting change the appearance; compare a physical sample before choosing.See all finish options →
The closed appliance footprint is not the whole requirement. Keep storage, cooking and serving locations distinct until the actual model and cabinet arrangement are checked.
The sample shows the door frame, a separate center panel, the face frame and the cabinet box. Each component has its own place in this Shaker construction.
Shaker construction: door frame, center panel, face frame and cabinet box. The cutaway helps locate these parts; confirm each material in the specifications for the selected cabinet.
01 / Door frame
The Shaker door has rails and stiles around a separate center panel. The frame and center panel are different components; confirm their materials in the specifications for the selected cabinet.
02 / Face frame
The face frame surrounds the opening at the front of the cabinet box and sits behind the doors. The face frame, door frame and cabinet box are separate parts.
03 / Cabinet box
The sample exposes the cabinet sides, interior surfaces and layered edges. The image does not establish the wood species or material specification of a selected cabinet.