Match the selected slide-in range to cabinet openings and counter edges
The slide-in label does not tell you whether the cooking surface overlaps the counter or how the rear junction finishes. Check the exact design before assuming the existing opening is suitable.
Choose the exact slide-in range before finalizing the neighboring cabinet and countertop detail. The category name does not fully describe the cooking surface’s relationship to the counter edges, the rear junction or the appliance’s installed front. Compare the selected model’s installation drawing with the actual opening, keeping the cabinet gap and countertop opening as separate measurements.
Identify whether the selected cooking surface overlaps the counter
GE Appliances describes older slide-in designs with a cooktop overlapping the countertop and other slide-in designs without that overlap. Its support information also discusses model-related filler accessories. These examples demonstrate a design difference; they do not make a particular edge treatment or accessory suitable for every slide-in range.
Read the selected model’s top, front and side views to identify the appliance body, cooking surface, any projecting trim and the required opening. Do not convert overall product width directly into a countertop cutout or assume that a visible lip carries the appliance. The applicable installation information must establish both the opening and the support arrangement.
Survey both the cabinet opening and the counter edges
Measure the gap between cabinet bodies separately from the space between finished countertop edges. Check those edges along the intended depth, including any front shaping, rear upstand or retained strip. An opening that appears wide enough at the front may have a different profile farther back, and the range must reach its intended installed position.
In a hypothetical replacement, the old cooking surface covered the counter edges beside it. A proposed non-overlapping model fits the cabinet gap but leaves those edges visible. The body-fit check passes while the finish relationship has changed. Resolve the actual edge condition and any applicable manufacturer-supported trim before treating this as a direct replacement.
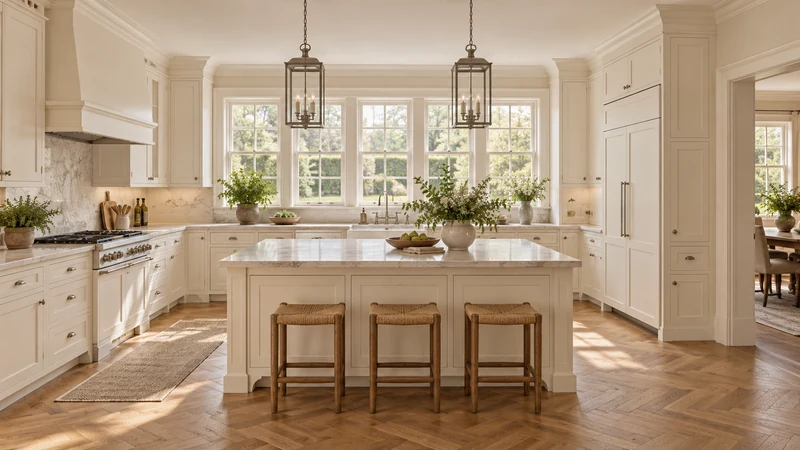
Design study The image makes the neighboring counter and cabinet relationships visible. It does not identify the range model, prove an overlapping installation, establish dimensions or demonstrate that the pictured arrangement meets installation requirements.
Review height and the rear junction in section
Use the finished floor as a shared vertical reference for the range and counters. Establish the model’s supported height range and required relationship to neighboring surfaces from its instructions. Do not assume adjustment can compensate for any difference, or alter an appliance’s support simply to make a photographed front line appear level with the counter.
Draw the rear wall, backsplash or upstand, any retained countertop strip and the appliance’s rear profile. Check the specified connection zones and installation position with the responsible installer. A rear obstruction can change the front projection even when the width is correct. An accessory intended to finish a junction does not automatically solve an incompatible opening or service location.
Check adjacent fronts as well as the closed elevation
With the range in its supported position, trace the oven door, appliance handle and any lower drawer or compartment that belongs to the model. Then test neighboring cabinet doors and drawers in the states the household expects to use. A cabinet pull that misses the closed range may interfere with an open appliance door or make a nearby drawer awkward to reach.
Keep geometric checks separate from installation requirements around the cooking surface. The fact that a cabinet door moves without contact does not establish the required relationship to nearby walls, overhead cabinets or other surfaces. Apply the exact appliance and ventilation-equipment instructions through the responsible installation design; do not infer those requirements from the illustration.
Resolve changed details before modifying the opening
Mark each mismatch as an opening, edge-finish, height, rear-position or operation issue. This makes the decision concrete: a supported trim option may address one visible junction, while a different counter condition or appliance selection may be needed for another. Avoid treating an accessory name as a general repair for all dimensional conflicts.
Keep the model instructions, measured opening, counter profiles, finished floor reference and agreed surrounding details together. Have the responsible installer confirm the complete installation, including the required securing arrangement, before use. If a countertop or cabinet modification is needed, define it from the verified design rather than cutting first to match the appliance’s advertised width.
Pure White
Cream White
Light Warm Gray
Gray
Navy
Black
Oak Tone
Dark Walnut Tone
Design study These finish studies are design references, not a list of currently orderable colors. Screens and lighting change the appearance; compare a physical sample before choosing.See all finish options →
A concealed connection needs an access plan that works with the appliance, cabinet fronts and normal contents in place. Seeing a point on an empty-room drawing is only the beginning.
Control-panel height is only part of the decision. Test the rack used, open door, person’s stance, grip and available landing together before fixing the oven cabinet.
The sample shows the door frame, a separate center panel, the face frame and the cabinet box. Each component has its own place in this Shaker construction.
Shaker construction: door frame, center panel, face frame and cabinet box. The cutaway helps locate these parts; confirm each material in the specifications for the selected cabinet.
01 / Door frame
The Shaker door has rails and stiles around a separate center panel. The frame and center panel are different components; confirm their materials in the specifications for the selected cabinet.
02 / Face frame
The face frame surrounds the opening at the front of the cabinet box and sits behind the doors. The face frame, door frame and cabinet box are separate parts.
03 / Cabinet box
The sample exposes the cabinet sides, interior surfaces and layered edges. The image does not establish the wood species or material specification of a selected cabinet.