A useful lunch-packing station starts with a complete usable set and ends with that set returning to its home. Group the containers, matching lids and utensils used for everyday lunches near the surface where packing happens. Keep the lunch bag’s storage and departure route connected to that process. Before adding a specialized cabinet, find out whether the current delay comes from missing parts, a crowded counter or the way items return from school.
Start with what happens when the bag comes home
Follow the lunch bag from the household entrance. Identify where it is opened, where used containers enter the normal cleanup routine and where the empty bag waits. If returned items remain inside the bag until the next morning, more storage beside the packing surface will not solve the missing-container problem. The return needs a visible, repeatable sequence that leads back to a ready set.
Choose a home for the emptied bag that is easy to reach for the next departure but does not occupy the packing surface overnight. Decide how cleaned components move from the household’s drying or dish-unloading location to their storage. A convenient return location often matters more than a drawer with elaborate divisions. Everyone involved should be able to recognize what belongs there and what is still awaiting cleanup.
Store usable sets rather than a collection of similar pieces
Sort the everyday containers by the lids that actually fit them. Similar-looking lids may not belong to the same system. Compare the physical fit and any identifying marks instead of assuming that a roughly matching shape is sufficient. Keep the preferred daily set easy to retrieve, while spare or occasional pieces can occupy a secondary location. A missing lid should remain a visible problem, not disappear into a larger stack.
Choose whether lids sit with their containers or in a clearly matched adjacent section. Nesting boxes can save space, but removing a deep box from beneath the whole stack may slow the routine. Test the arrangement with the person who packs and the person who puts pieces away. A system that is understandable only to its designer is unlikely to stay organized through a busy week.
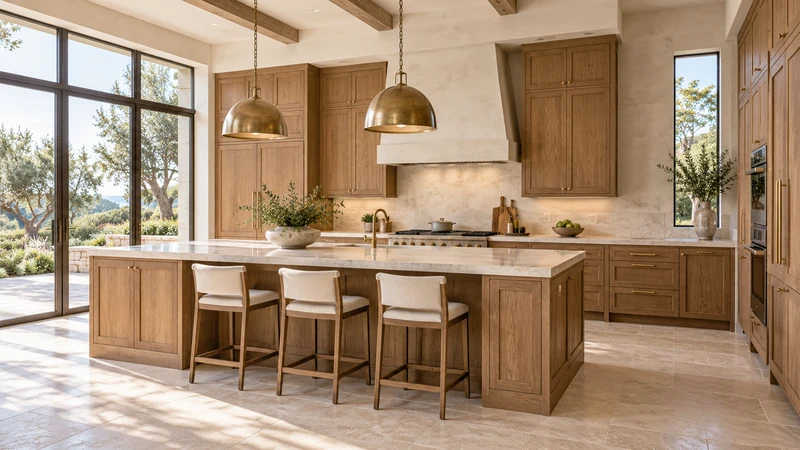
Design study The island and nearby drawers offer possible packing and storage locations to test. Their usefulness depends on the actual lunch set, available morning surface and return path, none of which is established by the rendering.
Check the lunch bag as part of the storage system
Place the chosen containers in the actual lunch bag with the usual accompanying items. Check the bag opening, the orientation of the containers and the ability to close it normally. A container can fit a drawer neatly yet be awkward to pack because its lid or handle catches at the bag entrance. If inserts or other accessories are normally carried, include their occupied space instead of testing an empty bag alone.
Keep wraps and other packing supplies near the assembly position if they are used regularly, but do not let occasional supplies consume the only working area. Draw the open container, lid and bag on the proposed surface. The useful footprint is the packing action, not just the footprint of a closed lunch box. Include another person preparing breakfast if that happens at the same time.
Test an ordinary morning from empty counter to departure
In a hypothetical household, containers are in a deep cabinet, lids are in a distant drawer and lunch bags are left near the entry. The proposed arrangement places matched daily components in an accessible drawer by the packing surface and gives emptied bags a nearby home. It improves the morning only if the return routine replenishes that drawer. If clean lids continue to remain beside the sink, the new drawer merely relocates the search. Test both the morning and the previous afternoon before accepting the change.
Make the reset part of the cabinet decision
Mark the packing surface, homes for ready components and bags, cleanup destination and departure route on the plan. Identify where the routine overlaps breakfast or dishwasher unloading and decide which surface must be available then. Keep the preferred set within the household’s normal reach and remove unmatched extras from the daily selection. The result should be a process that can be restored after use, with cabinet finishes chosen afterward from the reference below.
Pure White
Cream White
Light Warm Gray
Gray
Navy
Black
Oak Tone
Dark Walnut Tone
Design study These finish studies are design references, not a list of currently orderable colors. Screens and lighting change the appearance; compare a physical sample before choosing.See all finish options →
Group the dishes and dry supplies used together, then test access to cold ingredients and the return of used dishes before calling the zone self-service.
The sample shows the door frame, a separate center panel, the face frame and the cabinet box. Each component has its own place in this Shaker construction.
Shaker construction: door frame, center panel, face frame and cabinet box. The cutaway helps locate these parts; confirm each material in the specifications for the selected cabinet.
01 / Door frame
The Shaker door has rails and stiles around a separate center panel. The frame and center panel are different components; confirm their materials in the specifications for the selected cabinet.
02 / Face frame
The face frame surrounds the opening at the front of the cabinet box and sits behind the doors. The face frame, door frame and cabinet box are separate parts.
03 / Cabinet box
The sample exposes the cabinet sides, interior surfaces and layered edges. The image does not establish the wood species or material specification of a selected cabinet.