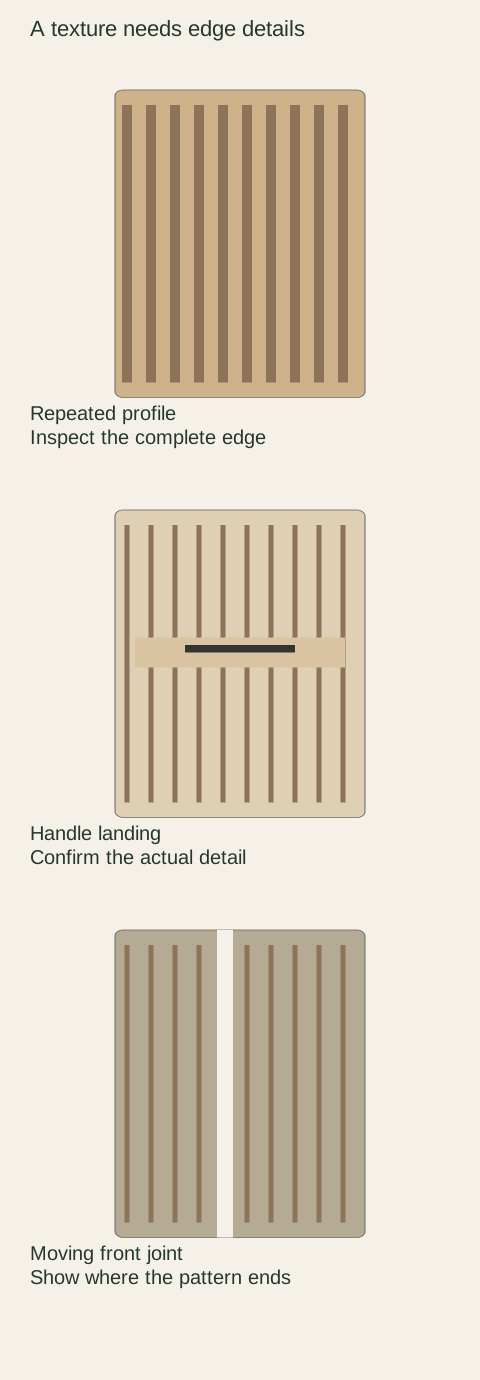
Before approving reeded or fluted cabinetry, look beyond the middle of the sample. The ends of the pattern, the gaps between moving fronts and the handle attachment can change the result more than the chosen wood tone. Ask for those details on the actual door family. A cropped photograph of repeating lines leaves the difficult parts outside the frame.
Get a section, not just a style word
Conestoga describes reeded profiles as generally raised and rounded, while fluted profiles generally have concave grooves; it also notes that the terms are sometimes used interchangeably. Confirm the actual cross-section and finished sample instead of assuming the sales label defines the shape.
Touch the finished sample with permission and look across it from the side. Decide whether you prefer broad shallow shaping, tighter ridges or a quieter texture. Keep that preference separate from material identification. A sculpted surface does not establish whether the front is solid wood, a veneered construction or a routed panel. Record the documented material and finish for the actual option.
Follow the pattern to every edge
Inspect the top, bottom and both sides of the sample. Does the repeated shape finish in a flat border, continue to the edge or end with a partial groove? How does the back meet that edge? These are design questions to resolve before ordering, particularly when a close-up has made the central texture seem continuous and effortless.
Diagram Design questions shown schematically. Groove shape, spacing, hardware preparation and moving clearances require the selected product's drawings.
Ask how the same profile ends on the narrowest and widest fronts in the project. A pattern can occupy their widths differently. Do not assume every size ends on an identical ridge or that the supplier will adjust spacing to satisfy a sketch. The actual manufacturing option must support the proposed edge treatment; an illustration by itself is not a fabrication agreement.
Door gaps remain working gaps
Draw the individual front boundaries over the repeated lines. Decide whether the gap should visually coincide with a groove or remain a deliberate break. Either choice must retain the clearances required by the selected front and hardware. Do not narrow a working gap simply to disguise it in the pattern.
Open the representative doors if an assembled sample is available. Watch the leading edges and any neighboring applied panel through the full movement. A fixed decorative panel beside a moving door may look continuous when closed but need a distinct junction in use. Ask the cabinet provider to resolve the moving detail rather than expecting an installer to trim it until it looks right.
Give the handle a real attachment detail
Place a paper outline of the proposed handle on the sample without drilling. Observe whether its feet land on a ridge, bridge a groove or sit on a flat area provided by the design. The visual center of a textured front is not automatically a suitable fixing location. Hardware dimensions and the front's construction must be reviewed together.
If the design requires a flat landing, an approved spacer or another mounting arrangement, obtain the supplier's detail. Do not improvise washers or sand down a finished ridge to make a handle sit flat. For an edge pull or opening profile, review the reverse and top edge as well as the face. The chosen opening method needs to work with the actual front thickness and assembly.
Treat an outside corner as its own composition
A texture on an island front does not automatically wrap around its end. Put the front and side together in a corner sketch. Decide whether the side is smooth, repeats the profile or uses a border that deliberately stops it. Include the exposed edge of any applied panel, since that edge may remain visible from the dining area.
A wraparound appearance can be attractive, but it needs an accepted construction detail and compatible components. Ask what happens at the last full ridge and the first ridge on the return. A smooth side is also a valid choice when the transition is clear. The goal is to avoid discovering an unplanned plain strip or an awkward partial pattern after installation.
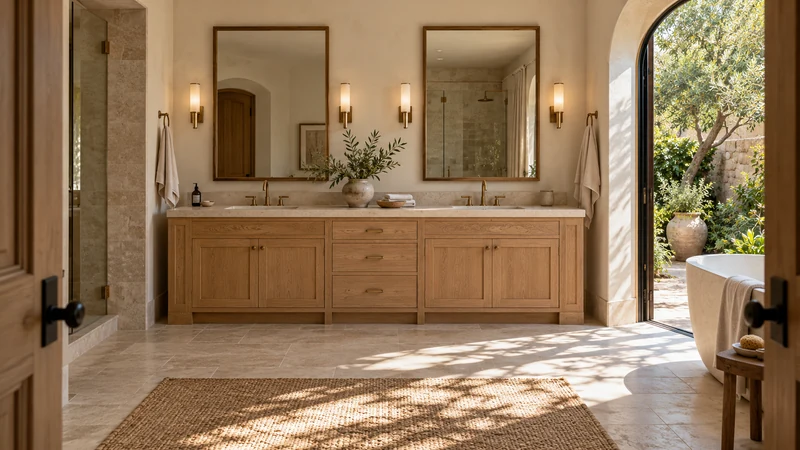
Design study This reference has framed fronts, not a verified reeded product. Use its visible side and drawer groups to identify where a proposed texture would start and stop.
A worked example on a beverage cabinet
Imagine a beverage cabinet with textured doors beneath plain upper shelves. The small sample looks convincing, but the proposed horizontal pull crosses several ridges. Beside it, a narrow drawer would have a different-looking pattern termination. Approving only the central texture has left both the grip and the small front unresolved.
A useful revision might keep the textured doors, choose a supplier-approved handle arrangement and make the small drawer intentionally plain. Another might retain texture throughout using a documented matching front family. Compare the whole elevation with the actual handle outline. The better choice is the one you can see and specify, not the one that relies on hiding the difficult parts in a rendering.
Check the hand and wiping route without a destructive test
Handle the permitted sample as you would the installed door. Feel the edge you would grasp and follow a clean soft cloth along the profile if the sample owner permits that demonstration. Ask for finish-specific care instructions. The purpose is to understand access to the texture, not to test it with abrasive brushes, oil or staining food.
An appealing tactile finish may still demand a routine you do not want in a busy preparation zone. You can limit it to a visible accent location while choosing simpler fronts near frequent spills, provided the resulting mix is reviewed as a complete design. That is a household preference, not a universal claim that textured doors are unsuitable for kitchens.
Release the whole front family
The order should name the profile, material, finish, direction, edge treatment and all affected door and drawer fronts. Add the handle position and any special mounting detail. Identify smooth panels and textured panels separately so a matching color does not conceal a change in surface. Keep the agreed corner and termination drawings with the physical sample.
At receipt, review a representative large front, narrow front and return panel against those records before drilling. A different pattern ending can be easy to miss in a stacked shipment. Photograph the whole piece and the relevant edge if something differs. A complete approval makes the discussion about a specific supplied detail rather than whether the general style still looks reeded.
Pure White
Cream White
Light Warm Gray
Gray
Navy
Black
Oak Tone
Dark Walnut Tone
Design study These finish studies are design references, not a list of currently orderable colors. Screens and lighting change the appearance; compare a physical sample before choosing.See all finish options →
The sample shows the door frame, a separate center panel, the face frame and the cabinet box. Each component has its own place in this Shaker construction.
Shaker construction: door frame, center panel, face frame and cabinet box. The cutaway helps locate these parts; confirm each material in the specifications for the selected cabinet.
01 / Door frame
The Shaker door has rails and stiles around a separate center panel. The frame and center panel are different components; confirm their materials in the specifications for the selected cabinet.
02 / Face frame
The face frame surrounds the opening at the front of the cabinet box and sits behind the doors. The face frame, door frame and cabinet box are separate parts.
03 / Cabinet box
The sample exposes the cabinet sides, interior surfaces and layered edges. The image does not establish the wood species or material specification of a selected cabinet.