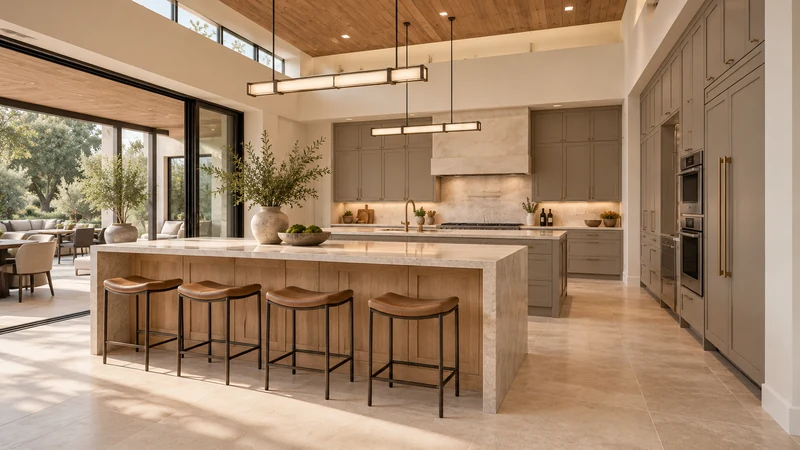
Plan serving storage around the kitchen door used for outdoor dining
A short route to the patio still needs a workable door and a place to set things down. Plan tray access, final assembly and the return of used dishes together.
Plan outdoor-serving storage around the door the household actually uses, including how that door is opened while carrying things. A cabinet near the patio is helpful only when the tray or dish can leave it, be assembled and pass through the doorway. Trace the route beyond the threshold to the first real destination, then back into the kitchen with used dishes. A line ending at the door omits much of the task.
Name the trips before grouping the supplies
Separate setting the outdoor table from carrying prepared dishes and from clearing afterward. Each trip uses different objects and may involve a different person. List what is normally carried together, such as plates and napkins for setup or a serving dish with its utensil. A forgotten utensil can create another kitchen crossing even when the large dish has a nearby storage home.
Choose representative trays and dishes from the household’s actual inventory. Include their handles and the way the person grips them. The largest tray may reduce trips but be awkward at a turn, while a smaller load changes the number of journeys. Compare the complete serving task rather than selecting a tray solely because it fits the cabinet.
Connect storage to a genuine assembly place
Locate the tray home and the surface where it is loaded or where serving pieces are gathered. Confirm the tray can leave its cabinet with the surrounding fronts and stools in their usual positions. Keep the assembly surface available during the cooking that precedes outdoor dining. A surface next to the door is not a dependable landing place if it is normally occupied by preparation equipment.
Design study The study makes the outdoor connection visible. An open presentation does not verify everyday door operation, clear passage or tray handling. Recreate the route with the selected door, furniture and carried objects.
Preserve the place where a person stands to load and lift the tray. Opening a nearby drawer for serving utensils should not require putting the tray in the walking route. If assembly moves to another counter, draw the extra carry instead of treating the door-side cabinet as a complete serving station by itself.
Operate the door with the carried task represented
Start with the door in its normal state, including a screen where present. Check the approach to its handle, the opening action and the usable passage with the actual door position. A wide-looking opening in a design image does not show which portion is routinely available. Include any threshold or change of level in the real walk-through rather than assuming a continuous floor from the plan.
If the load occupies the person’s hands, demonstrate the intended sequence: a real set-down point, an agreed helper or another practical way the household already uses the door. Do not rely on the door always being open unless that is genuinely the tested condition. The first place beyond it must also be available; an outdoor chair can interrupt the trip just after the kitchen portion appears successful.
Compare a serving scenario from storage to the table
In a hypothetical household, a large tray is stored by the patio door, but dishes are assembled on the island. The person carries the loaded tray to a closed door and discovers the nearby surface is occupied by cooking supplies. Moving the tray cabinet closer has not solved opening the door. Reserving a usable set-down place, changing the load or coordinating a helper changes the actual sequence and can be tested with an empty representative load.
Then bring used dishes back while the kitchen is still active. Identify the receiving surface and route toward cleanup. It may differ from the outward assembly place. Avoid assuming that a counter reserved for outgoing dishes will simultaneously accept everything returning from the table; show which task occupies it at that moment.
Record the whole trip and its operating conditions
Keep the serving groups, tray home, assembly surface, door sequence and destination beyond the opening. Add the return landing and any accepted extra trips. Recheck when furniture, door operation or the household’s serving pieces change. This plan should explain how supplies become a carried meal and how dishes come back, rather than merely locating storage beside an attractive outdoor view.
Pure White
Cream White
Light Warm Gray
Gray
Navy
Black
Oak Tone
Dark Walnut Tone
Design study These finish studies are design references, not a list of currently orderable colors. Screens and lighting change the appearance; compare a physical sample before choosing.See all finish options →
Choose the access face and the return route together. Storage near the table can simplify setting it, but only if clean dishes can also be put away and retrieved during meals.
Mobility does not create an extra patch of floor. Check the cart during preparation, during movement and where it stays when the kitchen needs its route back.
The sample shows the door frame, a separate center panel, the face frame and the cabinet box. Each component has its own place in this Shaker construction.
Shaker construction: door frame, center panel, face frame and cabinet box. The cutaway helps locate these parts; confirm each material in the specifications for the selected cabinet.
01 / Door frame
The Shaker door has rails and stiles around a separate center panel. The frame and center panel are different components; confirm their materials in the specifications for the selected cabinet.
02 / Face frame
The face frame surrounds the opening at the front of the cabinet box and sits behind the doors. The face frame, door frame and cabinet box are separate parts.
03 / Cabinet box
The sample exposes the cabinet sides, interior surfaces and layered edges. The image does not establish the wood species or material specification of a selected cabinet.