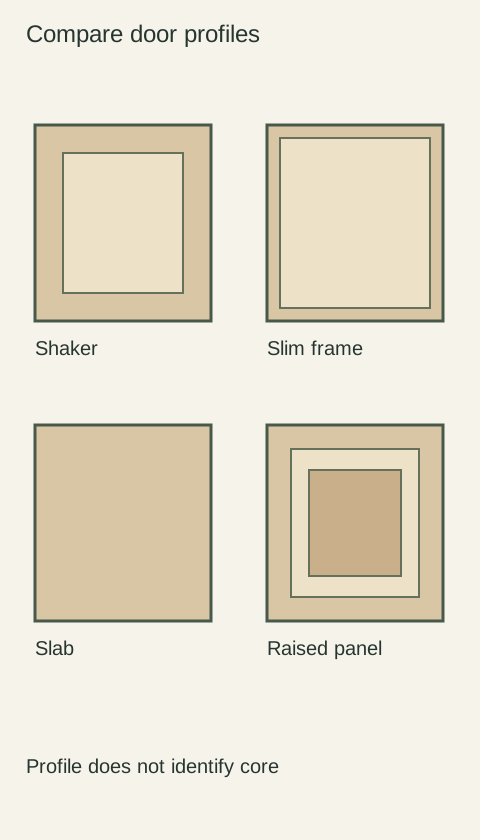
Approve a painted cabinet color on the intended door profile, not only on a flat chip. A recessed center, projecting frame or shaped edge adds light and shadow to the visible face. If the finished sample feels darker or busier than the chip, examine where that difference occurs before changing the color. You may prefer a different profile rather than a different paint tone.
Diagram The diagram compares face shapes and repeated outlines. It does not simulate actual shadows, profile depth or a specified painted color.
Find the part of the door that looks different
Start with the flat field, then the frame, inside profile and outer edge. Decide whether the whole surface looks too dark or whether the stronger contrast is concentrated along the recessed lines. A shaded groove can make the face read as more strongly outlined even when the broad flat areas still have the color you wanted.
Benjamin Moore notes that lighting affects the perception of neutral colors and recommends checking them under different light conditions. For a shaped cabinet front, that is a reason to inspect the complete sample where it will be used. It does not prove that every dark line is a shadow.
Ask whether the selected finish includes glazing, highlighting or another deliberate accent in the profile. A darkened detail may be part of the finish rather than simply a lighting effect. The color name alone may not state every decorative treatment. Compare the supplier’s exact finish description with the physical sample before assuming the recessed area is uniformly painted.
Observe the same clean sample as the direction of ordinary light changes. Note whether the darker-looking area moves, softens or remains distinct. This is a useful observation, not a definitive coating test. If a line remains unexpectedly dark or irregular, show it to the supplier; do not scrape a corner or apply cleaning products to see whether the color comes off.
Compare profiles without changing everything else
If the choice is still open, view a simpler profile and a more detailed profile in the same proposed color and sheen. Keep them in the same position for the comparison. Changing color, finish level and shape at once can produce a favorite sample without telling you which element made it work.
Stand back and imagine the detail repeated across the actual group of fronts. A single framed sample can look delicate while repeated outlines create a stronger overall pattern. Include a representative small drawer front, because the relationship between the center field and the surrounding detail may differ. A large door is not always a sufficient preview of the whole door family.
A worked choice with a pale gray finish
Imagine that a pale gray chip looks calm beside your countertop. On the deeply profiled door, the inner recess creates a pronounced dark border under the room’s side light. You try a lighter color, but now the broad face appears too white while the border still draws attention. The original issue was not simply that the paint was too dark.
A shallower or simpler profile in the original gray may give you the quieter result you wanted. Alternatively, you may decide that the stronger outline is attractive and keep it. Review the complete front in ordinary daylight and evening lighting before approving either direction, rather than using an unusually flattering photograph as the deciding evidence.
Preserve the profile as part of color approval
Record the door style, profile reference, finish name, sheen and any decorative accent together. If a drawing is supplied, make sure it corresponds to the finished sample. A substitution that keeps the color but changes the depth or shape of the profile can change the visual result and should receive its own review through the order process.
At receipt, compare the supplied fronts with the approved profile under comparable lighting. Photograph a whole door and the relevant recess if the appearance differs. Keep your report specific: unexpected dark accent, different contour, inconsistent finish or a lighting-dependent effect. That description lets the supplier investigate the actual concern without treating every shadow as a defect or dismissing every dark line as an inevitable feature of painted cabinetry.
Pure White
Cream White
Light Warm Gray
Gray
Navy
Black
Oak Tone
Dark Walnut Tone
Design study These finish studies are design references, not a list of currently orderable colors. Screens and lighting change the appearance; compare a physical sample before choosing.See all finish options →
A color name does not identify a finish system. Compare the decorative surface, the core, the edge and the repair method before choosing a cabinet front.
The sample shows the door frame, a separate center panel, the face frame and the cabinet box. Each component has its own place in this Shaker construction.
Shaker construction: door frame, center panel, face frame and cabinet box. The cutaway helps locate these parts; confirm each material in the specifications for the selected cabinet.
01 / Door frame
The Shaker door has rails and stiles around a separate center panel. The frame and center panel are different components; confirm their materials in the specifications for the selected cabinet.
02 / Face frame
The face frame surrounds the opening at the front of the cabinet box and sits behind the doors. The face frame, door frame and cabinet box are separate parts.
03 / Cabinet box
The sample exposes the cabinet sides, interior surfaces and layered edges. The image does not establish the wood species or material specification of a selected cabinet.