Paint, stain, foil and sheen: compare the finished surface
A color name does not identify a finish system. Compare the decorative surface, the core, the edge and the repair method before choosing a cabinet front.
KraftMaid describes paint and stain as different finish choices within its cabinet lines. The Composite Panel Association describes thermally fused laminate as a decorative paper system fused to a panel. That is different terminology from a foil or film-wrapped front. “Laminate,” “painted look” and “wood look” are not precise enough to identify what is on a particular door.
Ask the sample label or specification to identify the face material, core, edge treatment and back. A film-wrapped profiled door and a flat decorative panel with applied edging may look similar when closed but have different junctions. Do not describe an unknown white front as painted merely because it lacks visible grain.
Decide how much wood character you want
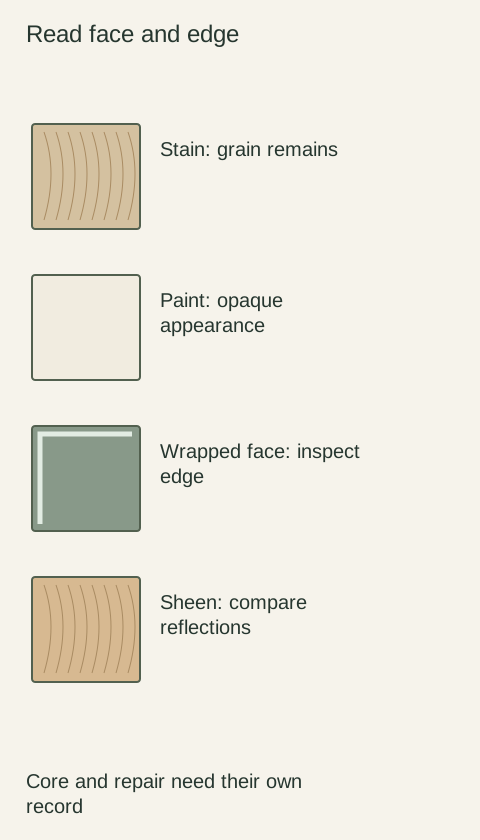
An opaque painted appearance can give a room a more uniform color field. It does not establish that the underlying material is grain-free or that joints will never show. Stained wood keeps more of the wood character visible; the result depends on the species, cut and selected finish, so a stain name alone cannot predict another substrate.
Compare a group of sample pieces if variation matters to you. A tiny, especially even chip is a poor guide to a large run of stained fronts. Decide whether contrasting grain is welcome or distracting. Write the actual material and finish combination on the selection rather than copying only the color name.
Diagram Illustrative diagram; not a product specification.
Inspect wrapped faces and their edges
For a foil or other decorative surface, look at an outside corner, the door back and the route around the profile. Locate the seam or transition, then read the selected manufacturer's heat and care instructions. Do not assume every decorative film is interchangeable or that every chipped edge can be painted successfully.
The core still matters. A surface can look undamaged while an edge or screw hole exposes a different material. Ask how exposed ends and field-cut edges are finished in the actual product. A screen image cannot confirm adhesion quality, moisture tolerance or whether the finish is available for your configuration.
Evaluate sheen with the sample upright
Sheen changes the way light appears on a surface. Tilt the sample slightly under the room's actual lighting and look for reflections, texture and fingerprints. Broad labels such as matte and satin do not promise identical appearance across manufacturers. Compare physical examples in the same position rather than ranking their names.
Check a pull location and the lower edge where hands regularly touch. A very smooth dark surface may show a different type of mark from a textured pale surface; your tolerance matters. Do not conduct scratch, heat or chemical tests on a sample unless its owner has expressly provided a testing procedure.
Plan the repair before there is damage
Find the finish-specific care sheet and ask what a compatible touch-up can address. A small color mark, a dent, lifting film and a swollen core are different conditions. A touch-up pen may reduce a contrasting spot without reproducing the original sheen or texture. Larger visible repairs may need a replacement front or professional refinishing assessment.
For an illustrative comparison, imagine a painted door with an edge nick and a wrapped door with a lifting corner. Buying the same generic “cabinet repair paint” for both ignores the failure mechanism. Record photographs, confirm the actual surface and choose a repair permitted for that system before applying a product that complicates later work.
Approve a combination that can be reordered
Keep the door name, substrate, finish code, sheen designation and sample identification together. Include exposed panels, fillers and trim in the same finish schedule. Note whether a future replacement is expected to blend with aged adjacent fronts; a code is an ordering reference, not a promise of an invisible match. Choose a surface you like in the room and can maintain using its own instructions.
Compare the complete finish package
Include the face, back, edges, exposed cabinet ends and matching trim in the comparison. Mark any component that uses a different surface system or sheen designation.
An intentional difference may be acceptable, but it should not arrive as a surprise. Keep the care requirements beside the appearance choice, particularly where a surface sits next to heat or frequent water use.
If two quotes use similar color names on different materials, list that difference before comparing their totals. The lower price and the preferred appearance may refer to different packages.
Finish references
Pure White
Cream White
Light Warm Gray
Gray
Navy
Black
Oak Tone
Dark Walnut Tone
Design study Design references only. The finish studies do not establish actual material, color matching or availability. Compare the selected physical sample.See all finish options →
Choose antiqued mirror for the reflected scene and concealed storage you want. Compare the full door group, its patterned surface and the view when it opens before replacing transparent glass.
A photograph or illustration can become a cabinet surface, but a print-ready picture and a usable set of doors are different deliverables. Plan both before ordering.
Fine brush texture can be intentional. Compare completed painted doors, distinguish the final application from the production location, and agree what the finish should look like.
The sample shows the door frame, a separate center panel, the face frame and the cabinet box. Each component has its own place in this Shaker construction.
Shaker construction: door frame, center panel, face frame and cabinet box. The cutaway helps locate these parts; confirm each material in the specifications for the selected cabinet.
01 / Door frame
The Shaker door has rails and stiles around a separate center panel. The frame and center panel are different components; confirm their materials in the specifications for the selected cabinet.
02 / Face frame
The face frame surrounds the opening at the front of the cabinet box and sits behind the doors. The face frame, door frame and cabinet box are separate parts.
03 / Cabinet box
The sample exposes the cabinet sides, interior surfaces and layered edges. The image does not establish the wood species or material specification of a selected cabinet.