Choosing oak cabinet grain: cathedral patterns, ray fleck or a quieter straight cut
Oak is a species choice; the visible grain still needs a decision. Compare broad arches, ray fleck and straighter patterns on complete finished fronts.
Choosing oak cabinetry starts with deciding which parts of its grain you enjoy seeing. A request for light oak may still produce broad arches, narrow lines or conspicuous pale flecks. If the goal is a quiet bank of fronts, say that explicitly and compare complete samples. A species name and a stain color leave too much of the appearance unresolved.
Name the pattern before choosing its color
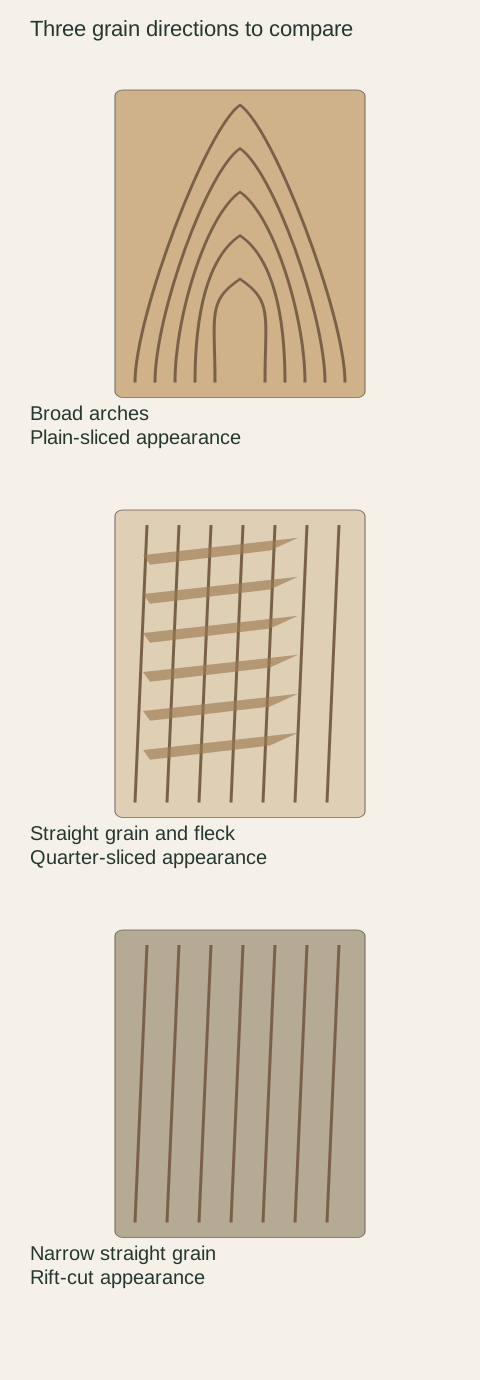
Columbia Forest Products describes plain-sliced veneer as commonly showing cathedral shapes, quarter-sliced oak as showing pronounced ray fleck, and rift-cut veneer as having narrow straight grain with reduced fleck. These are appearance distinctions in veneer, not a specification for an unidentified cabinet.
Start with ordinary descriptions beside those terms. Circle the broad arches you like, the cross-grain flashes you find distracting, or the straight lines you want to repeat. Give the supplier both the description and a labeled example. The label tells the supplier what to investigate; the example helps prevent a discussion in which everyone uses the same word for a different visual result.
Separate ray fleck from damage and decorative marks
A fleck can look like a lighter patch or ribbon across an otherwise straight-looking face. Its presence is not by itself evidence of a scratch, a finish failure or careless stain application. At the same time, calling a mark natural does not resolve every concern. Inspect the complete piece and ask the supplier to identify the feature in the context of the documented material.
Diagram Illustrative grain sketches, not species identification, grading limits or photographs of actual veneer. Real samples vary within each category.
Do not rub the mark with cleaner, sand it or apply stain to see whether it disappears. Those actions turn a selection question into a repair problem. Photograph the whole door and the detail in the same lighting. Describe what you see without assigning a cause: a light patch across the grain, an abrupt dark line, or a pale area that looks different when you move.
A quiet center panel does not describe the frame
A framed door can combine a center panel with rails and stiles that read differently. The parts may use different cuts or different material forms. Ask how the selected door is built and what appearance is expected on each part. A veneer sample does not establish the appearance of solid-wood rails, and a straight-grained rail does not represent a large veneered center.
Look at the top and bottom rails as well as the vertical stiles. Their direction is part of the frame's composition. If a reference photograph seems unusually uniform, ask whether it shows a slab front, a framed door or a specially selected sample. Avoid requesting an entire framed kitchen to look like a small uninterrupted patch from a slab panel.
Compare the cut with the finish held constant
Whenever possible, compare candidates in the same proposed finish and under the same ordinary light. A dark sample beside a pale sample makes it difficult to decide whether you prefer its grain or simply its color. If matching finish samples are unavailable, write down that limitation and postpone the final appearance judgment until a representative finished example can be reviewed.
Keep the sample upright in the intended direction. View it close enough to understand the pattern, then step back to the distance from which the cabinet group will normally be seen. A fleck that dominates a close-up may blend into the room; repeated arches across broad doors may become more noticeable at a distance. Neither observation is a universal rule, so record the result for this room.
Test the largest visible surface
A narrow sample can miss the feature that matters most. Review a complete door or an appropriately representative panel when the design includes a broad exposed island end, tall pantry front or long bank of slab drawers. Ask whether the sample represents the same cut and selection practice as those pieces. The largest surface should not depend on an assumption made from a small trim offcut.
Include the exposed end beside the front sample. Decide whether the end only needs a coordinated tone or whether its pattern must be comparably restrained. A plain side panel with a more active pattern can become the most visible wood surface from the dining table. Put that viewpoint on the review drawing instead of concentrating only on the kitchen's front elevation.
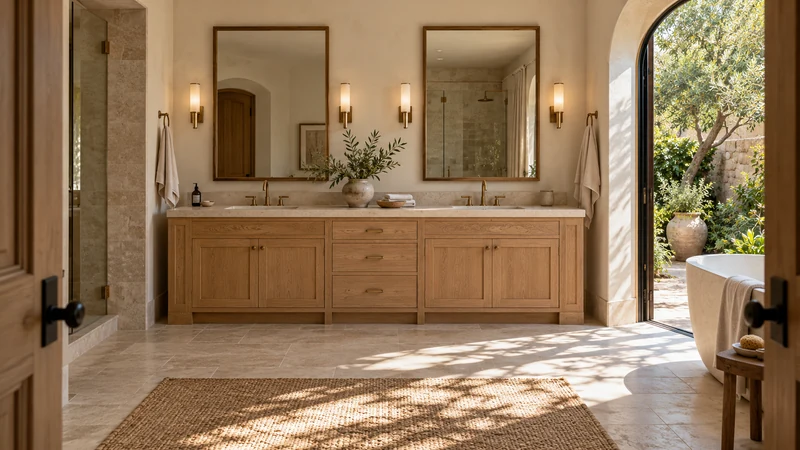
Design study This design study shows wood-tone fronts at room scale. It cannot establish a species, veneer cut, real grain range or current product availability.
A worked choice: straight lines, but fewer flashes
Imagine a homeowner who chooses a pale oak sample because the lines seem calm. A larger sample then shows prominent cross-grain fleck. The homeowner dislikes the fleck but still likes the color. Ordering a darker stain immediately may solve the wrong problem, especially if the intended room depends on a pale overall palette.
The useful next comparison is a representative straighter-grain option with less visible fleck, finished in the intended pale tone if the supplier can provide it. The homeowner may prefer that option, or may accept the larger flecked sample after seeing it in the room. The decision concerns a documented appearance range, not a claim that one oak cut is always better or more luxurious.
Write what can actually be supplied
Ask the seller to translate your preference into its available specification. That might identify a veneer cut, a stated material selection or a specific door family. Do not write a demand such as absolutely identical grain if no supplier has accepted it. Where the product permits a range, retain samples that honestly show that range instead of keeping only the calmest piece.
The approval should connect the door name, material description, cut where documented, finish and relevant exposed panels. Add a plain-language note about fleck and arches. Keep any supplier response that limits the request. If the proposed option cannot meet your visual priority, change the selection before ordering rather than relying on an optimistic interpretation of a photograph.
Keep the appearance decision separate from cabinet quality
A preference for rift-looking grain does not establish stronger hinges, a better drawer box or a more durable coating. Compare those assemblies through their own specifications. Likewise, a lively cathedral pattern is not evidence of a lower-quality cabinet. The useful question here is whether the visible wood belongs in the room you are planning.
At receipt, compare identified fronts and end panels as a group before modification. If a piece differs from the approved description, document the label, the whole surface and the specific concern. Ask for review against the actual agreement. This makes a disagreement about grain more precise without treating natural material as perfectly uniform or giving every unexpected appearance an automatic excuse.
Pure White
Cream White
Light Warm Gray
Gray
Navy
Black
Oak Tone
Dark Walnut Tone
Design study These finish studies are design references, not a list of currently orderable colors. Screens and lighting change the appearance; compare a physical sample before choosing.See all finish options →
A wood-looking front does not describe the cabinet behind it. Compare grain, joinery, drawer movement and shelf support without turning a single detail into a quality score.
The sample shows the door frame, a separate center panel, the face frame and the cabinet box. Each component has its own place in this Shaker construction.
Shaker construction: door frame, center panel, face frame and cabinet box. The cutaway helps locate these parts; confirm each material in the specifications for the selected cabinet.
01 / Door frame
The Shaker door has rails and stiles around a separate center panel. The frame and center panel are different components; confirm their materials in the specifications for the selected cabinet.
02 / Face frame
The face frame surrounds the opening at the front of the cabinet box and sits behind the doors. The face frame, door frame and cabinet box are separate parts.
03 / Cabinet box
The sample exposes the cabinet sides, interior surfaces and layered edges. The image does not establish the wood species or material specification of a selected cabinet.