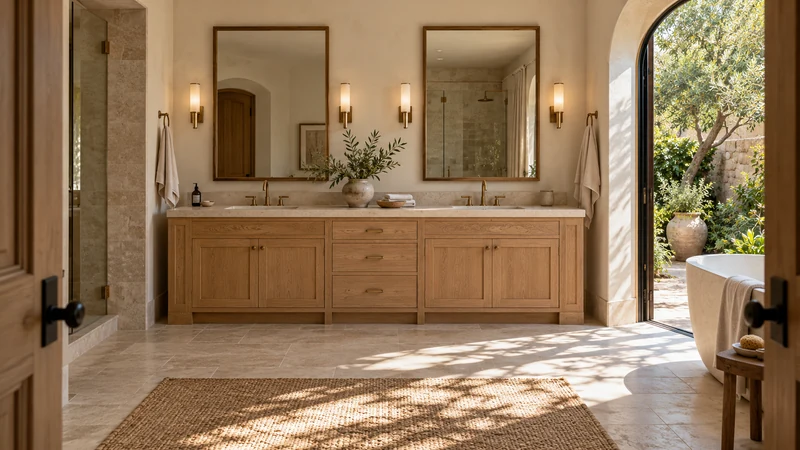
Wood-grain cabinets can work with an existing wood or wood-look floor without reproducing the floor exactly. Compare the relationship in color, pattern scale and direction, then decide which surface should attract more attention. The best test is an adequately sized cabinet sample held upright over the actual floor. Matching species names or small color chips cannot settle the composition.
Design study The illustration supports judging wood-tone fronts as a group at room scale. It does not prescribe a floor pairing or prove a wood species.
Read the existing floor as a whole
Look across a visible area of flooring rather than picking its prettiest plank as the reference. Note whether the overall appearance is light or dark, reddish or more muted, strongly varied or relatively quiet. Include the darker streaks, knots or repeated printed features that actually occupy the room. A cabinet choice should respond to the floor you live with, not an unusually calm fragment.
Take a room photograph to record the pattern distribution and plank direction, but judge color in person. If you have a spare flooring sample, verify that it resembles the installed floor before using it elsewhere. An unused piece kept in a box may be a useful identification reference without perfectly representing the current visible surface.
Treat grain as a separate design choice
KraftMaid’s oak guide illustrates that grain appearance can differ within oak options, including sweeping patterns and a straighter quartersawn appearance. The useful point is that a wood name does not fully describe the pattern you will see. The actual finished cabinet sample still controls the choice.
Describe the candidate’s grain in ordinary visual terms: narrow lines, broad arches, strong dark streaks or subdued texture. Then compare its scale with the floor. Similar color can still produce a busy combination if both surfaces carry forceful patterns. Conversely, noticeable color contrast can feel orderly when the patterns are quiet. These are relationships to examine, not rules that prescribe one successful combination.
Compare vertical and horizontal surfaces in place
Hold the cabinet sample upright in its intended grain direction while the floor remains horizontal. Look from the doorway and from the usual standing position. Rotating a loose sample until it looks attractive is not helpful if the ordered door will run in the other direction. Confirm any requested direction separately for doors and exposed end panels.
View enough of the cabinet pattern to understand its repetition. A tiny chip may contain only a straight line while the full front includes large arches. Add the countertop or another major fixed surface to the comparison after the cabinet-floor relationship makes sense. Otherwise you may keep adjusting the cabinet to solve several unrelated contrasts without identifying the source of the visual conflict.
A worked choice above a strongly patterned floor
Imagine a medium-brown floor with broad grain shapes and conspicuous dark streaks. A cabinet sample in nearly the same brown also has wide, high-contrast grain. The colors are close, yet the combination feels more active than you want. A second candidate is lighter, with quieter linear grain, and lets the floor remain the stronger pattern.
You may prefer that separation, or you may deliberately enjoy the richer patterned combination. Compare both in the room rather than rejecting one because someone says all woods must match. Also check whether the calmer sample represents the normal product range; a selectively quiet piece is not enough to establish that the complete cabinet order will have the same restraint.
Approve a relationship, then specify the actual products
Keep the chosen wood or surface identity, finish code, grain direction and representative appearance range with the approved sample. If the surface is a printed wood look, preserve its pattern identification rather than assigning a real species from the image. Do not assume that specifying “oak with oak” defines matching color, grain or gloss across different suppliers.
Before installation, place representative delivered fronts near the actual floor and compare them with the accepted sample. Assess the group from the normal viewing distance as well as close up. If a substitution or changed finish alters the relationship, document it while the supplier can review the identified parts. The order should preserve the specific combination you chose, not a vague instruction to make all the wood look the same.
Pure White
Cream White
Light Warm Gray
Gray
Navy
Black
Oak Tone
Dark Walnut Tone
Design study These finish studies are design references, not a list of currently orderable colors. Screens and lighting change the appearance; compare a physical sample before choosing.See all finish options →
A color name does not identify a finish system. Compare the decorative surface, the core, the edge and the repair method before choosing a cabinet front.
The sample shows the door frame, a separate center panel, the face frame and the cabinet box. Each component has its own place in this Shaker construction.
Shaker construction: door frame, center panel, face frame and cabinet box. The cutaway helps locate these parts; confirm each material in the specifications for the selected cabinet.
01 / Door frame
The Shaker door has rails and stiles around a separate center panel. The frame and center panel are different components; confirm their materials in the specifications for the selected cabinet.
02 / Face frame
The face frame surrounds the opening at the front of the cabinet box and sits behind the doors. The face frame, door frame and cabinet box are separate parts.
03 / Cabinet box
The sample exposes the cabinet sides, interior surfaces and layered edges. The image does not establish the wood species or material specification of a selected cabinet.