Wood grain, joints, drawers and shelves: read the parts separately
A wood-looking front does not describe the cabinet behind it. Compare grain, joinery, drawer movement and shelf support without turning a single detail into a quality score.
KraftMaid describes natural differences in grain, mineral streaks and color within wood cabinetry. Its examples also show why a fine finish line at a frame joint can be different from a loose structural joint. The USDA wood handbook explains how wood responds to moisture. These principles help interpret a sample; they cannot identify an unknown wood species from a photograph or establish the construction of a cabinet sold elsewhere.
Start with the exact sample identification: door style, stated material, finish and supplier. View the whole front before studying a small patch. Decide whether you like variation across a group of doors, not just the most even board in the sample. A printed wood pattern, wood veneer and solid wood can look similar in a distant photograph. Record what the specification says, and leave an undocumented core unidentified.
Inspect joints without pulling the cabinet apart
Look at where rails meet stiles and where drawer sides meet the front and back. A dovetail is recognizable joinery, but its name does not establish the quality of the drawer bottom, its support or the slides. Check the assembled drawer for visible separation and for movement at a joint during normal use. Do not twist a display cabinet or stress a door to create a test it was not designed to take.
Separate a narrow line in a coating from a joint that opens, moves or prevents normal operation. Photograph the location with a wider view that identifies the component. A single close-up can exaggerate a harmless finish detail or hide a loose assembly. Compare it with the selected manufacturer's acceptance and care guidance before deciding that it needs repair.
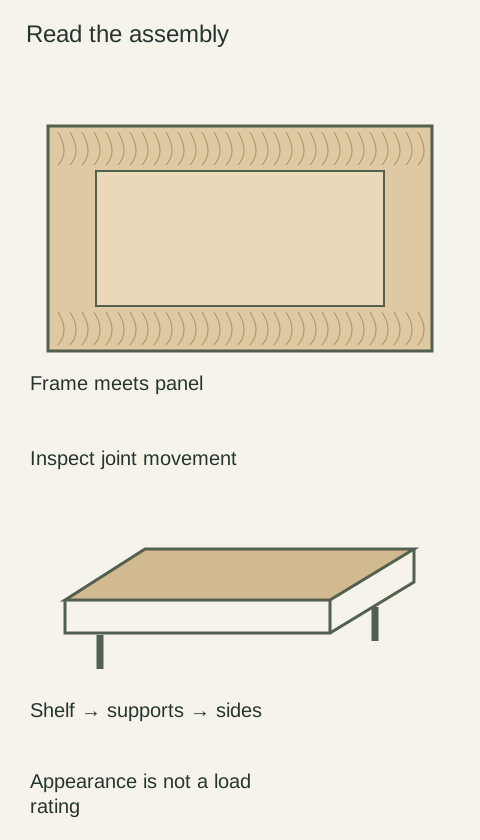
Diagram Illustrative diagram; not a product specification.
Treat the drawer as a working assembly
Open and close the drawer slowly, first empty and then with representative contents if the sample owner permits it. Watch the front, drawer box and runners separately. A smooth empty drawer says little about a heavily loaded cookware drawer. Ask for the actual runner model and its published loading conditions; do not apply another manufacturer's rating to an unmarked slide.
Measure usable interior space at the narrowest points. An organizer must clear screws, curved sides and any low obstruction above it when closed. Check whether the drawer reaches the items at the back and whether removal for cleaning follows an identified release method. A large outside front can conceal a smaller box.
Check shelf support and the intended load
Follow the load path: contents rest on the shelf, the shelf rests on its supports, and those supports transfer the load into the cabinet sides. Look for damaged holes, missing clips, unsupported edges and a shelf that rocks. Identify fixed and adjustable shelves separately. A loose shelf pin is a different problem from an inadequately supported cabinet.
Use your actual dishes or their measured footprint to plan storage. For an illustrative household example, a collection of heavy platters may fit visually on a long shelf but still need to move to a lower compartment with a suitable published load allowance. Replacing the shelf with a thicker panel by eye does not verify the supports or the cabinet attachment.
Use a comparison sheet that can survive the purchase
For each candidate, record door construction, exposed-end treatment, drawer-side and bottom materials, runner model, shelf material and support method. Write “not documented” beside missing fields. Compare a practical difference such as access to the back of a drawer before comparing decorative labels. If products have different configurations, show those differences instead of presenting their prices as directly equivalent.
Photograph the sample label together with the detail being discussed. Keep an approved finish sample and the written construction schedule with the order. This makes it possible to check a delivered drawer against the chosen configuration rather than against a different cabinet from a showroom photograph.
Choose what changes your daily use
A cook storing sheet pans may care most about clear opening and dividers; a household with heavy dinnerware may prioritize shelf support and lower storage. Neither need is resolved by the phrase “all wood.” Select a cabinet whose documented assembly and usable space suit the contents, then make sure the order names those parts. A grain preference remains a visual choice, while a loose joint or damaged support needs a separate corrective action.
Make a useful sample-visit record
Bring a list of the awkward objects you actually store, not a generic quality checklist. Record the biggest tray, a nested pan set and the drawer organizer that you intend to keep.
Ask permission to try them, then note where the failure occurs: entry, interior footprint, closing height or retrieval. This separates a size problem from a support question.
For heavy contents, attach the relevant load documentation instead of testing an unknown shelf to failure. When comparing quotes later, put the same contents against each candidate so the more attractive sample does not receive an easier test.
Finish references
Pure White
Cream White
Light Warm Gray
Gray
Navy
Black
Oak Tone
Dark Walnut Tone
Design study Design references only. The finish studies do not establish actual material, color matching or availability. Compare the selected physical sample.See all finish options →
Compare the actual countertop products, heat-source routine and fabrication proposal. A fired porcelain slab and resin-bound quartz are different materials, but neither label replaces a complete kitchen specification.
Compare a complete tile-and-grout installation with a specified slab surface. The choice changes the wall’s repeated joints, material transitions, care and finished edges.
Granite is a broad commercial name; quartz surfacing is a manufactured product. Choose with the selected slabs, care requirements and complete fabrication in view.
The sample shows the door frame, a separate center panel, the face frame and the cabinet box. Each component has its own place in this Shaker construction.
Shaker construction: door frame, center panel, face frame and cabinet box. The cutaway helps locate these parts; confirm each material in the specifications for the selected cabinet.
01 / Door frame
The Shaker door has rails and stiles around a separate center panel. The frame and center panel are different components; confirm their materials in the specifications for the selected cabinet.
02 / Face frame
The face frame surrounds the opening at the front of the cabinet box and sits behind the doors. The face frame, door frame and cabinet box are separate parts.
03 / Cabinet box
The sample exposes the cabinet sides, interior surfaces and layered edges. The image does not establish the wood species or material specification of a selected cabinet.