Start with the sink task and the exact basin, then coordinate cabinet fit, plumbing and remaining storage. A deeper bowl changes more than the appearance.
A laundry sink cabinet must fit the chosen sink assembly while leaving room for its plumbing and the way you intend to use it. Do not choose a cabinet solely from the bowl’s advertised width. The basin, mounting arrangement, counter and cabinet structure must be checked together, and a deep bowl can consume storage that a front-view drawing appears to promise.
Choose the basin by the work it needs to do
List the tasks that justify the sink: handling a particular wash item, filling a container or performing an occasional cleaning job compatible with the sink’s instructions. Then test the relevant object. A wide rim does not tell you whether a bucket fits the inner bottom or clears the faucet while being removed.
Use an empty container for the layout trial and account separately for how a filled one would be handled. Include its handle in the removal path. A basin that accepts the object when lowered at an angle may not allow it to be lifted out conveniently in normal use. Avoid selecting the deepest available bowl without checking the user’s reach to its bottom.
Keep sink dimensions and cabinet requirements separate
Manufacturer specifications may list bowl dimensions and minimum cabinet size as separate fields; Elkay’s laundry-sink listing does so. Read both, then have the selected installation checked against the actual cabinet and counter arrangement. The relationship is not established merely because a bowl width is smaller than a cabinet’s outside width.
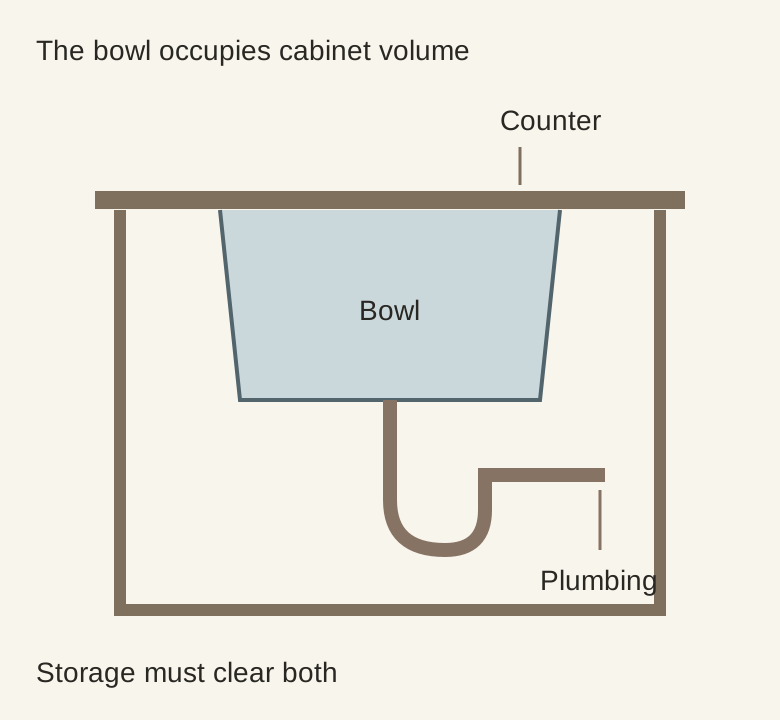
Diagram The bowl and schematic pipe route show why storage must be coordinated. This is not a plumbing installation drawing or a measured cabinet specification.
Ask for the sink model, mounting type and required support to be identified in the cabinet proposal. Include faucet mounting and access to the connections. If an accessory or drawer is also proposed, its full travel needs checking against the bowl, drain and service space rather than only against the door opening.
Treat what remains below the sink as irregular space
The lowest part of the bowl and the plumbing divide the interior into different usable areas. A tall bottle might fit beside the bowl yet fail to pass through the available opening. A removable container may clear the pipes while sitting on the floor but strike them when lifted. Plan each retained item by both its resting position and the way it leaves.
Keep access for inspection and service visible in the arrangement. Do not fill every gap with a fixed organizer that must be dismantled to reach a connection. Follow product storage instructions for household supplies and use appropriate restricted storage where needed; a door beneath a sink is not automatically a suitable place for every cleaning product.
Preserve a separate surface for clean laundry
A sink can take away part of the counter used for folding. Draw the wet task and the clean folding task at the same time. If the only remaining strip is occupied by the faucet or supplies, the design may require a different sink size, another work surface or a change in the proposed cabinet arrangement.
Bring the actual basin specification, task objects and a sketch of the plumbing and storage intentions to the cabinet discussion. Finish the decision with a clear answer about what can be used at the sink, what can be stored below and where clean laundry goes. Matching the laundry room’s door style is only one part of that selection.
Pure White
Cream White
Light Warm Gray
Gray
Navy
Black
Oak Tone
Dark Walnut Tone
Design study These finish studies are design references, not a list of currently orderable colors. Screens and lighting change the appearance; compare a physical sample before choosing.See all finish options →
Check the stored shape, the deployment path and the position used for ironing. A board hidden neatly in a cabinet can still block the room when opened.
A rod may fit between cabinets while sleeves, hangers and long hems do not. Plan the occupied space and the movement needed to hang and remove garments.
The sample shows the door frame, a separate center panel, the face frame and the cabinet box. Each component has its own place in this Shaker construction.
Shaker construction: door frame, center panel, face frame and cabinet box. The cutaway helps locate these parts; confirm each material in the specifications for the selected cabinet.
01 / Door frame
The Shaker door has rails and stiles around a separate center panel. The frame and center panel are different components; confirm their materials in the specifications for the selected cabinet.
02 / Face frame
The face frame surrounds the opening at the front of the cabinet box and sits behind the doors. The face frame, door frame and cabinet box are separate parts.
03 / Cabinet box
The sample exposes the cabinet sides, interior surfaces and layered edges. The image does not establish the wood species or material specification of a selected cabinet.