Missing cabinet parts and the installer job handoff
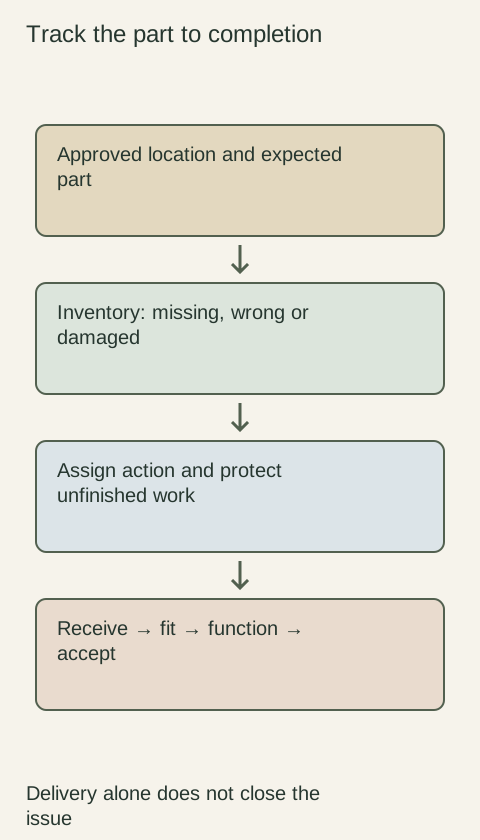
A useful punch list identifies the exact location, missing or incorrect part and the evidence needed to finish. Keep unresolved work visible instead of treating delivery or a closed door as completion.
Dura Supreme's installer resources show why installation and adjustment instructions belong to the selected cabinet and hardware. NKBA's detailed-drawing material explains the role of assembly details. Give the installer the actual approved drawings and instructions, not a similar product's guide or a rendering that omits mounting and interface information.
Identify project, room, document revision and the person authorized to answer changes. Include cabinet-location labels, bill of materials, finish and hardware schedule, appliance references and site-condition notes. State the work included in the installer agreement and the work owned by other trades. A handoff article does not establish that any particular cabinet seller provides installation or replacement labor.
Inventory against location, not just carton count
Record each received cabinet and loose component against its order line and intended location. Keep readable carton labels and package condition photographs. A complete carton count does not prove that the correct panel, hinge plate or accessory is inside. Check what can reasonably be inspected without damaging or losing protective packaging, following the seller's receiving procedure.
Separate missing, wrong, damaged, unverified and not-yet-opened items. Those states require different actions. Search the labeled loose-parts packages and approved inclusion notes before declaring a component missing, but do not let a prolonged search erase a required reporting deadline. Follow the applicable written reporting process and keep its submission evidence.
Diagram Illustrative diagram; not a product specification.
Write an issue that another person can resolve
Use a stable issue label and cabinet location. Record expected item, observed condition, correct order code if known, finish and handedness, photographs and the effect on installation. Name a responsible party and requested next action. “Door problem” forces everyone to restart diagnosis; “specified right-hand front not received at the sink-right location” narrows the task.
For an illustrative example, a finishing panel expected at “island-room-side” is absent from the verified packages. Attach the approved elevation showing that face, the order line and the carton inventory. Request confirmation of the correct panel code and replacement scope. If the code was never ordered, identify an order omission rather than presenting it as a transit loss.
Protect the unfinished condition and decide what can proceed
Do not improvise a mounting part or drill a substitute front to keep the day moving. Use the selected installation instructions and resolve unsupported attachments before loading the cabinet. Protect exposed edges, stored fronts and unfinished work from site damage according to the product guidance.
Identify the dependency: does the missing panel block only a decorative finish, or does the missing component prevent safe attachment or appliance coordination? The responsible installer should define what can continue without concealing the issue or requiring destructive rework. Record any temporary condition and who must return to finish it. “Installed except for” is a useful state only when the exceptions are explicit.
Track the replacement through installation
A reorder needs the approved part identity, dimensions where required, finish, drilling and destination. Confirm the seller's response, cost responsibility and any return instruction in writing. Do not invent a delivery date or assume product coverage includes removal, travel or reinstall labor. Track those scopes separately.
On arrival, compare the replacement with the unresolved issue before discarding labels or removing the old part. Record any color or configuration difference and obtain a decision before installation when it changes the approved selection. Fit and adjust using the exact product guide, then check the relevant operation and neighboring clearances.
Close each item with evidence of the actual result
Keep before-and-after photographs, installed part identification, functional check and the responsible person's acceptance. Receipt of a replacement is different from installation; installation is different from acceptance. Update the punch list without deleting the history, and carry any unresolved trade dependency into the final handoff.
Give the owner the approved final drawings, finish and hardware information, care instructions and a concise list of remaining work with its owner. The completion record should show which cabinet locations are finished and which still need action. That makes the return visit and future maintenance easier than an email saying everything is mostly done.
Use the punch list to plan the return visit
Before a return visit, match each open issue with the replacement part, required tool or trade input and the work that must already be finished on site. Confirm that the correct part is physically available rather than treating an order acknowledgment as arrival.
Keep access arrangements and responsible contacts with the job packet.
After the visit, close only the work actually checked and carry the rest forward with a specific next action. This avoids repeated trips caused by a vague “parts are in” message that refers to only part of the outstanding work.
Finish references
Pure White
Cream White
Light Warm Gray
Gray
Navy
Black
Oak Tone
Dark Walnut Tone
Design study Design references only. The finish studies do not establish actual material, color matching or availability. Compare the selected physical sample.See all finish options →
Compare appearance requirements and structural performance separately. A Premium aesthetic specification does not, by itself, purchase a higher structural duty level.
An unfinished cabinet purchase includes a separate finishing project. Compare the completed result, handling route and usable date before treating a lower cabinet invoice as savings.
An inspection report should state which pieces and which characteristics were examined. A passed sample does not certify every cabinet, and a full count is not a full performance test.
The sample shows the door frame, a separate center panel, the face frame and the cabinet box. Each component has its own place in this Shaker construction.
Shaker construction: door frame, center panel, face frame and cabinet box. The cutaway helps locate these parts; confirm each material in the specifications for the selected cabinet.
01 / Door frame
The Shaker door has rails and stiles around a separate center panel. The frame and center panel are different components; confirm their materials in the specifications for the selected cabinet.
02 / Face frame
The face frame surrounds the opening at the front of the cabinet box and sits behind the doors. The face frame, door frame and cabinet box are separate parts.
03 / Cabinet box
The sample exposes the cabinet sides, interior surfaces and layered edges. The image does not establish the wood species or material specification of a selected cabinet.