Cabinet hinges, slides, pulls and handleless fronts
Hardware controls how a cabinet opens, what you can reach and where your hand goes. Compare the complete operating arrangement, then record the actual parts.
Blum publishes distinct hinge, drawer and motion systems, including technologies for closing and opening assistance. Its planning services provide product-specific information. A brand name alone cannot establish a hinge's fit, a drawer's capacity or whether a touch-open function is included. Identify the selected system and its purpose before comparing a long list of features.
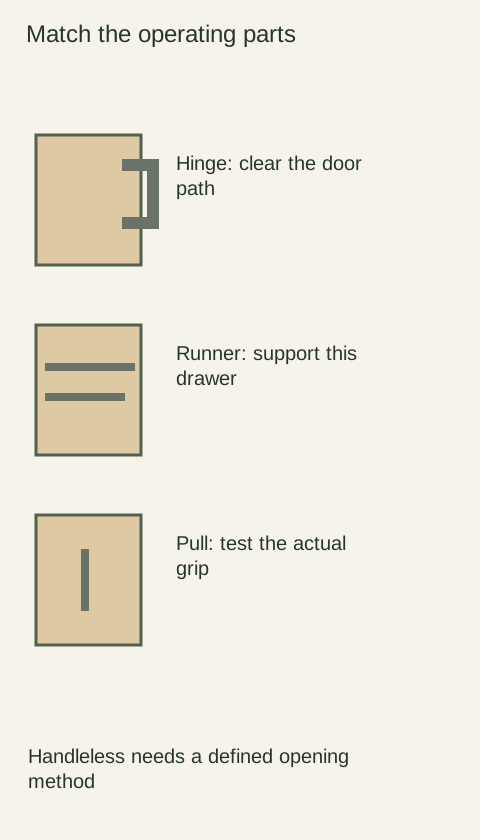
For a door, record whether it is inset or overlay, where it attaches and what it must clear when open. For a drawer, record the runner model, usable travel and the drawer construction it supports. For pulls, record mounting centers, projection and finish. Missing specifications should remain open fields, not assumptions based on a photograph.
Watch the door through its whole swing
Open the door slowly and observe the pull, wall, adjacent front and any interior pull-out. The door needs to clear the things you use, not merely open far enough to look inside. An interior drawer may require a particular hinge arrangement or additional clearance. Use the selected hinge and accessory planning information to resolve it.
At a wall return, mark the obstruction on the plan. A decorative pull can hit that wall before an internal tray clears the door. Choosing a different hinge by name does not prove the collision is solved. Check the actual moving envelope with the panel thickness and handle projection included.
Diagram Illustrative diagram; not a product specification.
Judge a slide with the drawer it carries
Try the sample drawer with representative contents when permitted. Look for access to the rear, stable travel and comfortable closing. Read the load specification with its installation conditions, including whether it applies to a pair of runners or the complete assembly. Do not turn a hardware rating into permission to load a shelf or cabinet box to the same weight.
Check the release method and whether the drawer can be removed for cleaning without disturbing alignment. If a seller offers a runner upgrade, compare the new drawer's interior dimensions and construction as well as its closing feel. Different hardware can change the usable space.
Fit the handle to the hand and door
Hold the proposed pull against a paper template in the intended location. Check finger clearance, grip and contact with neighboring fronts. A long bar can catch clothing along a narrow walking route; a small knob may be awkward for a user who finds pinching uncomfortable. Test with the people who will use the cabinet rather than selecting purely from an elevation.
Replacement pulls need a measured hole pattern and a suitable base that covers any old marks. An online overall length is not the spacing between mounting holes. Record both where necessary. Do not drill until the door layout, handedness and hardware location have been approved.
Understand what handleless actually means
A handleless appearance can come from a recessed grip, a channel, a shaped door edge or touch-to-open hardware. Those arrangements need different hand movements and cabinet details. Soft closing by itself does not open a door. Mechanical push opening and electrical assistance also have different compatibility and service requirements.
In an illustrative sink-zone test, try opening the proposed front with damp hands while standing where you will actually work. Keep the floor dry and the sample owner informed. Check whether an accidental lean triggers the front, whether another door blocks the grip and how the arrangement will be cleaned. A clean photograph cannot answer those use questions.
Record a working hardware schedule
List cabinet location, hinge or runner model, motion function, pull reference, mounting location and any needed clearance detail. Attach the relevant manufacturer drawing rather than a similar-looking product page. Include replacements or permitted equivalents only when the responsible party approves them. The result should describe how each opening works and which parts belong there, so purchasing and installation can follow the same decision.
Review an opening map with the people who use it
Mark each cabinet's opening method on the plan and walk through a normal task: take out a pan, reach a spice container, empty a bin and put dishes away. Check where hands and neighboring fronts meet.
An awkward opening may need a different pull position or accessory arrangement rather than more expensive hardware.
Record the actual model and any sample-test result at that location. When a proposed substitution arrives, repeat the affected task instead of accepting a brand label as proof that the original function has been preserved.
Finish references
Pure White
Cream White
Light Warm Gray
Gray
Navy
Black
Oak Tone
Dark Walnut Tone
Design study Design references only. The finish studies do not establish actual material, color matching or availability. Compare the selected physical sample.See all finish options →
Compare the actual countertop products, heat-source routine and fabrication proposal. A fired porcelain slab and resin-bound quartz are different materials, but neither label replaces a complete kitchen specification.
Compare a complete tile-and-grout installation with a specified slab surface. The choice changes the wall’s repeated joints, material transitions, care and finished edges.
Granite is a broad commercial name; quartz surfacing is a manufactured product. Choose with the selected slabs, care requirements and complete fabrication in view.
The sample shows the door frame, a separate center panel, the face frame and the cabinet box. Each component has its own place in this Shaker construction.
Shaker construction: door frame, center panel, face frame and cabinet box. The cutaway helps locate these parts; confirm each material in the specifications for the selected cabinet.
01 / Door frame
The Shaker door has rails and stiles around a separate center panel. The frame and center panel are different components; confirm their materials in the specifications for the selected cabinet.
02 / Face frame
The face frame surrounds the opening at the front of the cabinet box and sits behind the doors. The face frame, door frame and cabinet box are separate parts.
03 / Cabinet box
The sample exposes the cabinet sides, interior surfaces and layered edges. The image does not establish the wood species or material specification of a selected cabinet.