A useful food-container drawer starts with matched sets, not an organizer purchase. Pair every container with a lid that closes properly, group compatible shapes and decide which sets are used often enough to deserve easy access. Then measure those groups. A wider drawer cannot fix a collection of unidentified lids, and a neat empty organizer may have less room than the collection needs.
Match the collection before sizing the storage
Lay out clean, dry containers and check their actual lids. Similar-looking rectangles may have different rims, and a lid that rests on top is not necessarily a compatible closure. Keep uncertain pieces apart while you identify them. Decide which unmatched items you intend to replace or retain for another use; do not design the main storage around an unresolved pile.
Separate the frequently used collection from occasional large containers. Keep the collection you expect after the kitchen work, rather than automatically allocating room for every piece accumulated over time. This is also the point to notice whether replacement lids are available for an existing line. Compatibility matters more here than making every container the same color.
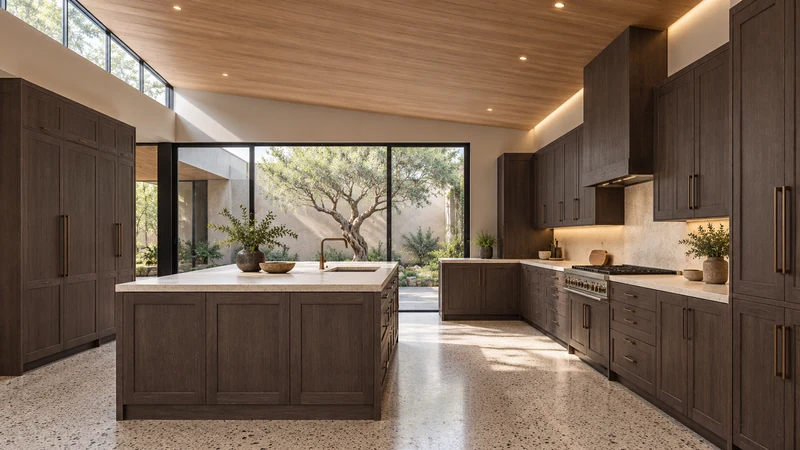
Design study The visible side drawers suggest a storage location near food preparation. Their clear interiors and divider options are not established by this design image.
Choose between nesting and complete sets
Nesting similar containers saves footprint but requires separating the stack when you need one from the bottom. Storing lids upright beside the matching group makes them easier to scan. Keeping a frequently used container together with its lid takes more space but can shorten packing time. These methods can coexist: a small daily group can stay ready while occasional pieces nest elsewhere.
Test the movement, not just the arrangement. Lift out a container, retrieve its lid and return both with the drawer open only as far as its hardware allows. A narrow upright lid slot can become frustrating if it grips the larger lids or lets small ones disappear. Removable dividers should make the collection easier to handle and clean, not merely divide it into equal rectangles.
Measure the grouped objects inside the usable drawer
For a hypothetical drawer with an 18-inch clear interior width, a 7-inch container group, an 8-inch lid group and a 1-inch divider occupy 16 inches, leaving 2 inches. That arithmetic checks only width. The assumed groups still need enough depth, height and hand access, and the divider must remain in place during use. These are teaching dimensions, not specifications for the pictured cabinetry.
Measure the widest rim and any projecting tabs, not only the container base. Check the height of the nested stack and of the tallest lid when stored upright. A drawer front that looks tall does not reveal the available height beneath the cabinet framing above it. Compare the actual interior drawing or a measured sample drawer before selecting an organizer.
Test how the collection returns from washing
Emptying the dishwasher is where a beautiful arrangement often becomes a loose pile. Try putting away a mixed batch without rearranging every divider. Give each lid family an obvious location next to its containers. If the system requires examining tiny labels or dismantling a stack whenever someone cleans up, simplify the grouping before adding more hardware.
Allow pieces to be clean and dry before nesting them for storage. The drawer is not a drying rack. Keep the location convenient to packing leftovers without letting an open drawer block the route between sink, dishwasher and work area. A short reach on the plan is not helpful if another person must step around it repeatedly.
Use the collection to choose the drawer
Take the grouped footprint, stack height and preferred lid arrangement to the cabinet comparison. Confirm clear width, usable depth, overhead clearance and divider compatibility for the selected drawer. Keep a little flexibility for replacements, but do not enlarge the cabinet just to preserve unused pieces. The aim is to retrieve a matching set and put it back without a search.
Pure White
Cream White
Light Warm Gray
Gray
Navy
Black
Oak Tone
Dark Walnut Tone
Design study These finish studies are design references, not a list of currently orderable colors. Screens and lighting change the appearance; compare a physical sample before choosing.See all finish options →
Plan the trip from unloading groceries to the next shopping run. Separate bags ready to leave from bags waiting for care and the reserve you actually use.
A compact nested stack can still be heavy and awkward to separate. Check lifting, usable height and the complete drawer assembly before assigning the storage.
The sample shows the door frame, a separate center panel, the face frame and the cabinet box. Each component has its own place in this Shaker construction.
Shaker construction: door frame, center panel, face frame and cabinet box. The cutaway helps locate these parts; confirm each material in the specifications for the selected cabinet.
01 / Door frame
The Shaker door has rails and stiles around a separate center panel. The frame and center panel are different components; confirm their materials in the specifications for the selected cabinet.
02 / Face frame
The face frame surrounds the opening at the front of the cabinet box and sits behind the doors. The face frame, door frame and cabinet box are separate parts.
03 / Cabinet box
The sample exposes the cabinet sides, interior surfaces and layered edges. The image does not establish the wood species or material specification of a selected cabinet.