Dye or pigment stain for cabinets with visible wood figure?
Matching the color is only part of a stained cabinet finish. Dye, pigment and layered systems can reveal or soften the wood figure differently even when the overall brown looks similar.
For cabinets chosen specifically for their figured wood, compare how the completed finish shows that figure as well as whether it reaches the requested color. A dye-based process can be useful when transparency is the priority. A pigmented or blended process can be useful when the design wants more visual blending. Neither label establishes the quality of the finished cabinet. The important choice is whether the color process supports the reason you selected that wood, rather than hiding it while satisfying a color chip.
Colorant and carrier are different descriptions
Target Coatings distinguishes the very small colorants in dye stains, which penetrate the wood structure and remain transparent, from larger pigment particles, which increasingly obscure the underlying surface as concentration rises. It also explains that wood stains can contain either type or a blend, in water-based or oil-based formats. Therefore water-based versus oil-based is not the same comparison as dye versus pigment. A quote that names only the carrier leaves the color mechanism unresolved.
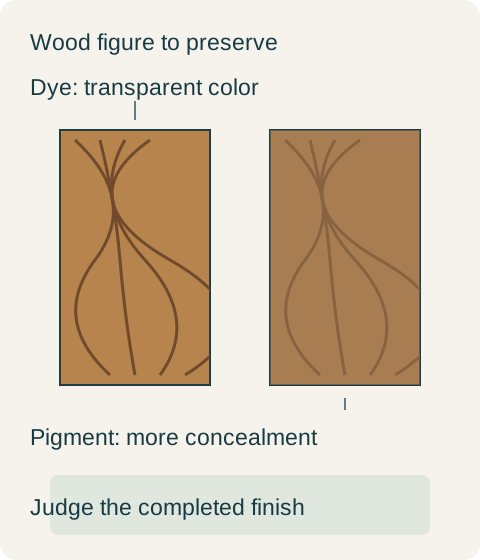
Imagine that the wood is the image and the finish must change its overall color without losing important detail. A transparent color treatment and a treatment that partly covers the image can reach a similar average brown while leaving different information visible. This analogy is useful when reading samples: judge the figure at normal viewing distance and again close enough to see whether subtle features remain. Do not use a dark stain name as evidence that the grain must be hidden, or a light stain name as proof that the result is transparent. The completed surface supplies that answer.
Dye and pigment can also work in sequence
General Finishes recommends its Dye Stain for showing figured wood and describes using dye beneath a darker stain to build color depth. It also allows specified dye uses in a clear coating as a toner. These are different locations for color: in a preliminary wood-coloring step, beneath another stain, or within a film layer. A finish described only as stained may therefore contain several deliberate operations. The buyer does not need a shop recipe, but the accepted process should not be casually reduced to a single substitute stain.
Diagram Conceptual comparison of transparency and concealment, not microscopic particle scale or a universal ranking. Actual dye, pigment and blended systems must be judged as completed finishes.
Keep the figure that made the wood worth choosing
In a hypothetical cabinet project, the selected figured veneer has visible movement that the owner wants to preserve in a warm brown finish. Completed trials use representative veneer and the same proposed final sheen. The more heavily pigmented trial reaches the desired overall brown but masks subtle figure. A dye-led trial reaches an acceptable brown while retaining the detail the owner values. The owner chooses the dye-led finish for the figured fronts and rejects a later simplification to the pigmented trial, even though the two read as similar colors from across the room. The retained figure, rather than the stain’s category or prestige, decides the result.
This decision also establishes a limit: the owner has not approved maximum transparency and maximum concealment of wood differences at the same time. If the project instead calls for a quieter, more blended surface, retaining less visual detail can be intentional. A pigment-containing process is not defective merely because it softens figure. Conversely, choosing costly figured material and then accepting a finish that hides the wanted detail can spend money without preserving the intended benefit. Write the visual priority in plain language before reviewing the trial, so darker, richer and more even do not become interchangeable requests.
The topcoat belongs in the appearance decision
General Finishes instructs users to test the complete finishing schedule and notes that wood species, lighting and topcoat can affect color. Its dye guidance also describes some color pickup during the first topcoat application. These details explain why an intermediate dyed board is not a finished approval sample. The process has not yet shown the color after subsequent layers, nor how that specific application preserves it. An attractive unfinished stain sample cannot stand in for the cabinet surface the buyer will receive.
A useful comparison can include a sample showing successive finish stages, but the acceptance target remains the completed end of that sequence. The earlier stages explain what a proposed change would remove. If a shop suggests dropping the preliminary dye and adding more pigment later, that is a process alternative with a possible visual consequence; it is not automatically equivalent because the final color name stays unchanged. In the hypothetical figured-front project, the owner keeps the demonstrated sequence. A production simplification is accepted only if its completed trial preserves the already chosen appearance.
Transparency does not promise unchanged color in sunlight
Target Coatings describes dyes as generally less resistant to long light exposure than pigments. That is a formulation-level consideration, not a prediction of a particular cabinet’s fading time. Do not turn the preference for visible figure into a promise of permanent color, or assume a clear topcoat makes every underlying colorant equally stable. Where strong daylight is central to the project, the specific finishing system’s exposure evidence matters alongside its initial appearance.
Retain a finished sample that contains representative figure, along with the material and process identity used to produce it. For a later extension or replacement, compare the new finished work with the installed cabinet group; naming the original dye alone does not recreate the wood selection or the appearance of an aged surface. The purchase succeeds when the color, figure and accepted variation belong to the same demonstrated finish. Choosing the prettiest color from one trial and the clearest figure from another still leaves an unmade surface to be invented.
Pure White
Cream White
Light Warm Gray
Gray
Navy
Black
Oak Tone
Dark Walnut Tone
Design study These finish studies are design references, not a list of currently orderable colors. Screens and lighting change the appearance; compare a physical sample before choosing.See all finish options →
A stain name does not guarantee an even cabinet finish. Evaluate the complete preparation and coloring process, including the tradeoff between depth and uniformity.
Compare the actual countertop products, heat-source routine and fabrication proposal. A fired porcelain slab and resin-bound quartz are different materials, but neither label replaces a complete kitchen specification.
The sample shows the door frame, a separate center panel, the face frame and the cabinet box. Each component has its own place in this Shaker construction.
Shaker construction: door frame, center panel, face frame and cabinet box. The cutaway helps locate these parts; confirm each material in the specifications for the selected cabinet.
01 / Door frame
The Shaker door has rails and stiles around a separate center panel. The frame and center panel are different components; confirm their materials in the specifications for the selected cabinet.
02 / Face frame
The face frame surrounds the opening at the front of the cabinet box and sits behind the doors. The face frame, door frame and cabinet box are separate parts.
03 / Cabinet box
The sample exposes the cabinet sides, interior surfaces and layered edges. The image does not establish the wood species or material specification of a selected cabinet.