Custom cabinets with specialist-made doors: judge the assembled result
A cabinetmaker can build the boxes and buy custom doors from a specialist. Follow the dimensions, profiles and finish across that manufacturing split before choosing the package.
A custom cabinet does not have to come entirely from one workshop. A local cabinetmaker may build the boxes while a specialist makes the doors and drawer fronts. That arrangement can still deliver a project-specific result. The useful question is whether the finished cabinet has been designed and priced as a coordinated assembly. A door from another factory is neither evidence of poor craftsmanship nor proof of a superior cabinet; it is a component whose fit, appearance and preparation have to agree with the rest.
Start where the closed door meets the cabinet
Stand in front of the proposed cabinet and follow the visible surfaces. The door meets a face frame or box edge, the drawer front sits beside another front, and the finished end returns around the side. These parts can come from different production routes. A matching color name does not explain whether their profiles, sheen and edge treatment look related. Examine the transitions as a whole. This is where a component-sourcing choice becomes visible to the person who lives with the cabinets.
Conestoga says it sells directly to cabinet manufacturers and industry professionals, while homeowners can work through a local cabinetmaker. Its model illustrates specialist components supplied within a custom-cabinet project; it does not describe every cabinetmaker’s purchasing arrangement.
The cabinetmaker needs a coherent schedule that connects each finished front to the cabinet receiving it. Do not treat a rough room drawing, a box opening and an ordered door size as interchangeable information. The front must suit the selected construction and its intended position. A pair of doors also needs to be considered together, not as unrelated rectangles. Whoever coordinates the cabinet should derive the component order from the approved assembly rather than asking the homeowner to guess a door dimension from a photograph.
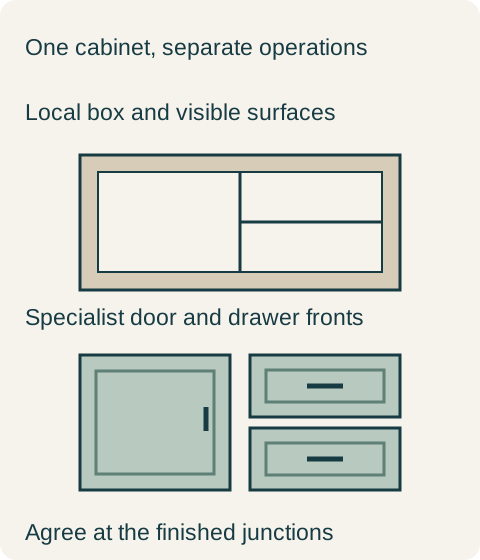
Teaching example Hypothetical production arrangement. The cabinet box and specialist-made fronts meet in one finished assembly; the diagram does not identify a usaKT supplier or product.
Front preparation belongs in that same decision. Determine whether doors arrive prepared for the selected hinges and whether drawer fronts include any specified machining. The drilling pattern and its position must correspond to the actual hardware and cabinet. Avoid paying for a prepared front before that compatibility is settled. This is not an argument for factory drilling in every project: a cabinetmaker may intentionally prepare the fronts in the shop. The important distinction is between a planned operation and an omitted one.
Finish the visible box and the door as one composition
A Sherwin-Williams case study describes Conestoga’s Prism program coordinating specialist-finished components with cabinet boxes finished by cabinetmakers. It is a named example of split production addressing finish coordination, not a guarantee that unrelated paint batches or materials will match.
For your own project, put a finished front beside the actual face frame, exposed end and trim treatment. Look at flat areas and molded profiles, because a simple chip does not show how the complete shapes read together. If the cabinetmaker proposes to finish all components after receiving unfinished doors, the comparison is a different production route. It may simplify some appearance decisions while adding finishing work to the local scope. Neither arrangement automatically costs less; compare the finished components and included operations.
The missing end panel changes the package
Consider a hypothetical project with locally built painted boxes and a selected specialist door profile. The first presentation includes a factory-finished door, but the exposed end is described only as paint to match. On review, the owner sees that the proposed plain end would not repeat the framed detail wanted on the island. The cabinetmaker revises the package to include a coordinated decorative end and confirms how the adjacent visible box surfaces will be finished. The owner accepts the specialist-door route with that completed end treatment; having the local shop manufacture every door is not a project requirement.
The decision keeps the reason for outsourcing clear: the selected profile and finished appearance suit this project. It does not rely on an assumed factory discount. A competing in-house proposal can be compared using the same front design, exposed-end detail and hardware preparation. If it changes the design to something easier for that shop to produce, recognize it as a design alternative rather than a like-for-like saving. A fair comparison allows real differences instead of hiding them under the word custom.
Check the fronts in their intended positions
Before installation depends on a pile of unmarked fronts, the fabricator should be able to connect each item with its location. Adjacent fronts need the intended orientation; a replacement needs the original profile and finish identification. Review visible seams and returns on the completed cabinet, not only the loose door. The component manufacturer may have made exactly what was ordered while a project-level mismatch remains. Keeping assembly and component records together makes that mismatch easier to identify without guessing which workshop caused it.
For later additions, retain enough information to distinguish the specialist door from the cabinetmaker’s own box and finish work. That makes a new pantry front or replacement end a defined request, although it does not promise perpetual availability or a perfect match to aged surfaces. Choose the supplier arrangement that can deliver the specified assembled cabinet and explain these transitions. The origin of each part is useful information when it leads to that result, rather than a label used to praise or dismiss the entire kitchen.
Pure White
Cream White
Light Warm Gray
Gray
Navy
Black
Oak Tone
Dark Walnut Tone
Design study These finish studies are design references, not a list of currently orderable colors. Screens and lighting change the appearance; compare a physical sample before choosing.See all finish options →
Translate the design into identifiable products, details and responsibilities. A useful handoff lets another professional price and build the intended arrangement without reconstructing private conversations.
Compare appearance requirements and structural performance separately. A Premium aesthetic specification does not, by itself, purchase a higher structural duty level.
The sample shows the door frame, a separate center panel, the face frame and the cabinet box. Each component has its own place in this Shaker construction.
Shaker construction: door frame, center panel, face frame and cabinet box. The cutaway helps locate these parts; confirm each material in the specifications for the selected cabinet.
01 / Door frame
The Shaker door has rails and stiles around a separate center panel. The frame and center panel are different components; confirm their materials in the specifications for the selected cabinet.
02 / Face frame
The face frame surrounds the opening at the front of the cabinet box and sits behind the doors. The face frame, door frame and cabinet box are separate parts.
03 / Cabinet box
The sample exposes the cabinet sides, interior surfaces and layered edges. The image does not establish the wood species or material specification of a selected cabinet.