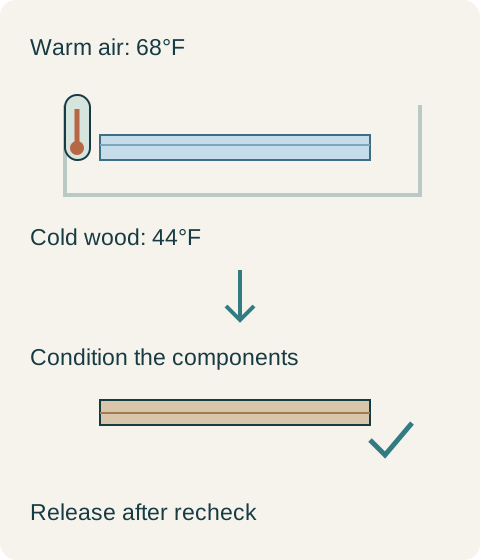
A cabinet component brought in from cold storage can remain unsuitable for gluing after the workshop feels comfortable. The room thermostat describes the air at its sensor, not the wood at the joint. A production quote that assumes immediate assembly after delivery should account for the actual condition of the incoming material.
Read the application limit for all the materials
Titebond II Premium provides a concrete example. Its application guideline says above 55°F. Its chalk-temperature explanation identifies the glue, air and materials, rather than the air alone. These are requirements for this named adhesive, not a universal temperature schedule for every cabinet glue.
The same product lists stable freeze/thaw behavior and explains that freezing can thicken it, with agitation potentially restoring its form. It also says to keep it from freezing. Survival of a storage incident therefore does not authorize application to cold wood, and a liquid-looking bottle is not proof that a planned joint meets the application conditions.
Separate the stock receiving record from the assembly release. Identify which parts arrived cold, where they were held and how their temperature was checked before bonding. A surface warmed briefly by a heater is a poor substitute for allowing the components to reach suitable working conditions. Do not invent a fixed acclimation time from the calendar; the part and storage conditions matter.
Teaching example Hypothetical production example: warm room air does not establish the temperature of incoming wood. The diagram is not a conditioning-time or bond-strength specification.
Move the assembly slot, not just the thermostat
In a hypothetical shop using Titebond II Premium for a non-load-bearing decorative wood assembly, the room reads 68°F, the glue 66°F and incoming parts 44°F. The order cannot go straight to glue-up. The shop moves it to a later assembly slot and conditions the stock. When subsequent checks show the parts and adhesive at 64°F with the room still at 68°F, the shop releases this temperature hold and follows the remaining approved assembly procedure. It does not add more glue or simply extend clamp time to compensate for the original cold parts.
This release resolves temperature only. Joint fit, moisture condition, adhesive suitability and the complete curing procedure remain separate production requirements. A successful temperature check should not be turned into a load rating for the assembled cabinet or a reason to substitute this product into a structural connection.
Put the delay in the production plan
For a buyer comparing shop proposals, the useful distinction is whether material conditioning is included before the promised assembly date. A proposal that reserves space and time for cold incoming stock may describe a more complete process than one that promises immediate bonding regardless of delivery conditions. That difference need not imply an invented price premium.
Keep the adhesive identity, batch record and actual release readings together. If assembly already occurred with materials outside the product conditions, warming the finished part later is not evidence that the original bond was acceptable. Have the producer assess that batch under its quality procedure before it becomes part of the delivered order.
Pure White
Cream White
Light Warm Gray
Gray
Navy
Black
Oak Tone
Dark Walnut Tone
Design study These finish studies are design references, not a list of currently orderable colors. Screens and lighting change the appearance; compare a physical sample before choosing.See all finish options →
A painted door, a wood-grain side and a plywood cabinet box can belong to the same cabinet. Here is how to read those parts, what the sample photos actually show, and which details to put on a quote.
Compare the actual countertop products, heat-source routine and fabrication proposal. A fired porcelain slab and resin-bound quartz are different materials, but neither label replaces a complete kitchen specification.
The sample shows the door frame, a separate center panel, the face frame and the cabinet box. Each component has its own place in this Shaker construction.
Shaker construction: door frame, center panel, face frame and cabinet box. The cutaway helps locate these parts; confirm each material in the specifications for the selected cabinet.
01 / Door frame
The Shaker door has rails and stiles around a separate center panel. The frame and center panel are different components; confirm their materials in the specifications for the selected cabinet.
02 / Face frame
The face frame surrounds the opening at the front of the cabinet box and sits behind the doors. The face frame, door frame and cabinet box are separate parts.
03 / Cabinet box
The sample exposes the cabinet sides, interior surfaces and layered edges. The image does not establish the wood species or material specification of a selected cabinet.