An old mark inside a sink cabinet and fresh water on its floor call for different questions. A photograph can show where a mark is, but it cannot date the leak or prove that the fitting above it is responsible. Record what is wet now, when it was noticed and what changed after ordinary use. Arrange attention to an active leak promptly; cabinet documentation should support that work rather than delay it.
Diagram Use the care diagram as context; photographs and timed observations do not identify a hidden plumbing fault.
Establish what is visible before cleaning
From a normally accessible position, look at the cabinet floor, nearby seams and visible pipe connections. EPA WaterSense recommends listening for drips and looking under sinks for leakage at connections, puddling and other water spots. These observations provide a starting point for an investigation, without requiring the cabinet owner to dismantle plumbing.
Take an overall photograph showing the affected area and a closer view of visible water or a mark. Note whether you saw a droplet forming, found a puddle or only noticed discoloration. Keep those descriptions separate. A dark ring might remain after water has gone; its color alone does not tell you whether the source is active or how long it has existed.
Put observations in time order
Record the date, approximate observation time and relevant normal activity before discovery. Useful descriptions include water appearing after normal sink use, a damp area noticed before anyone used the sink, or a mark that has looked unchanged during recent observations. Avoid turning an association into a diagnosis: water found after dishwashing does not by itself identify a particular connection.
Do not repeatedly operate an already leaking fixture to create a better demonstration. If the problem was noticed during ordinary use, retain that information and seek appropriate service. Where water is still arriving or access is unsafe, addressing the situation takes priority over photographing every surface. A short, accurate account is more useful than an elaborate test that adds exposure.
Separate drying from proving the leak has stopped
Once accessible water can be removed safely, follow the cabinet's care instructions and record what was cleaned or dried. Preserve the initial photographs so later changes can be compared with a known view. Do not cover the affected area with an opaque liner or paint merely to improve its appearance before the source is understood.
A dry cabinet during a later glance is an observation, not proof of a completed repair. Some conditions occur intermittently, and a repair may need confirmation by the person responsible for the plumbing. Keep the service finding and the cabinet condition as separate entries. This avoids reporting that everything is resolved when only the visible puddle has disappeared.
Use a concrete change to improve the service request
Imagine a brown ring is dry in the morning. Later, after normal sink use, fresh droplets are visible nearby. The useful report is that the ring was present earlier and new water was observed later, with photographs of both conditions. It is not that the ring proves the drain has been leaking for a particular period, or that the nearest fitting must be defective.
Send the location, visible observations and timing to the appropriate plumbing service contact. If cabinet material has also changed, send the cabinet supplier a separate description of raised edges, altered seams or other visible changes. This lets each person answer the part within their work instead of asking the cabinet supplier to diagnose a hidden plumbing connection from a stain.
Close the record with findings and remaining questions
Add the service date, what the service provider actually identified and any follow-up instructions. Distinguish a confirmed finding from an owner's suspicion. Keep photographs taken from a similar position afterward, where normal access permits, so a remaining mark is not automatically mistaken for fresh leakage when somebody else checks the cabinet.
If a panel remains distorted or an edge stays lifted after the source is addressed, request a cabinet assessment rather than assuming drying restores it. Conversely, a visible old mark alone does not establish that replacement is necessary. The finished record should make clear what happened to the water source, what condition remains in the cabinet and who is answering the outstanding question.
Pure White
Cream White
Light Warm Gray
Gray
Navy
Black
Oak Tone
Dark Walnut Tone
Design study These finish studies are design references, not a list of currently orderable colors. Screens and lighting change the appearance; compare a physical sample before choosing.See all finish options →
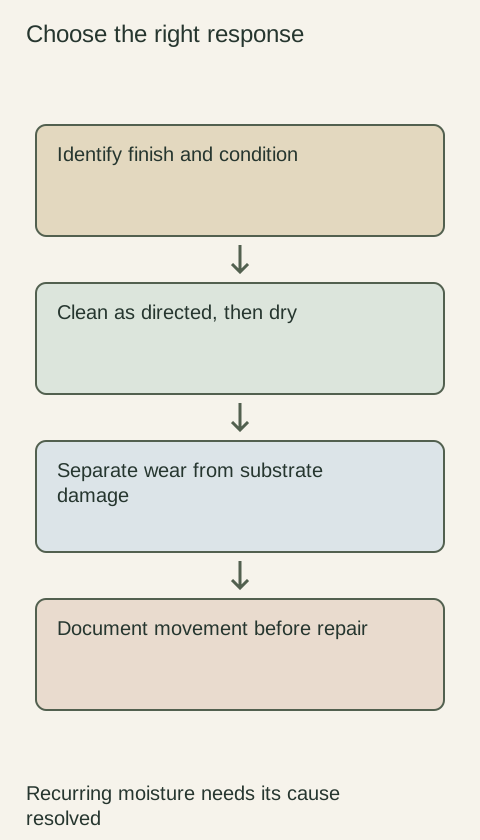
Routine cleaning, a finish touch-up and a moving wood joint need different responses. Identify the surface and condition before applying a cleaner or repair product.
The sample shows the door frame, a separate center panel, the face frame and the cabinet box. Each component has its own place in this Shaker construction.
Shaker construction: door frame, center panel, face frame and cabinet box. The cutaway helps locate these parts; confirm each material in the specifications for the selected cabinet.
01 / Door frame
The Shaker door has rails and stiles around a separate center panel. The frame and center panel are different components; confirm their materials in the specifications for the selected cabinet.
02 / Face frame
The face frame surrounds the opening at the front of the cabinet box and sits behind the doors. The face frame, door frame and cabinet box are separate parts.
03 / Cabinet box
The sample exposes the cabinet sides, interior surfaces and layered edges. The image does not establish the wood species or material specification of a selected cabinet.