A swollen edge does not automatically mean the entire cabinet must be replaced, but hiding the edge is not an adequate answer when the panel also supports a connection or adjacent part. Identify the affected component and what it does before comparing a cosmetic repair, a component replacement or a larger intervention. First address the exposure that preceded the change; a new part installed into an unresolved moisture problem is not a completed solution.
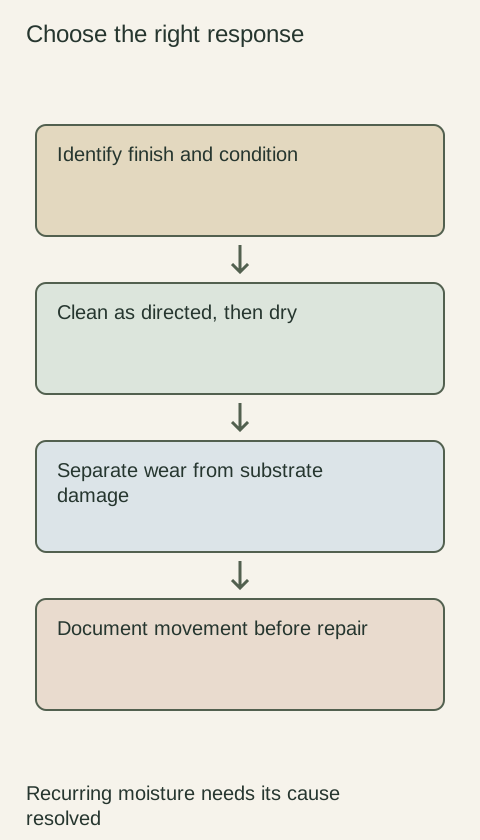
Diagram The care diagram does not establish repairability or remaining support capacity; assess the actual affected component.
Identify the panel rather than naming only the cabinet
Describe whether the change is on a removable shelf, a door, an applied end panel, a cabinet floor or a structural side. If you cannot identify the role, send an overall view with the affected area marked alongside a close photograph. Similar-looking surfaces may belong to components that are attached and replaced very differently.
Record what changed: a raised edge, increased thickness, a lifted surface, a seam opening or a nearby door no longer clearing. Avoid using a single label such as water damage to stand in for these observations. The supplier needs to know both the location and the effect before discussing the extent of disassembly or the parts involved.
Keep exposure history separate from recovery expectations
Dura Supreme warns that prolonged puddling can cause wood to expand and weaken joints or seams. That explains why moisture history matters; it does not establish the condition or remaining capacity of your particular panel from a photograph. Identify known exposure and any steps taken to address its source.
Do not promise yourself that a dry surface means the panel will return to its former dimensions. Equally, do not assume every visible mark is swelling. Describe what can actually be seen and leave material identification and repair suitability open for assessment. Avoid forced heat, compression or sanding as a home experiment to discover whether the part can be restored.
Ask what the proposed repair actually restores
A cosmetic proposal should explain the appearance it aims to improve and whether any changed dimensions remain. A component replacement proposal should identify the exact part, finish and attachment implications. Where a connection or supporting panel is involved, ask how that condition will be assessed rather than accepting a paint or filler proposal as an answer to the whole problem.
The distinction is practical: a finish repair might reduce a visible blemish without correcting a door's interference, while replacing an applied panel may address an exposed face without requiring an entirely new cabinet. Neither result can be assumed in advance. Have the service provider connect the proposed work to the observed defect and the function that needs to be restored.
Compare scopes using the surrounding installation
Consider an applied side panel with a raised lower edge after a leak. The cabinet box behind it might need inspection, but its condition cannot be inferred merely from the applied panel. Compare a panel-only proposal with a broader proposal by asking what each includes, what must be removed and which underlying conditions remain unverified until access is available.
Now consider a changed cabinet floor beside a connection supporting another part. The same surface-covering proposal would not answer the support question. Do not load or use an affected component to test its strength. Ask the responsible installer or supplier what assessment is needed and how the unit should be treated while that question is unresolved.
Define a useful completion check
Before authorizing work, identify the intended result in ordinary terms: the affected part is replaced or treated as specified, adjacent moving parts operate as intended, visible transitions meet the agreed appearance reference and the moisture source has been addressed separately. Do not substitute a promise of invisibility for a description of repair scope and remaining limitations.
Keep the part identity, original observations, proposal and final photographs together. If inspection reveals a wider affected area, request an updated scope before treating the original estimate as complete. The best choice is the smallest intervention that actually resolves the assessed condition, with any unresolved support or moisture question clearly assigned rather than concealed under a finished surface.
Pure White
Cream White
Light Warm Gray
Gray
Navy
Black
Oak Tone
Dark Walnut Tone
Design study These finish studies are design references, not a list of currently orderable colors. Screens and lighting change the appearance; compare a physical sample before choosing.See all finish options →
Routine cleaning, a finish touch-up and a moving wood joint need different responses. Identify the surface and condition before applying a cleaner or repair product.
The sample shows the door frame, a separate center panel, the face frame and the cabinet box. Each component has its own place in this Shaker construction.
Shaker construction: door frame, center panel, face frame and cabinet box. The cutaway helps locate these parts; confirm each material in the specifications for the selected cabinet.
01 / Door frame
The Shaker door has rails and stiles around a separate center panel. The frame and center panel are different components; confirm their materials in the specifications for the selected cabinet.
02 / Face frame
The face frame surrounds the opening at the front of the cabinet box and sits behind the doors. The face frame, door frame and cabinet box are separate parts.
03 / Cabinet box
The sample exposes the cabinet sides, interior surfaces and layered edges. The image does not establish the wood species or material specification of a selected cabinet.