Compare the same samples in the same position before judging color. Then change the lighting or surroundings deliberately, so you know what changed the impression.
If a cabinet finish looks different on another display, the difference may not be the finish alone. One door may be upright beneath a spotlight while another sample lies flat beside a dark countertop. A useful showroom visit separates those comparisons. First put the options into similar viewing conditions. Then examine how each responds to the conditions that matter in your kitchen or bathroom.
Start with samples in the same position
Ask to compare identified samples side by side at a similar angle and height. Keep their labels visible so an attractive impression stays connected to a product name. If one is a loose door and the other an installed display, acknowledge that the comparison is incomplete rather than deciding from memory after walking across the room.
View door finishes upright as well as looking closely at the surface. Laying a sample flat can put the overhead fixture directly into its reflection, which changes what you see. If your interest is the color across a cabinet run, step back enough to see the surface as a whole. If you are examining an edge profile, move closer for that separate task.
Change one neighboring material at a time
Bring or request the relevant countertop, flooring and wall-color samples when available. Begin with the same surroundings for each cabinet option. Then change a neighboring material deliberately. If both the cabinet and countertop change at once, it is harder to identify which combination you actually prefer.
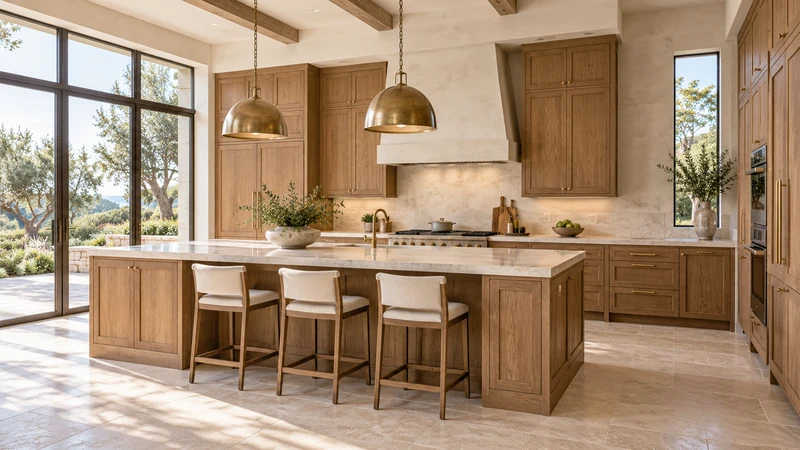
Design study The surrounding finishes contribute to the room impression. This design image is a coordination reference, not a physical color sample.
For example, compare the same cabinet sample beside the planned floor and then beside a possible alternative. Note whether the objection concerns the cabinet itself or that particular pairing. A finish you dislike against one display’s countertop may work with your own materials. Conversely, copying a showroom door without its surrounding palette may not recreate the display you liked.
Identify where the favorable impression occurs
After the controlled comparison, view the samples under other available lighting conditions with staff assistance. Avoid mixing up a change in location with a change in product. Record where each observation was made: near the window, beneath the display lighting or away from the concentrated beam. These are descriptions of the visit, not guarantees of appearance at home.
Look from your likely approach direction as well as straight on. Notice whether a bright reflection obscures part of the finish or emphasizes the surface. Move yourself before concluding that the patch is a color difference. For an actual suspected defect, ask for a closer examination; do not assume every visible variation is merely lighting.
Leave with a comparison you can repeat
Record the finish identity and the specific combination that worked, then ask whether a matching physical sample can be viewed in the project room. A phone photo is useful for remembering the display arrangement, but it is a weak substitute for bringing the material comparison into your own surroundings. Include the sample labels in your reference pictures so the options do not get confused later.
At home, compare in the cabinet’s intended orientation and the room conditions you actually use. If the result differs from the visit, return to the same identified samples rather than starting from a similar-looking online image. Make the final selection from the whole combination you intend to order, and keep unresolved differences visible until you can understand them. A showroom is most useful when it helps you make a repeatable comparison, not just a quick favorite.
Pure White
Cream White
Light Warm Gray
Gray
Navy
Black
Oak Tone
Dark Walnut Tone
Design study These finish studies are design references, not a list of currently orderable colors. Screens and lighting change the appearance; compare a physical sample before choosing.See all finish options →
Read what happens after a covered problem: which part is supplied, who handles the work and what access is required. The headline term cannot answer those questions.
The sample shows the door frame, a separate center panel, the face frame and the cabinet box. Each component has its own place in this Shaker construction.
Shaker construction: door frame, center panel, face frame and cabinet box. The cutaway helps locate these parts; confirm each material in the specifications for the selected cabinet.
01 / Door frame
The Shaker door has rails and stiles around a separate center panel. The frame and center panel are different components; confirm their materials in the specifications for the selected cabinet.
02 / Face frame
The face frame surrounds the opening at the front of the cabinet box and sits behind the doors. The face frame, door frame and cabinet box are separate parts.
03 / Cabinet box
The sample exposes the cabinet sides, interior surfaces and layered edges. The image does not establish the wood species or material specification of a selected cabinet.