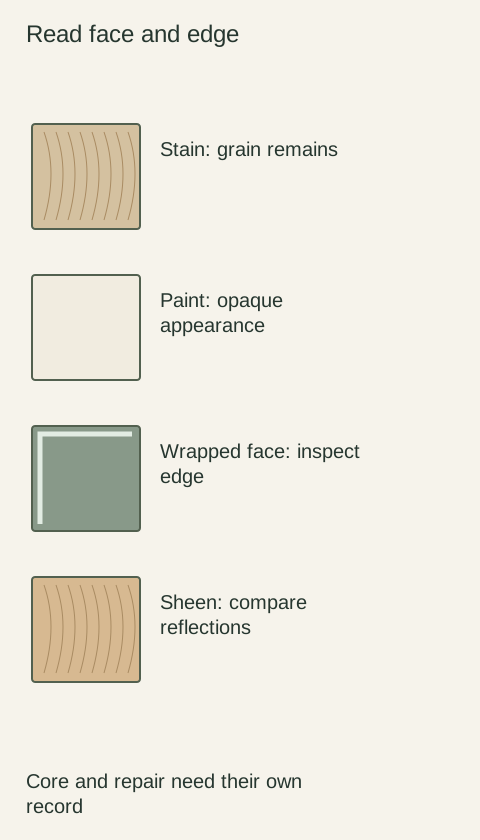
Choose cabinet sheen by viewing the actual finish from the directions in which you will see and touch the doors. A straight-on showroom view may hide reflections that become conspicuous beside a window. Compare appearance, marks from normal handling and the prescribed cleanup separately; a low-sheen label alone does not tell you how the surface will perform.
Diagram The sheen panel prompts a reflection comparison. The illustration is not a gloss measurement or evidence of cleaning performance.
Make the comparison about sheen first
Begin with samples in the same color and, if available, the same door profile. A darker color or a deeper profile can distract from the finish difference you are trying to evaluate. Confirm that each sample represents the coating system and finish level offered for the actual order, rather than a wall-paint demonstration or a different material with a similar name.
Sherwin-Williams explains that gloss and sheen concern reflected light and can change perceived color as viewing direction and illumination change. That supports looking from several positions. It does not establish a cabinet finish’s cleaning resistance or let you treat every supplier’s “satin” as the same surface.
Place the finished door upright where the light reaches the planned cabinet face. Walk through the usual approach and look along the surface as well as directly at it. Note whether a bright window reflection, a moving highlight or a cloudy-looking area catches your attention. Repeat with the alternative in the same position so the lighting comparison stays meaningful.
Then step back to the distance at which the entire cabinet run will be seen. A striking close-up reflection may be unobtrusive in daily use, while a broad highlight can dominate the whole front. If you intend to change lighting, keep the decision provisional until you can examine a representative lighting condition. Do not choose a sheen solely to solve a glare problem created by a temporary work lamp.
Observe contact where hands will actually land
With the sample owner’s permission, handle a representative area normally and compare it with an untouched area. Look around the intended pull position or grasping edge. Use ordinary clean hands, not oils, abrasives or deliberately harsh contamination. The purpose is to understand your tolerance for visible contact, not to conduct an improvised durability test.
Ask for the finish-specific cleaning method and use only that approved method on a suitable sample. After it is dry, check whether the mark is gone, whether wiping leaves streaks and how much care the process required. A surface that shows a touch mark briefly but cleans easily may suit you better than one whose initial appearance you prefer but whose care feels burdensome.
A worked choice beside a bright window
Imagine comparing a quiet low-sheen finish with a more reflective finish in the same dark color. In the showroom, you prefer the reflective sample’s depth. At home, its window highlight moves across the door as you enter the room. The lower-sheen option is calmer there, but ordinary hand contact is still visible when you look along its face.
You can now weigh the actual tradeoff: reflection during normal viewing against visible contact and the approved cleaning routine. Neither option earns the label “maintenance-free.” If the difference bothers you mainly around the opening edge, review the intended pull and contact pattern as part of the selection rather than assuming a sheen change will remove all handling marks.
Record the finish level and preserve a fair reference
Save the exact finish designation alongside the color, door style and approved sample identity. If numerical gloss information is supplied, ask what it describes and how it relates to the finished sample; do not compare unexplained numbers from different methods. Retain the care instructions for the selected coating instead of substituting advice for another product.
At delivery, check the surfaces clean and dry under comparable light. Report patches, streaks or a finish-level difference with a whole-door view and the relevant detail. A photograph can locate the concern, but reflection depends on camera position. Preserve the physical reference so the supplier can distinguish an actual finish difference from a change in viewing angle.
Pure White
Cream White
Light Warm Gray
Gray
Navy
Black
Oak Tone
Dark Walnut Tone
Design study These finish studies are design references, not a list of currently orderable colors. Screens and lighting change the appearance; compare a physical sample before choosing.See all finish options →
A color name does not identify a finish system. Compare the decorative surface, the core, the edge and the repair method before choosing a cabinet front.
The sample shows the door frame, a separate center panel, the face frame and the cabinet box. Each component has its own place in this Shaker construction.
Shaker construction: door frame, center panel, face frame and cabinet box. The cutaway helps locate these parts; confirm each material in the specifications for the selected cabinet.
01 / Door frame
The Shaker door has rails and stiles around a separate center panel. The frame and center panel are different components; confirm their materials in the specifications for the selected cabinet.
02 / Face frame
The face frame surrounds the opening at the front of the cabinet box and sits behind the doors. The face frame, door frame and cabinet box are separate parts.
03 / Cabinet box
The sample exposes the cabinet sides, interior surfaces and layered edges. The image does not establish the wood species or material specification of a selected cabinet.