A soft cloth is useful for cabinet care only while it is suitable for the finish and clean enough for the task. A microfiber label does not tell you whether the cloth picked up grit from a floor, dried paint from a jobsite or residue from another cleaner. Inspect it before use, keep cabinet cloths separate from rough cleaning work and change them when they become contaminated. The care method includes the condition of the tool, not just the liquid you choose.
Diagram The cleaning tool must be suitable and clean; this diagram does not certify every microfiber cloth for every cabinet finish.
Check the cloth before it touches the door
Look for visible particles, stiff patches, damaged fabric or rough attachments that could contact the finish. If the cloth was dropped, used on debris or left on a dirty work surface, replace it with a known-clean one rather than assuming a quick shake has removed everything. Do not use the cabinet itself as the place to find out whether a suspicious patch will scratch.
Dura Supreme cautions against household cleaning cloths carrying grease, dirt or previous cleaners. That concern applies to the cloth's actual condition. Follow the cabinet's specified cloth requirements as well; choosing microfiber by name does not replace inspecting its surface and knowing where it has been used.
Separate cabinet cleaning from other household tasks
Keep cloths used on finished cabinet faces apart from those used for floors, rough construction cleanup or heavily soiled equipment. Identify their intended use in a way the household or cleaning team understands. The aim is practical separation, not a complicated system: the person reaching for a cloth should be able to choose one whose recent use is known.
Also distinguish a cloth that holds the permitted cleaning solution from a clean cloth used for the drying step when the product instructions call for one. Do not assume an apparently dry cloth is free of an earlier chemical. When the cleaner or previous task is unknown, use a fresh appropriate cloth instead of adding a different product and creating an uncertain mixture on the surface.
Manage the soil collected during the job
As cleaning proceeds, inspect the cloth and use a clean section or replace it before carrying collected residue across other fronts. A cloth can start clean and become unsuitable partway through the task. Keep used cloths out of the clean supply and off cabinet faces while you retrieve another one. This prevents the next person from unknowingly starting with the tool you just set aside.
For visible coarse debris or construction dust, consult the product's cleanup instructions before wiping across it. Do not grind particles into the finish with extra pressure. If a simple permitted method cannot remove the debris without dragging it, stop and ask the installer or supplier how to handle the condition. Ordinary maintenance and post-construction cleanup may not be the same task.
Wash and store cloths for their next use
Follow the cloth manufacturer's washing and drying directions, considering any restrictions in the cabinet's care guidance. A laundry cycle does not justify ignoring visible contamination that remains afterward. Check cleaned cloths again before putting them back into the cabinet-care supply, and set aside any that have developed persistent rough areas or cannot be confidently identified as suitable.
Store usable cloths in a clean, dry place where workshop dust or other cleaning products will not be deposited on them. Do not hang a damp used cloth over a cabinet door to keep it nearby. The storage habit should preserve the cloth's readiness and avoid leaving moisture against the very finish the routine is intended to protect.
Recognize when the tool may be the problem
Imagine a cloth used to wipe a dusty windowsill is then used on a cabinet because it still feels soft. A particle caught in it can be carried across the front. Choosing a fresh cabinet cloth before that second task would remove an avoidable uncertainty. Changing to a stronger cleaner afterward would not address the original mistake of reusing an unverified cleaning tool.
If new marks appear during wiping, stop and retain the cloth and cleaner information for the inquiry. Note where the marks began and whether the cloth had contacted another surface. Do not keep rubbing to prove a cause or polish the whole door to hide the result. A useful care routine makes the cloth's cleanliness observable and repeatable, while any unexpected surface change receives its own assessment.
Pure White
Cream White
Light Warm Gray
Gray
Navy
Black
Oak Tone
Dark Walnut Tone
Design study These finish studies are design references, not a list of currently orderable colors. Screens and lighting change the appearance; compare a physical sample before choosing.See all finish options →
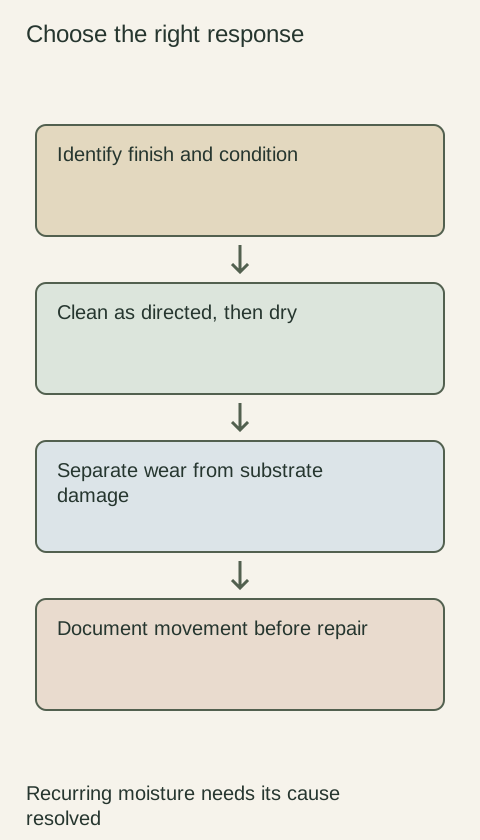
Routine cleaning, a finish touch-up and a moving wood joint need different responses. Identify the surface and condition before applying a cleaner or repair product.
The sample shows the door frame, a separate center panel, the face frame and the cabinet box. Each component has its own place in this Shaker construction.
Shaker construction: door frame, center panel, face frame and cabinet box. The cutaway helps locate these parts; confirm each material in the specifications for the selected cabinet.
01 / Door frame
The Shaker door has rails and stiles around a separate center panel. The frame and center panel are different components; confirm their materials in the specifications for the selected cabinet.
02 / Face frame
The face frame surrounds the opening at the front of the cabinet box and sits behind the doors. The face frame, door frame and cabinet box are separate parts.
03 / Cabinet box
The sample exposes the cabinet sides, interior surfaces and layered edges. The image does not establish the wood species or material specification of a selected cabinet.