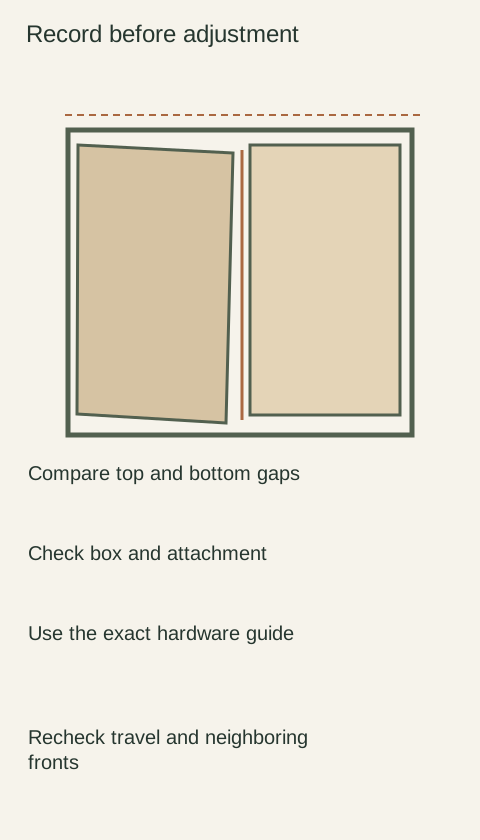
When a door begins rubbing, turning the nearest hinge screw may move the symptom without explaining it. First locate what touches what, and when in the opening or closing movement contact begins. Then distinguish a visible obstruction from an alignment question or a changed component. This sequence is an observation method, not a universal hinge-adjustment recipe. It helps you decide whether a simple permitted correction is appropriate or the installer needs to assess the assembly.
Diagram Locate the actual rubbing contact before using instructions for the installed hinge; the diagram gives no universal screw direction.
Name both sides of the contact
Identify whether the door touches another door, a drawer front, a cabinet frame or a fixed adjacent surface. Note the part of the door involved: upper corner, lower edge, hinge side or handle side. An overall photograph showing neighboring fronts is more useful than a close photograph of an isolated scuff with no indication of its position.
Observe only normal movement that can be made without forcing the door. Stop at resistance rather than repeatedly dragging the finish across the contact point. A sound alone does not locate the interference; look for the visible relationship and report uncertainty where you cannot see it. Do not insert fingers into a narrowing gap to feel where the rubbing starts.
Record when the problem appeared
Separate rubbing present since installation from a change after earlier normal operation. Include recent work, removal and rehanging, a new adjacent item or an observed change in the door or cabinet. These are useful leads, not proof of cause. Avoid choosing a seasonal explanation merely because the calendar changed around the same time.
Check for an obvious accessible obstruction, such as packaging left at an edge or an object extending into the door's path. Remove only ordinary loose items that can be safely handled. A fitted part, hinge component or bumper should not be removed simply because it lies near the contact. Its role may be necessary to the intended movement or closed position.
Compare the resting gaps with the movement
Look at the door in its normal resting position without forcing it closed. Record whether gaps appear uneven, whether a corner stands forward or whether contact occurs only partway through travel. These observations distinguish questions that a static front photograph might miss. A door that looks aligned at rest can still meet an adjacent object during its swing.
For example, a front can appear evenly spaced when closed yet touch a neighboring pull during opening. Moving the door sideways without understanding that contact may spoil the closed alignment and still leave an unsuitable opening path. Show the contact location and the resting view together so the response addresses the movement that actually causes the problem.
Use the instructions for the installed hinge
KraftMaid directs door-alignment adjustments to guidance for the exact hinge style. Follow that model-specific approach: identify the hinge and its intended adjustments before deciding whether an owner-level correction described in the instructions is appropriate. A screw visible on another hinge in a video may serve a different purpose on yours.
Do not loosen mounting hardware, release a door or repeatedly turn unknown screws to see what happens. If a door appears unstable, a fixing moves in its substrate or the cabinet itself has changed position, ask the responsible installer for assessment. Likewise, a visibly distorted panel is not automatically corrected by hinge adjustment; identify the question before selecting the intervention.
Check the whole operating result after a permitted correction
If a documented adjustment is appropriate and completed, review the affected door's normal travel, resting gaps and relationship to neighboring fronts. Removing one contact is not a complete result if another edge now rubs or the closing action no longer works as intended. Keep a short record of the specific adjustment and the observed change for any follow-up service.
If the rubbing remains, send the overall view, contact detail, onset history and hinge identification to the supplier or installer. Explain what was already tried without continuing to chase the gap through unrelated adjustments. A useful service request identifies the moving relationship that needs correction and leaves unverified cabinet position, attachment or panel-condition questions open for proper assessment.
Pure White
Cream White
Light Warm Gray
Gray
Navy
Black
Oak Tone
Dark Walnut Tone
Design study These finish studies are design references, not a list of currently orderable colors. Screens and lighting change the appearance; compare a physical sample before choosing.See all finish options →
Routine cleaning, a finish touch-up and a moving wood joint need different responses. Identify the surface and condition before applying a cleaner or repair product.
The sample shows the door frame, a separate center panel, the face frame and the cabinet box. Each component has its own place in this Shaker construction.
Shaker construction: door frame, center panel, face frame and cabinet box. The cutaway helps locate these parts; confirm each material in the specifications for the selected cabinet.
01 / Door frame
The Shaker door has rails and stiles around a separate center panel. The frame and center panel are different components; confirm their materials in the specifications for the selected cabinet.
02 / Face frame
The face frame surrounds the opening at the front of the cabinet box and sits behind the doors. The face frame, door frame and cabinet box are separate parts.
03 / Cabinet box
The sample exposes the cabinet sides, interior surfaces and layered edges. The image does not establish the wood species or material specification of a selected cabinet.