Water-damaged cabinets, replacement fronts and older kitchens
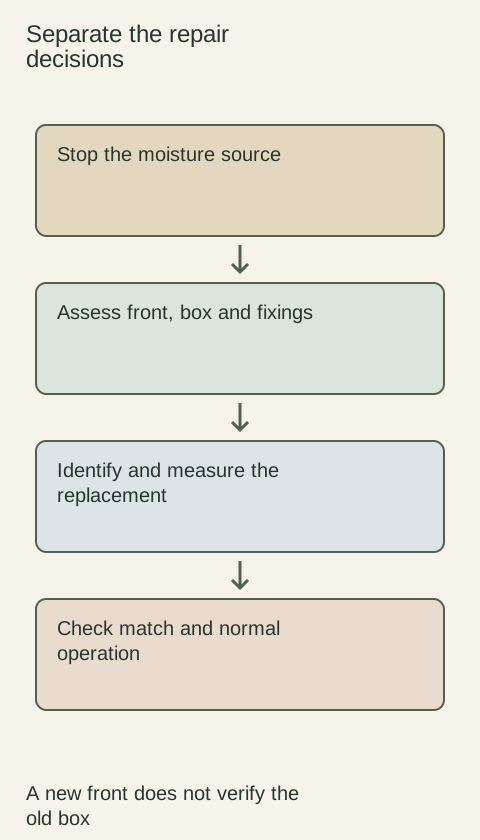
Stop the moisture source and assess the cabinet before ordering a new door. A replacement front can improve appearance while leaving a damaged box or attachment unresolved.
KraftMaid's care guidance warns that ongoing moisture, including wet towels left on sink doors, can damage cabinetry. That supports prevention, not a remote diagnosis of your cabinet. If water is still entering, address the source before refinishing or replacing a front. Keep people away from an unstable cabinet or affected electrical equipment and use the appropriate repair professional for the source.
Photograph the area and identify where water appears to enter, travel and collect. Distinguish an occasional splash on a dry surface from persistent dampness beneath plumbing or along an appliance. Record what was wet and whether the condition returns after the source work. Do not describe staining alone as proof of mold or infer hidden soundness from a dry-looking face.
Separate the front from the box and supports
Inspect the door or drawer front, cabinet sides and bottom, back, shelf supports and mounting areas as separate components. Look for swelling, lifting surface, deformation and loose attachments. Check whether the opening still holds its shape and operates normally. A photograph can identify a location to examine, but it cannot establish the remaining strength of a damaged fixing.
Do not load or lean on questionable parts to test them. If the bottom, wall attachment or supporting material is compromised, a door-only order does not close the repair. Seek an on-site assessment of the affected structure and any concealed conditions. Agree which parts can remain and which need replacement before measuring for cosmetic pieces.
Diagram Illustrative diagram; not a product specification.
Identify an older cabinet before seeking matches
Search existing order records and labels on the cabinet, drawer or hinge. Record the line, door name, finish code and any manufacturer information you can verify. Keep an unknown item unknown instead of choosing a visually similar current product. A familiar color name may have changed meaning between product lines or generations.
Photograph the whole elevation, one complete front, the edge, back and hardware. A close picture of grain alone cannot identify the species, coating or supplier. If records cannot be recovered, a replacement specialist may work from an actual removed sample and measured geometry. Obtain permission before removing a door and preserve its location and hardware arrangement.
Measure for the selected replacement method
Follow the proposed supplier's measuring and drilling instructions. Record opening size and existing front size separately, together with thickness, edge profile, inset or overlay, hinge position and mounting pattern as required. A hole pattern is not safely copied from a different hinge. Drawers need their attachment arrangement documented too.
In an illustrative repair, an old sink door might have a sound cabinet behind it but a swollen lower edge on the front. A replacement may be a sensible scope after the water source and cabinet condition are resolved. Another opening with a damaged bottom and loose hinge attachment needs a broader repair, even if both kitchens look similar from the front.
Compare a single replacement with a planned group
A new front can differ from adjacent aged parts in color, sheen, grain or profile. Ask what matching evidence the proposed replacement uses and compare a physical sample where possible. An original finish code helps identify a target; it does not guarantee an invisible match after years of use and light exposure.
Compare the practical cost and appearance of replacing the affected piece, a visually connected group or a larger run. Include matching panels and any new hardware holes in the scope. You do not need to replace a whole kitchen merely because a single match is imperfect, but the compromise should be deliberate and recorded.
Close the repair with function and condition checks
Confirm the moisture-source repair, cabinet assessment, replacement specification and installation responsibility. After fitting, verify stable attachments, normal travel and clearance using the actual hardware instructions. Keep the removed part until the replacement has been checked and any permitted claim documented. A completed cosmetic repair and a resolved moisture problem should each have their own evidence.
Make the repair proposal comparable
Ask each proposal to name the moisture work, retained and replaced cabinet parts, hardware, finish-matching approach and installation labor separately. Include what will be checked after the concealed area becomes accessible and how additional damage will be documented.
This keeps a door-only price from being compared with a broader cabinet repair as if they were the same service.
Record any appearance compromise and who accepted it. Keep the final photographs and part information with the original cabinet records so a future owner can distinguish a repaired component from an untouched one.
Finish references
Pure White
Cream White
Light Warm Gray
Gray
Navy
Black
Oak Tone
Dark Walnut Tone
Design study Design references only. The finish studies do not establish actual material, color matching or availability. Compare the selected physical sample.See all finish options →
Routine cleaning, a finish touch-up and a moving wood joint need different responses. Identify the surface and condition before applying a cleaner or repair product.
The sample shows the door frame, a separate center panel, the face frame and the cabinet box. Each component has its own place in this Shaker construction.
Shaker construction: door frame, center panel, face frame and cabinet box. The cutaway helps locate these parts; confirm each material in the specifications for the selected cabinet.
01 / Door frame
The Shaker door has rails and stiles around a separate center panel. The frame and center panel are different components; confirm their materials in the specifications for the selected cabinet.
02 / Face frame
The face frame surrounds the opening at the front of the cabinet box and sits behind the doors. The face frame, door frame and cabinet box are separate parts.
03 / Cabinet box
The sample exposes the cabinet sides, interior surfaces and layered edges. The image does not establish the wood species or material specification of a selected cabinet.