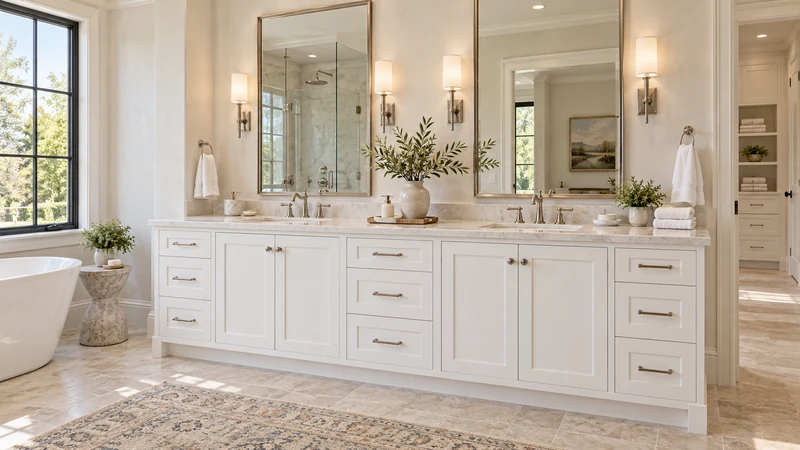
The cabinet center, basin center and useful mirror position can be different. This is especially apparent with an offset basin, a drawer bank at one end or a separate dry preparation area. A mirror that looks balanced over the furniture may require the user to lean sideways for an ordinary task. Begin with the actual standing position and reflection needed, then choose a mirror arrangement that also works with the wall.
Name the lines before choosing one
Draw a front elevation with the cabinet outline, basin, faucet and wall boundaries. Mark the center of each relevant part separately rather than drawing a single line through the whole assembly. Add windows, switches and existing lights. This reveals whether an apparent alignment problem comes from the cabinet layout, the basin location or another fixed wall element.
Also mark the user's position for the intended task. Washing at the basin and preparing at a dry section of counter may use different locations. Do not assume that the basin center must control every mirror in the room. The task determines the useful reflection area; furniture symmetry is another consideration, not a substitute for that test.
Design study Mirrors appear above separate basin positions in this design study. Use the visible relationships to discuss alignment, without inferring exact centers, mounting heights or lighting performance.
Test reflection from the normal position
Mark the proposed mirror outline on the wall, then use a securely supported portable mirror where practical to test the view. The outline can show composition, but it cannot demonstrate a reflection by itself. Have the actual users stand as they normally would, looking forward without deliberately finding a special position that makes the proposal work. Test the relevant height and side-to-side coverage.
Avoid treating the mirror's outer frame as entirely reflective area. A substantial frame, an inset reflective surface or an adjacent cabinet may change what the user can see. If several people use the room, include their different positions and ordinary tasks. The goal is to identify a useful viewing zone before committing to a product, not to derive a universal mirror height from a staged photograph.
Resolve an offset-basin example
Imagine a hypothetical vanity with the basin toward one end and a broad drawer section at the other. Centering a narrow mirror over the whole cabinet leaves the washing position near the mirror's edge. Moving that mirror toward the basin could improve washing use, while making the wall arrangement visibly asymmetrical. A broader mirror might cover the intended positions, but its edges would need to work with the wall and lighting.
If the drawer side is also a deliberate grooming station, simply moving the mirror over the basin may sacrifice that function. Test whether a shared reflective surface or distinct mirror positions serve both tasks. Compare actual views and reach, then accept the composition that supports them. A cabinet with an offset basin should not be rejected automatically because a centered decorative mirror was chosen first.
Coordinate the wall around the useful view
Once the reflection area is established, review light locations, windows and the selected faucet together. A mirror moved to follow the basin may no longer relate to the existing light as intended. Ask the appropriate installer or electrician to review any proposed fixture changes and the chosen products. Do not infer electrical or mounting suitability from the fact that the wall appears clear in an elevation.
If the mirror is also a storage cabinet, test its door opening and the retrieval position. The useful closed reflection does not prove that the door clears a nearby fixture or can be opened comfortably. Keep this operating check separate from the centerline decision. Confirm the selected product's mounting requirements and any concealed conditions before final placement.
Record a position that can survive product changes
Document the basin location, intended standing positions, reflective area and relationship to the light or neighboring wall feature. Identify whether the chosen alignment follows washing, dry preparation or a shared view. This record is more useful than an instruction to center the mirror “over the vanity,” which different people may interpret differently.
Recheck the layout if the basin, mirror width, frame or cabinet arrangement changes. A small-looking substitution can move the useful reflection edge or create a different visual relationship. Make the final choice after a realistic viewing test and a coordinated wall review, so the installation position supports the way the household uses the room.
Pure White
Cream White
Light Warm Gray
Gray
Navy
Black
Oak Tone
Dark Walnut Tone
Design study These finish studies are design references, not a list of currently orderable colors. Screens and lighting change the appearance; compare a physical sample before choosing.See all finish options →
The sample shows the door frame, a separate center panel, the face frame and the cabinet box. Each component has its own place in this Shaker construction.
Shaker construction: door frame, center panel, face frame and cabinet box. The cutaway helps locate these parts; confirm each material in the specifications for the selected cabinet.
01 / Door frame
The Shaker door has rails and stiles around a separate center panel. The frame and center panel are different components; confirm their materials in the specifications for the selected cabinet.
02 / Face frame
The face frame surrounds the opening at the front of the cabinet box and sits behind the doors. The face frame, door frame and cabinet box are separate parts.
03 / Cabinet box
The sample exposes the cabinet sides, interior surfaces and layered edges. The image does not establish the wood species or material specification of a selected cabinet.