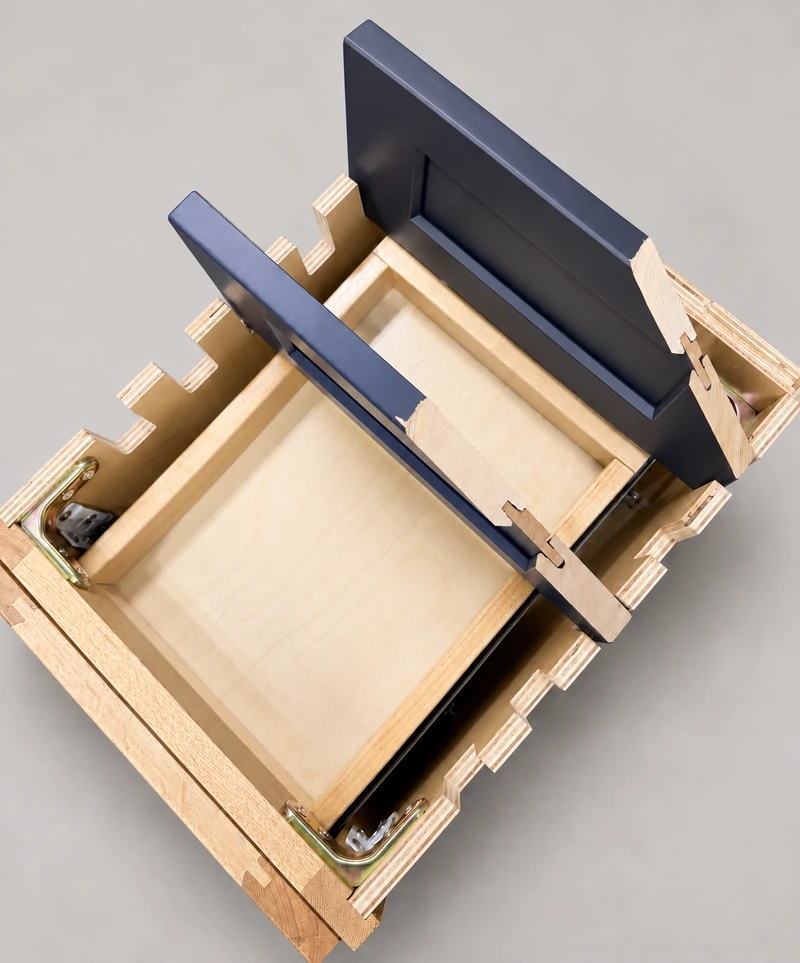
A line at a painted cabinet-door joint: what to check
Locate and document a painted joint line, distinguish an appearance change from looseness or damage, and request an assessment before filling or repainting.
A fine line at a painted door joint can be associated with movement in wood components, but appearance alone cannot establish whether a particular door is acceptable or defective. Locate the line, record whether anything has changed in operation, and compare it with the product’s written expectations. Do this before filling, sanding or repainting, because those actions can conceal the condition that needs assessment.
Physical sample The cutaway locates where separate components meet. It illustrates why a painted face can cover a joint; it is not a photograph of a reported finish defect or a diagnosis of seasonal movement.
Understand why a painted joint can become visible
Wood exchanges moisture with surrounding air, and that relationship affects its properties. A painted surface does not remove the underlying wood’s relationship with its environment. This is a general material principle, not a prediction of exactly how far a particular door will move.
American Woodmark’s painted-cabinetry guidance explicitly describes visible joint lines arising from wood expansion and contraction. That statement applies to the products and expectations in its guidance. It does not decide a claim about another cabinet, establish a universal acceptable gap or mean that every crack is normal.
Look for the actual joint between the horizontal rail and vertical stile, or around the center panel. Photograph the whole door so the location is clear, then take a closer image under ordinary lighting. A line at an assembly joint, a scratch crossing an uninterrupted face and a chipped corner are different observations. Describe the route of the line instead of calling all of them a split door.
Compare the front with the accessible back and edges without taking the door apart. Note whether the line is newly noticed or visibly changing. Keep the door identification and finish name with the photographs. If several doors are involved, identify them individually; a group photograph alone may hide which one has the reported condition.
Check function separately from appearance
Record whether the door opens and closes as before, whether it rubs a neighboring front, and whether any component seems loose during ordinary use. Do not twist the frame or pull on the panel to test strength. A visible paint line and a loose connection call for different questions, even if they occur in the same area.
If there is swelling, a recent spill or another sign of moisture exposure, include that history. If the room’s heating or cooling conditions have changed, describe the timing without assuming it proves the cause. These observations give the supplier a more useful starting point than a close-up sent with no context.
A worked comparison of similar-looking complaints
Imagine that a narrow line becomes visible where a painted rail meets a stile. The door remains firm in ordinary handling and still operates normally. You photograph it and request an appearance assessment under the product’s finish guidance. That request should not automatically become a plan to fill every joint in the room.
Now imagine a similar-looking line accompanied by a corner that moves during ordinary opening. Record the movement and stop stressing the component while arranging an assessment. The close-up may resemble the first example, but the functional observation changes the question. Neither example supplies a universal repair instruction; it shows why a complete description is necessary.
Agree on the remedy before altering the finish
Send the order identification, door location, overall and close photographs, relevant history and functional observations to the responsible supplier. Request a response tied to the exact construction and finish. If a touch-up is proposed, establish what visual result is expected, who will perform it and whether the area should first be inspected in person.
Avoid filling a joint simply to erase the line before its role is understood. A repair that hides the symptom may not address a loose component, and a surface touch-up may remain visible in different light. Keep the assessment and any approved repair instructions with the order record. For a future purchase, review the manufacturer’s painted-finish expectations alongside the sample so joint appearance is part of the selection rather than a surprise after installation.
Pure White
Cream White
Light Warm Gray
Gray
Navy
Black
Oak Tone
Dark Walnut Tone
Design study These finish studies are design references, not a list of currently orderable colors. Screens and lighting change the appearance; compare a physical sample before choosing.See all finish options →
A painted door, a wood-grain side and a plywood cabinet box can belong to the same cabinet. Here is how to read those parts, what the sample photos actually show, and which details to put on a quote.
Read the rear-panel construction and mounting information separately so an attractive interior back does not stand in for the cabinet’s installation requirements.
The sample shows the door frame, a separate center panel, the face frame and the cabinet box. Each component has its own place in this Shaker construction.
Shaker construction: door frame, center panel, face frame and cabinet box. The cutaway helps locate these parts; confirm each material in the specifications for the selected cabinet.
01 / Door frame
The Shaker door has rails and stiles around a separate center panel. The frame and center panel are different components; confirm their materials in the specifications for the selected cabinet.
02 / Face frame
The face frame surrounds the opening at the front of the cabinet box and sits behind the doors. The face frame, door frame and cabinet box are separate parts.
03 / Cabinet box
The sample exposes the cabinet sides, interior surfaces and layered edges. The image does not establish the wood species or material specification of a selected cabinet.