Check the edge-to-face transition, corners and visible match on a finished sample, and separate appearance questions from claims about hidden bonding quality.
When a cabinet panel has edge banding, inspect the transition between the narrow edge and the broad face. The useful checks are whether the edge is finished as ordered, how it feels, and whether its color, texture and sheen work with the face. A tidy seam is encouraging, but a glance cannot establish the hidden bond quality or make the panel waterproof.
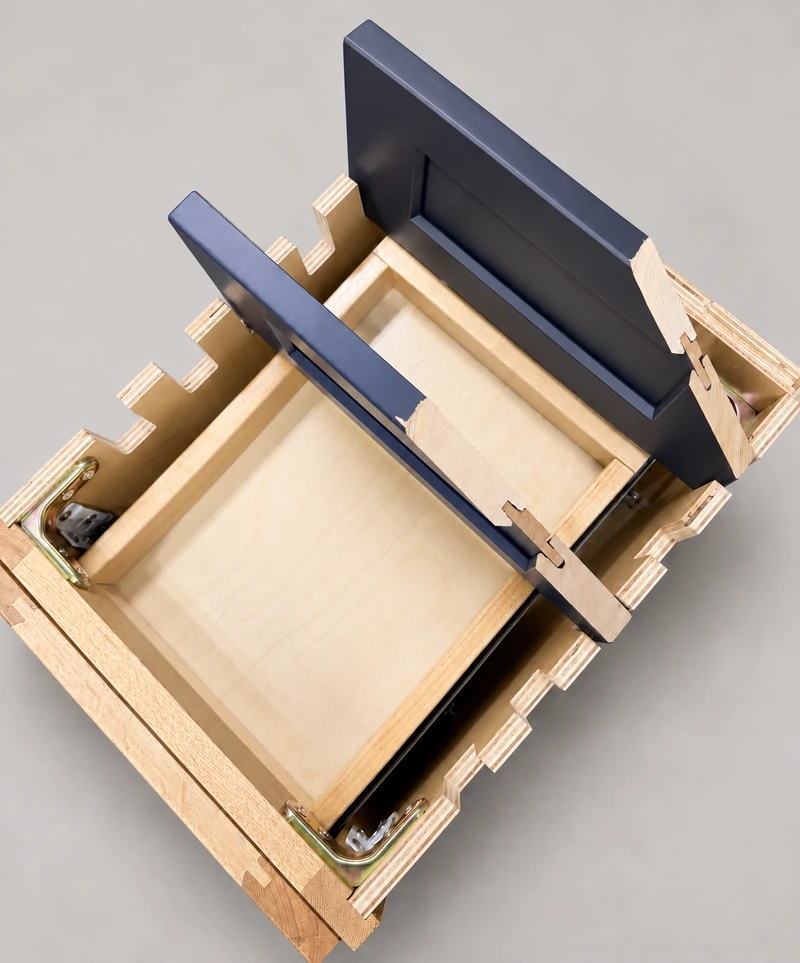
Physical sample The open edges show where a panel core meets its face. They are cutaway locations, not a demonstration of finished edge banding; evaluate a separate completed edge sample before approval.
Identify the edge treatment before judging it
Edge banding is a separate strip covering an exposed panel edge. REHAU’s guidance treats color, pattern, texture and gloss as relevant parts of the visual match. Its products are examples of edging options, not proof of the material used on a particular usaKT.com cabinet.
Confirm which edges will be exposed after installation and what treatment is included for each. A door edge, shelf front and concealed back edge may have different requirements. Use a finished sample of the quoted construction; an exposed cutaway is useful for locating a core, but it cannot demonstrate the quality of a completed banded edge. Request written identification of the core separately if the quotation uses only a surface name.
Examine the face-to-edge transition
Move the sample through normal viewing angles. Look for an abrupt color change, a shiny line against a matte face, or a texture that stops in a distracting way. A wood-grain surface may coordinate with an edge without continuing the same grain across the corner. Decide whether you want a coordinated edge or actual pattern continuation, then confirm what the supplier offers.
With permission, lightly feel a safe, accessible finished edge. Note a ridge, sharp corner, rough transition or area that seems raised. Do not pry with a fingernail, blade or coin to test adhesion. Such an improvised test can damage the sample and still does not establish the behavior of the finished cabinet under its intended conditions.
Look at the corners and the ends of strips
The long straight edge can look good while the corner deserves another look. Examine where banded edges meet and where the face finish ends. Record a chipped corner, an exposed-looking line or a gap with an overall photograph and a close view. Avoid declaring the cause from appearance alone: a mark may need cleaning, finishing clarification or product assessment.
If a strip appears lifted, keep the part in its observed state and contact the responsible supplier before installation or repair. A recommendation to use household glue is not a substitute for identifying the edging system and the approved remedy. Keep the part label with the images so the response applies to the correct component.
A sample decision about a matte wood appearance
Imagine comparing a matte wood-look panel with its proposed shelf-front edge. Under the room’s side light, the broad face looks muted but the narrow edge catches a bright reflection. The colors seem close when viewed straight on. The mismatch is therefore not resolved by choosing the same color name; the finished assembly needs to be considered from the angle at which it will be used.
Ask to see the quoted edge on the quoted face rather than loose strips alone. If the contrast is intentional and acceptable, retain that approved sample. If it is distracting, identify a different available combination before ordering. Do not assume that an edge from another collection will bond correctly or be supplied simply because its color looks better.
Leave with an observable acceptance reference
Record the cabinet series, panel surface, exposed edges and the approved edge appearance. Include photographs under ordinary lighting, without filters that alter color or hide texture. Ask how a visible mismatch or lifted edge should be reported and whether any field trimming would require a specified finishing treatment.
At receiving, compare the same locations rather than demanding that every concealed construction edge resemble a visible shelf front. Document unexpected exposed core, loose edging or damage before modifying the piece. The goal is a clear agreement about the finished edges you will actually see and touch, together with a way to address a discrepancy.
Pure White
Cream White
Light Warm Gray
Gray
Navy
Black
Oak Tone
Dark Walnut Tone
Design study These finish studies are design references, not a list of currently orderable colors. Screens and lighting change the appearance; compare a physical sample before choosing.See all finish options →
A painted door, a wood-grain side and a plywood cabinet box can belong to the same cabinet. Here is how to read those parts, what the sample photos actually show, and which details to put on a quote.
Judge a painted MDF door by its actual profile, finished edges and construction, with a sample that represents the size and details you intend to order.
The sample shows the door frame, a separate center panel, the face frame and the cabinet box. Each component has its own place in this Shaker construction.
Shaker construction: door frame, center panel, face frame and cabinet box. The cutaway helps locate these parts; confirm each material in the specifications for the selected cabinet.
01 / Door frame
The Shaker door has rails and stiles around a separate center panel. The frame and center panel are different components; confirm their materials in the specifications for the selected cabinet.
02 / Face frame
The face frame surrounds the opening at the front of the cabinet box and sits behind the doors. The face frame, door frame and cabinet box are separate parts.
03 / Cabinet box
The sample exposes the cabinet sides, interior surfaces and layered edges. The image does not establish the wood species or material specification of a selected cabinet.