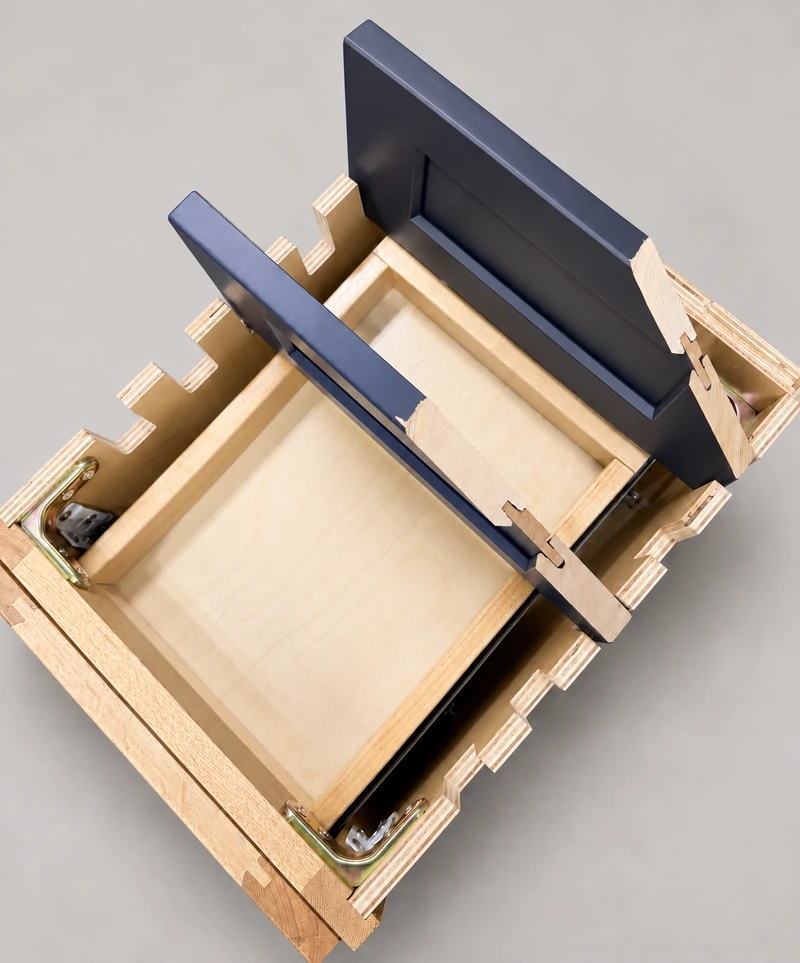
A shelf-front lip can change how the shelf looks and how objects move across its front. Before selecting it, establish whether the front is flush with the shelf surface, projects above it or extends below it. Ask for a section drawing or a finished sample: a face-on photograph can make very different edge shapes look similar.
Physical sample Use a physical sample to separate face and edge details. This sample does not show or establish the shelf-lip geometry for your order.
Name the edge treatment before comparing it
The front may be a thin covering on the panel edge, a separate strip or a shaped part of the shelf assembly. REHAU describes edgebanding as a way to cover exposed panel edges, with appearance matching involving more than color alone. That basic function should not be confused with the geometry of a projecting lip.
Have the supplier mark the shelf top, front face and underside on the drawing. Ask whether the piece shown in the sample is the exact detail in your order. Words such as “thick edge” or “finished front” are not enough to establish whether anything stands above the usable surface or hangs below it.
Check what happens when an object crosses the front
A raised lip creates a step between the shelf surface and the space in front. Test the motion of a representative object on an approved display sample, using an empty, manageable item. Does it slide out, need to lift over the edge or require a different grip? The answer matters more than whether the lip looks substantial in a catalog.
Do not turn this into a load test or assume the lip makes stored items secure. Its retention function, if any, needs a specific description. A tall item can still tip, and an object placed behind a raised edge can still be awkward to grasp. If easy straight-out movement is your priority, state that use requirement before approving the detail.
Look underneath and along the joint
A front strip extending downward may make a shelf appear thicker without changing the thickness of the panel behind it. Check the usable opening beneath the front as well as the opening farther back. These can be different when the underside projects, affecting how a tall item passes through even though it fits once inside.
Inspect the meeting line for a visible gap, abrupt ledge or rough area. Ask how the surface should be cleaned without forcing moisture into a joint. Do not run a bare finger along an unknown sharp edge or scrape the finish to investigate. A finished sample and the supplier’s explanation are more useful than improvised damage tests.
A worked choice for serving pieces
Imagine choosing a shelf detail for frequently handled serving trays. You prefer the fuller appearance of a built-up front in the photograph. On the sample, however, a raised top lip requires lifting the tray before pulling it out, while the downward portion narrows the entry for a taller serving piece on the shelf below.
Ask whether the same visual family includes a flush-top detail, and compare the complete section rather than accepting a smaller front dimension without explanation. The right choice may preserve the look you want while changing the handling motion. If no alternative exists, decide using the actual tray and opening rather than assuming the drawing will feel different in use.
Keep appearance and structural claims separate
A larger-looking front is not proof of a stronger shelf. If reinforcement is claimed, request information for the complete assembly, including the connection and support conditions. Do not calculate capacity from the apparent front thickness or borrow a rating from a plain shelf. The edge detail and the shelf’s supported span are separate specification questions.
Record the approved section, finish, protrusions and any stated functional role with the order. On receipt, compare the profile and joints before installation, then check that the intended objects pass through the finished opening. If a detail differs, document the section and whole shelf together. This makes the conversation about the chosen geometry, not merely whether the front has an attractive finished face.
Pure White
Cream White
Light Warm Gray
Gray
Navy
Black
Oak Tone
Dark Walnut Tone
Design study These finish studies are design references, not a list of currently orderable colors. Screens and lighting change the appearance; compare a physical sample before choosing.See all finish options →
A painted door, a wood-grain side and a plywood cabinet box can belong to the same cabinet. Here is how to read those parts, what the sample photos actually show, and which details to put on a quote.
The sample shows the door frame, a separate center panel, the face frame and the cabinet box. Each component has its own place in this Shaker construction.
Shaker construction: door frame, center panel, face frame and cabinet box. The cutaway helps locate these parts; confirm each material in the specifications for the selected cabinet.
01 / Door frame
The Shaker door has rails and stiles around a separate center panel. The frame and center panel are different components; confirm their materials in the specifications for the selected cabinet.
02 / Face frame
The face frame surrounds the opening at the front of the cabinet box and sits behind the doors. The face frame, door frame and cabinet box are separate parts.
03 / Cabinet box
The sample exposes the cabinet sides, interior surfaces and layered edges. The image does not establish the wood species or material specification of a selected cabinet.