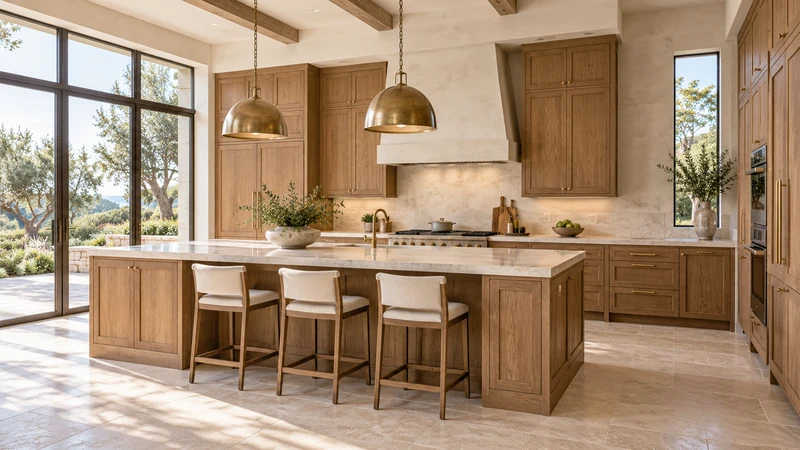
Read a kitchen before-and-after for the work behind the picture
A brighter room may reflect a new window, changed walls or different staging as much as new cabinets. Identify the changes before borrowing the result.
Before-and-after photographs can help you recognize a direction you like, but they rarely describe the whole project by themselves. A room may look larger because a wall moved, brighter because a window changed or calmer because appliances and everyday belongings were removed from the frame. Before using the result to choose cabinets, identify which changes belong to the cabinetry and which depend on the rest of the renovation.
Find the same part of the room in both views
Use fixed features such as a doorway or window to compare the camera positions. If the after photograph is taken farther back or from another corner, apparent aisle width and cabinet scale may not be directly comparable. Ask for a plan or another view when the relationship matters. Do not measure cabinet dimensions by comparing pixel widths across different photographs.
Look beyond the main cabinet run. A tall pantry may have moved outside the after frame, or a visible appliance may now occupy another wall. Those changes can make the featured view look cleaner without reducing the amount of storage or equipment the household needs. Check what left the photograph before assuming it left the room.
Separate cabinet work from room work
Read the project description for relocated walls, windows, doors, appliances and services. Then identify whether the cabinet work replaced boxes, changed fronts, altered the layout or added storage elsewhere. These are different scopes. A photograph that shows new doors cannot establish that the cabinet boxes were replaced, just as a new floor does not prove a new cabinet layout.
Consider an illustrative story in which the after image shows a larger island and more daylight. If the renovation also opened an adjacent wall and moved the dining area, buying an island of the same appearance will not reproduce the result in an unchanged room. The transferable idea may be the relationship between preparation and dining, not the island’s exact size.
Design study The windows, room volume and island all contribute to this image. It is a design study, not a documented before-and-after project or evidence of work completed by usaKT.com.
Check what stayed and what became a separate purchase
A useful case description names retained appliances, existing tops, reused fixtures and any separately supplied items. Those details explain why one renovation could follow a different sequence from yours. If the story retained a countertop, for example, that does not establish that your top can be removed and reused with another cabinet configuration. Treat it as a project-specific fact to investigate, not a universal shortcut.
Also distinguish the installed room from the styled photograph. A fruit bowl, hidden waste bin or cleared countertop may change the impression while leaving a storage question unanswered. Ask where the everyday objects go. An attractive after view is more useful when the project explains how normal use was accommodated rather than only what was taken out of sight.
Turn the inspiration into a question for your own plan
Write down the specific improvement you want: a clearer unloading route, more reachable drawers or a less crowded view from the living room. Match that goal to your measured layout and the constraints you intend to keep. This is more actionable than asking a supplier to recreate an entire photograph without explaining which part of it matters.
Bring the reference image with a short change list and questions about the missing scope. A strong before-and-after story should help you understand a decision, not merely invite you to copy the finish. If the project description leaves important work unexplained, keep the image as inspiration and use your own drawings to establish what the cabinet order must actually include.
Pure White
Cream White
Light Warm Gray
Gray
Navy
Black
Oak Tone
Dark Walnut Tone
Design study These finish studies are design references, not a list of currently orderable colors. Screens and lighting change the appearance; compare a physical sample before choosing.See all finish options →
The sample shows the door frame, a separate center panel, the face frame and the cabinet box. Each component has its own place in this Shaker construction.
Shaker construction: door frame, center panel, face frame and cabinet box. The cutaway helps locate these parts; confirm each material in the specifications for the selected cabinet.
01 / Door frame
The Shaker door has rails and stiles around a separate center panel. The frame and center panel are different components; confirm their materials in the specifications for the selected cabinet.
02 / Face frame
The face frame surrounds the opening at the front of the cabinet box and sits behind the doors. The face frame, door frame and cabinet box are separate parts.
03 / Cabinet box
The sample exposes the cabinet sides, interior surfaces and layered edges. The image does not establish the wood species or material specification of a selected cabinet.