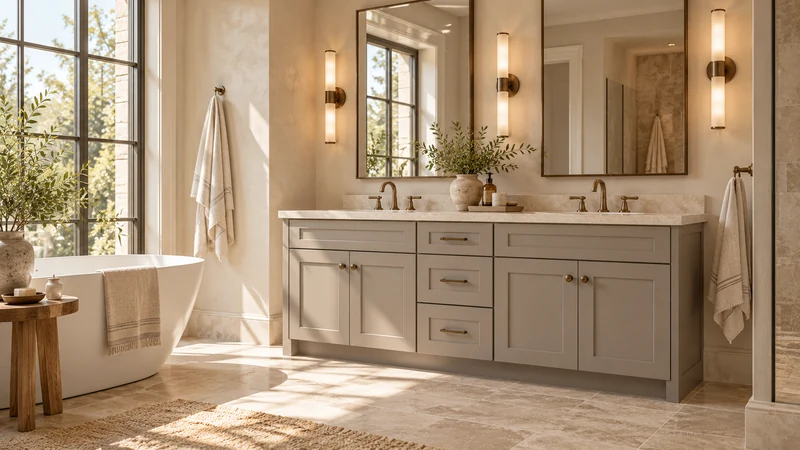
A vanity installed between walls needs more planning than finding a cabinet whose label matches the opening. The room has a finished width, the cabinet has an actual width, and fillers or side details occupy the space between them. The top may follow a different outline. Treat these as separate pieces of the fit decision, then check how the cabinet will enter the opening and how its doors will work once installed.
Define the opening that will remain
Measure between finished surfaces at the front and rear of the proposed cabinet and at the relevant heights. Record each result where it was taken. A single tape reading near the floor does not describe an opening with tile, projecting trim or an uneven wall. If finishes will be replaced, identify which measurements describe today's room and which depend on the planned work.
Include the edges that affect use: baseboard, door casing, a side-wall towel bar and any adjacent door handle. A cabinet may fit between the walls at its back while its front sits beside projecting trim. Photograph the opening with the measurement locations marked, so a designer can distinguish a real narrowing from a measurement taken at a different depth.
Design study The vanity study makes the front edges and separate top visible. It is not a measured alcove installation; use actual wall measurements to decide the side treatment.
Divide the width deliberately
In a hypothetical example, a verified finished opening is 61 inches wide and the proposed cabinet is actually 60 inches wide. Subtraction leaves 1 inch in total. That remainder is not automatically a usable filler allowance, and it is not 1 inch on each side. The plan must decide how the remainder is distributed and whether the selected doors and drawers can operate beside the walls.
Ask for the cabinet's actual outside dimensions and the permitted side treatment. A filler can help separate moving fronts from a wall, but its needed size depends on the selected construction and obstructions. Do not assume that a narrow decorative strip solves an opening problem. Nor should a cabinet that exactly matches the measured opening be treated as easy to install without reviewing the insertion path and field conditions.
Test the front before centering the box
Centering a cabinet may look balanced on an elevation while leaving a drawer blocked at one end. Place the door and drawer movement on a plan. Include knobs or pulls, the thickness of a wall projection and the standing position needed to use the storage. If the left and right conditions differ, equal side gaps may be a poor practical choice.
Keep the basin position in this discussion. Shifting the cabinet to gain door clearance also shifts the basin unless the assembly is designed otherwise. Compare the mirror, faucet and retained drain against the revised location. The aim is a coordinated wash position, not a centered cabinet box surrounded by unresolved fixtures.
Let the top follow its own verified outline
The cabinet fit and the top fit are related but are not the same drawing. A top supplier may need to account for the finished walls, side splash choices and the intended edge treatment. Give that supplier the cabinet layout and state which surfaces are final. Do not take a cabinet's nominal width as a finished top measurement or assume that the same overhang belongs on enclosed and exposed sides.
Keep responsibility clear when pieces come from different suppliers. A cabinet order does not establish who provides, measures or installs the top. Resolve that scope before approving a wall-to-wall assembly. For general context, KraftMaid describes wall-to-wall vanity arrangements as a configuration distinct from freestanding or corner placement; that description does not establish dimensions for a usaKT product.
An assembled cabinet must pass the bathroom entry and reach its intended position. Compare the route with the complete unit, including projections that cannot simply be removed. The installer should review whether pipes or side returns affect placement. A drawing showing the cabinet already inside the alcove does not prove that it can be moved there as drawn.
Finish with a marked plan identifying actual cabinet width, side treatments, basin position, final wall surfaces and the top supplier's next measurement step. Recheck the opening after any work that changes its boundaries. This gives each person a specific fit condition to confirm before the cabinet is ordered.
Pure White
Cream White
Light Warm Gray
Gray
Navy
Black
Oak Tone
Dark Walnut Tone
Design study These finish studies are design references, not a list of currently orderable colors. Screens and lighting change the appearance; compare a physical sample before choosing.See all finish options →
The sample shows the door frame, a separate center panel, the face frame and the cabinet box. Each component has its own place in this Shaker construction.
Shaker construction: door frame, center panel, face frame and cabinet box. The cutaway helps locate these parts; confirm each material in the specifications for the selected cabinet.
01 / Door frame
The Shaker door has rails and stiles around a separate center panel. The frame and center panel are different components; confirm their materials in the specifications for the selected cabinet.
02 / Face frame
The face frame surrounds the opening at the front of the cabinet box and sits behind the doors. The face frame, door frame and cabinet box are separate parts.
03 / Cabinet box
The sample exposes the cabinet sides, interior surfaces and layered edges. The image does not establish the wood species or material specification of a selected cabinet.