Choose a vanity from the finished garage-conversion plan
A garage shell measurement is not a cabinet-order dimension. Follow the wall buildup, floor plan and bathroom entry through to the finished vanity location.
Choose the vanity from the proposed finished bathroom, not from the empty garage shell. New partitions and finishes can change both the wall length and the route past the cabinet. A room that looks generous before the bathroom is enclosed can become tight at its entrance. Keep an early style preference separate from the final cabinet order until the drawings show the surfaces the vanity will actually meet.
Locate the finished wall line before choosing width
Ask for a dimensioned elevation of the vanity wall and identify the finished faces. Do not subtract a guessed allowance for a new wall assembly. If the project drawing is still based on the existing shell, label that fact and ask the designer or builder to show the intended finished location. The cabinet supplier needs the resulting space, not a promise that the field crew will find room later.
Imagine the initial sketch shows a vanity between a new partition and an existing exterior wall. A later revision moves the partition to accommodate another room. The original cabinet may still look right in the rendering, but its installation envelope has changed. Revise the cabinet line with the wall plan rather than preserving an early width simply because it has already appeared in a quote.
Test the entrance with the cabinet drawn at full depth
Mark the cabinet body, top overhang and handles separately. Then trace the bathroom door and the person entering. A shallow outline of the front alone misses the corner that someone passes with a towel or laundry basket. If the room has an inward-opening door, check the actual sweep and the place a person stands to close it; do not solve an overlap by assuming the door can always be changed.
Compare a narrower cabinet, a different approved configuration or another placement using the same entry test. The useful comparison is what becomes easier and what storage is lost. A smaller vanity that clears the route may still need a separate place for towels. Show that tradeoff in the plan instead of selecting the largest box that fits a wall measurement.
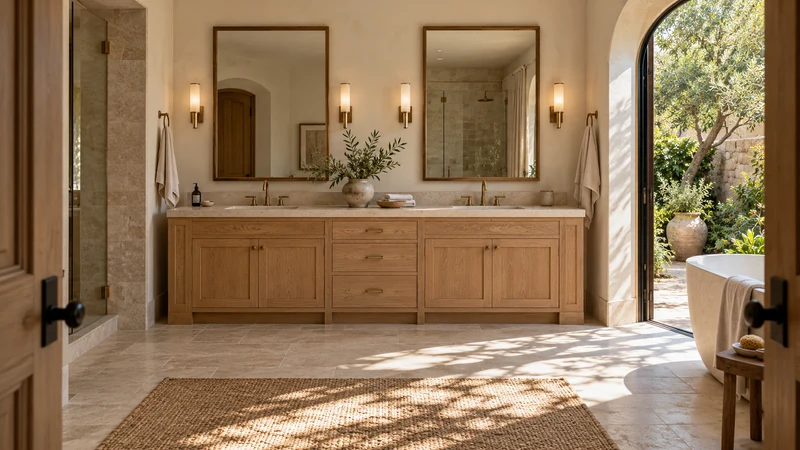
Design study Use the visible cabinet depth and end as a reminder to draw the whole installed envelope. This design image is not a garage-conversion plan or a measurement reference.
Give the installer the conditions hidden by a finished-room image
Document the proposed floor level, wall backing or mounting arrangement, and the locations of fixed services through the responsible project drawings. A floor change can affect cabinet leveling and the relationship between adjacent fixtures. This article does not specify structural, plumbing or conversion work; the point is to keep those decisions coordinated with the selected cabinet rather than treating them as invisible.
Mark which cabinet ends can be seen from the bathroom entrance. A line drawing may show a plain side that requires a selected finished end or a separate panel. Include the chosen treatment in the product list and verify its effect on width. Do the same for fillers and trim: decorative completion parts occupy space and should not be left as unmeasured additions.
Turn the early preference into a checked order
Keep the finish preference, cabinet model, final dimensions and current drawing revision together. If a wall or service moves, record whether the product remains suitable or needs another review. An unchanged photo in a proposal does not establish that the cabinet is still correct. Ask for the revised cabinet list to match the revised plan.
The handoff should show the finished wall elevation, cabinet and top outlines, door movement, visible-end treatment and unresolved field conditions. You can compare finishes before every detail is settled, but do not confuse that choice with a completed fit check. A conversion vanity succeeds when the actual new room works around it, not merely when it looks attractive against the old garage wall.
Pure White
Cream White
Light Warm Gray
Gray
Navy
Black
Oak Tone
Dark Walnut Tone
Design study These finish studies are design references, not a list of currently orderable colors. Screens and lighting change the appearance; compare a physical sample before choosing.See all finish options →
A basement vanity order needs more than the finished room width. Document the route downstairs, fixed services and the conditions behind the proposed cabinet.
The sample shows the door frame, a separate center panel, the face frame and the cabinet box. Each component has its own place in this Shaker construction.
Shaker construction: door frame, center panel, face frame and cabinet box. The cutaway helps locate these parts; confirm each material in the specifications for the selected cabinet.
01 / Door frame
The Shaker door has rails and stiles around a separate center panel. The frame and center panel are different components; confirm their materials in the specifications for the selected cabinet.
02 / Face frame
The face frame surrounds the opening at the front of the cabinet box and sits behind the doors. The face frame, door frame and cabinet box are separate parts.
03 / Cabinet box
The sample exposes the cabinet sides, interior surfaces and layered edges. The image does not establish the wood species or material specification of a selected cabinet.